Printing – What I Have Learned

Many years ago, I had an HP Printer and it worked great.  It sat there quietly just waiting for someone to send it a print job.  Once it received an order, it printed the document with no issues.  The only things I had to check were; did the printer have paper in it, was the correct paper in the printer, and was printer turned on.  HP made this printer so well it lasted for more than a dozen years.  I had to stop using the printer and purchase a new one because HP tried to encourage the owners to buy a new printer by no longer making a printer driver for it.  

My current printer is a Epson Photo Printer.  The more the industry makes printers easier for the general public to use, the more complicated they make it for us who want to print impressive items.

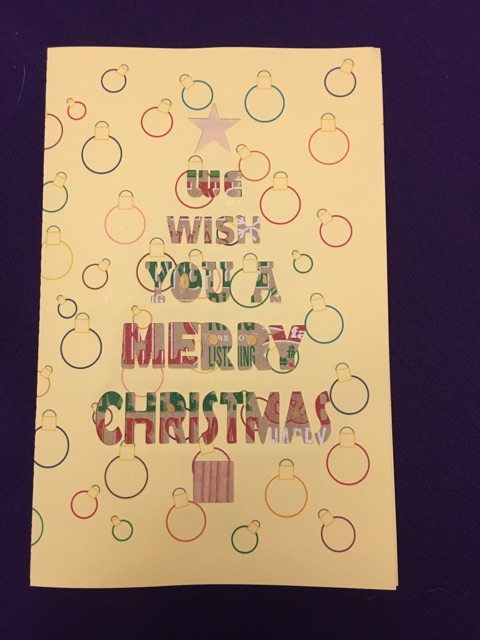
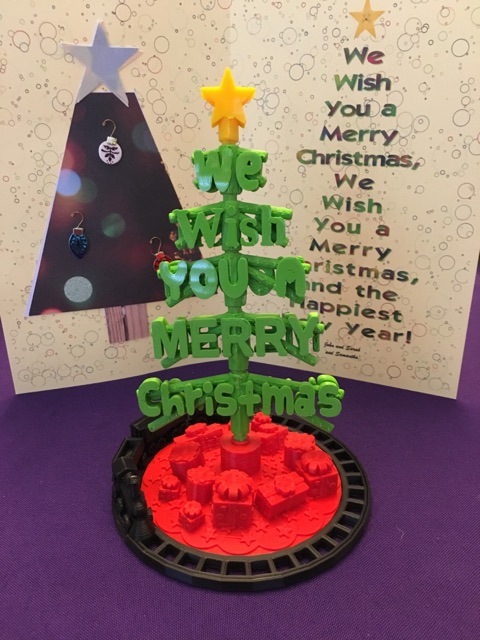
There were two projects that I was trying to print.  One was a photo I edited with Corel Photo-Paint and the other was my Christmas Cards.  Challenge one: Printing the photo on metallic paper.  Challenge two: Printing the cards on high quality paper.

Color Management

  1. Make sure the color conversion is being done by the program, not the printer nor the default computer driver.  The printed colors may be different from what you intended.

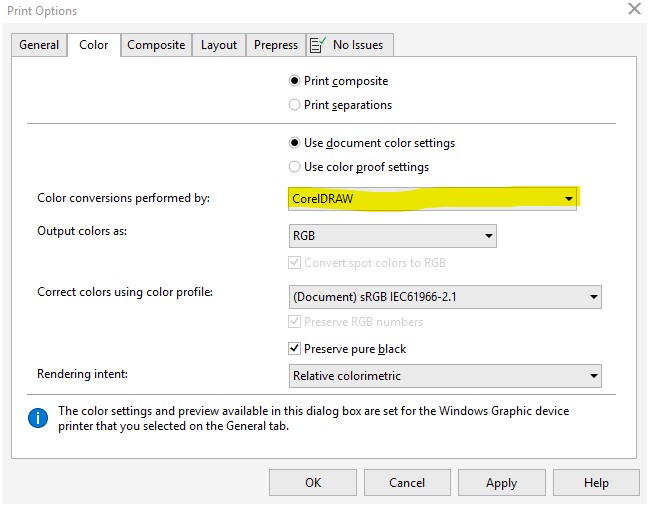
2. For a better print, you may need to designate a color profile.  I used the Premium Luster for the Metallic Paper.

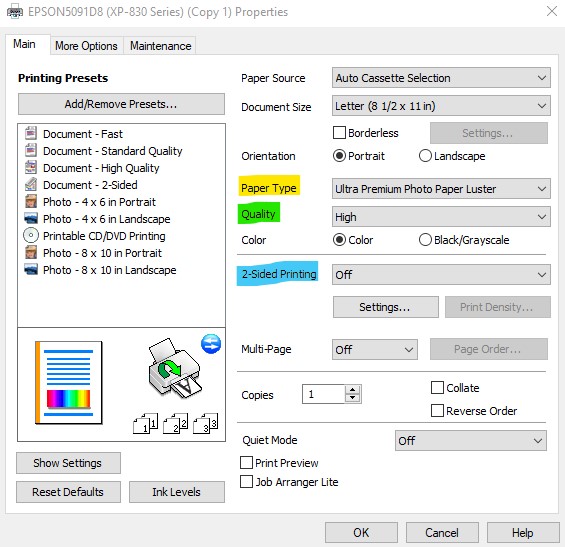
3. Select the correct paper type.  Select “High” Quality for detailed work.  And, turn 2-sided Printing “Off” because we want to give the front side time to dry completely before printing the reverse side.

Thick Paper

Yes, I was dealing with thick paper.  I learned after my prints were smearing, that envelopes are considered “thick”.  If an envelope is thick, maybe I should consider most paper, such as card stock, photo paper, and envelopes as thick.  There is a setting on the computer to tell the printer you are using thick paper.  Basically, it slows the printing down to allow the ink to dry.

I did a web search to find the “Thick Paper” setting.  It was little help.  I found it by looking at all the settings. It is located under the “Maintenance” tab under “Extended Settings”.

Select the check box next Thick Paper and Envelopes.  Epson only recommends turning it on if the prints are smearing, because it slows the printing down.

Smearing Prints

If your prints have smeared, you probably need to clean the inside of the printer.  Yes, the printer is designed where you can not take it apart and use a cloth to clean the inside.

To clean the inside:  Do not place any document on the scanner part of the printer.  Press Copy on the printer and make blank copies until the paper comes out clean.  For me, this was about 10 copies.

For smeared prints, you may want to slow down the printing speed to give the ink time to dry to produce a higher quality.  To do this, turn off “High Speed” by removing the check.

After all the smearing of ink, I decided it was best to clean the print nozzle before I attempted to print anything else.  This is done directly on the printer.

Success!  I got 20 prints with no smearing.

Christmas Card 2016

Since I was having so much trouble printing my 3D Christmas Tree card.  I created another card to send out with the card and to the others on my list.  It was designed with Silhouette Studio and cut out using the Silhouette Curio.

5051647661

I used plain cardstock, but the background was lacking.  To spruce up the background I used Corel Draw to create the background for both the card.

5051647751

My niece was excited to be “and Samantha” on the Christmas Card.  She never has been an “and Samantha” before.

Thanks to my sister, she took these picture and display the tree and the card as I imagined.

5051648951

Dominoes

My father-in-law has shown very interested in the 3D printing.  Asking questions about how it works and what can it print.  Before Father’s Day, I sat down in from of the computer and said “What can I print for my father-in-law?  He plays dominoes every Friday!  I can do that!”

I looked up the dimensions for Dominoes; design the dominoes; and created the case to look like a domino.

DSCN8355DSCN8351DSCN8349

His own personalized dominoes.  I also printed a set for my dad for Father’s Day with his last name on them.

The .stl files can be downloaded from youmagine.com.

https://www.youmagine.com/designs/dominoes/embed

Tinkercad – the free, online 3D CAD app

3D Print – Caboose

Even though it is the last car on a train, it is the 3rd car in my train series, the Caboose.  After looking several train cars, I redesign the wheel attachment.  I named the train the “Midnight Express” because the entire train will be print in black.

I place items inside the car.  Table chairs, stove, sink, bench, barrels, crates, and platforms to look out the top windows to view the entire train.

DSCN7343

DSCN7349

The ladders are not fitting together quite right, but these are delicate.

DSCN7356

The next car will be the passenger car.  I believe the train will need a box car and a cattle car.  Do I need a tank car?  Were they in use when trains ran off of coal.  May be a log car and a sleeper car.  There many of choices.

Object Size (W, D, H): 27, 136.43, 62.51 mm

Caboose in Tinkercad

Tinkercad – the free, online 3D CAD app

3d Print – Coal Car

This is the 2nd train car I designed in my effort to print a train.  The first car was the engine. Link: Train Engine

The Coal Car was fun to design.  Instead of spending hours on Tinkercad finding the right shape for the coal container (I didn’t want a box),  I duplicated the same shape and just slightly increase the size until I had the height I wanted.

DSCN7329DSCN7334

The joint to connect the Engine with the Coal Car actually worked.  It was tested previously, but to see it function was amazing.

DSCN7336

Object Size (W, D, H): 25, 55.97, 42 mm


Tinkercad – the free, online 3D CAD app

Coal Car

3D Print – Two Story House

My 3D printed house. It was fun to design and a challenge to print. Instead of printing it in six sections, the next time I believe I will be printing it in four sections and if I want it in multiple colors, I will paint it.. The six sections were; foundation, 1st floor, balcony, 2nd floor, roof, and roof siding.

The roof siding fit into it designed location without much effort.

DSCN7320

The next house I will print on normal print vs. fast print.  Even if the sections take 11 hours each or more to print.  With the details in the house, I believe it is needed.

DSCN7319

I do not know why the corner next to the steps appears to be melted.  Maybe some oils from my fingers were on the build plate that prevented proper adhesion.

DSCN7317

The roof came out great. And, the railing printed nicely.  Whoops, it looks like I didn’t remove some of railing structure before taking the pictures.

DSCN7322

The house was designed using Tinkercad.com; link Two Story House.

Object Size (W, D, H): 161.19, 133.06, 112.14 mm  (approximately)


Tinkercad – the free, online 3D CAD app

3d Print – Train Engine

One of my projects in the 3D Printing world is to design and print a train; Train Engine, Coal Car, Passenger Car, Cargo Car, etc.    I am not particularly into trains, but I thought it would be a fun project.  I’ve based the size of the train after Gn15 Model Train scale.  It specifies a train track gauge of 16.5 mm.

Only two of the cars have been completely designed and just finished printing the Train Engine, after several false starts.  The train is not a copy of any one train.   I used components I liked from many trains and incorporated them into the design.

A colored version of the Train Engine can be viewed on Tinkercad link: Train Engine.  Minor modifications where made for a successful print of the train.  The train was printed using supports (everywhere settings).  The carefully removal of the supports took time.

DSCN7283

The wheels of the train were printed separately because I wanted them to be able to spin.

DSCN7287DSCN7293DSCN7290DSCN7286

I even put chairs and gauges in the car to give the train character.  The grid on the platform was not part of the designed.  It was remnants of the support structure.  Instead of smoothing it out, I thought is provided a nice effect.

Train Engine:

Print Time: 3 hours 53 minutes
Filament: PLA – 4.11 meters 33 grams
Layer height: 0.1 mm
Shell Thickness: 0.8

Object Size (W, D, H): 33.468, 151.55, 60.503 mm

Wheels:

Print Time: 55 minutes
Filament: PLA – .45 meters 4 grams
Layer height: 0.1 mm
Shell Thickness: 0.8

Once I completed the entire train, I will make the .STL files available on youmagine.com.

Tinkercad.com deserves created for provide me the resources to create!

Tinkercad – the free, online 3D CAD app

3D Print – Birthday

There are plenty of March birthdays in my family.  I needed cards.  Someone suggested buying gift cards for my dad.  So, I needed some gift card boxes.  Out comes the Corel Draw, the Silhouette, and the Ultimaker 2 to handle two of the birthdays.

Dad’s Birthday!

I used Corel Draw to create the background, then I printed it on metallic photo paper.  I designed the rest of the card using Silhouette Studio.

DSCN7169DSCN7175

I designed the gift card box in Tinkercad getting the dimension from a credit card.  The box was printed on the Ultimaker 2 using semi-transparent filament.

DSCN7192DSCN7195

Print Time: 3 hours 45 minutes
Filament: PLA – 5.22 meters 41 grams
Layer height: 0.1 mm
Shell Thickness: 0.8

Object Size (W, D, H): 100.001, 164.001, 12.701 mm  (Both pieces printed together)

Amanda’s Birthday!

I used a template for Amanda’s card and cut it on the Silhouette.  However, I did design the envelope since no envelope was a good size..  Alas, I didn’t get a picture.

DSCN7166

I tweak the gift card box after the other one was printed to make the top smaller and fit better.  It was printed using pink filament.

DSCN7183DSCN7187

Print Time: 3 hours 45 minutes
Filament: PLA – 5.25 meters 42 grams
Layer height: 0.1 mm
Shell Thickness: 0.8

Object Size (W, D, H): 100.001, 163.501, 12.701 mm  (Both pieces printed together)

The boxes was printed with the top and bottom laying flat on the printer bed to make the boxes smoother.