Windows Update – Argh

If you ever looked at the homepage, you would have noticed it says Technology is one thing that this blog is about.  Well, I haven’t written about technology in a long time, because I have been drawing.

First the Rant!

Microsoft, why do you make my PC starting acting up the day you release a new Windows Update, even though the update hasn’t been installed on the PC?  The web browser start hanging up and sometimes crashing.  The PC gets so slow, I want to pull my hair out!  It was perfect fine the day before you release the new update.  But, on update day – Argh!  I have to stop everything and update my PC just to get it to work like it did the day before.  If it only takes me an hour to get my PC updated, I am lucky.  But, most of the time it takes me days because of an error.

End of Rant!

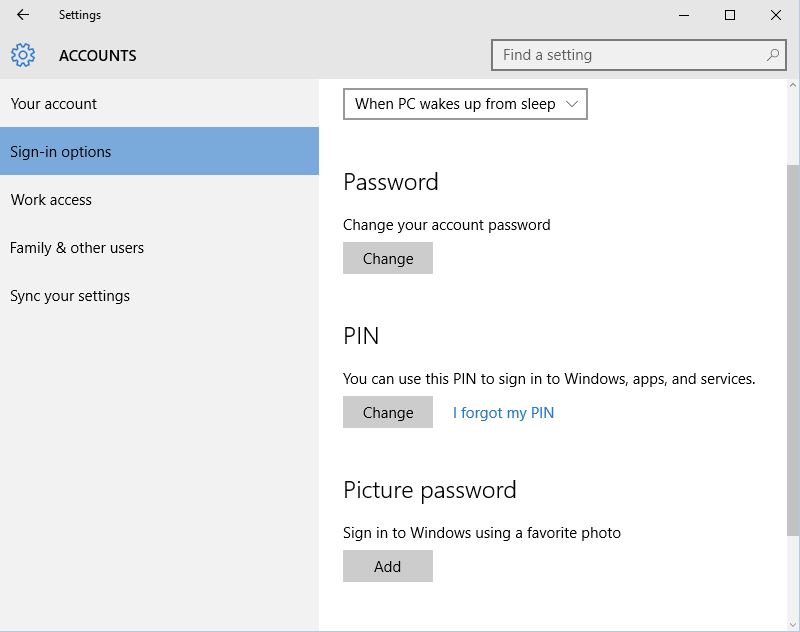
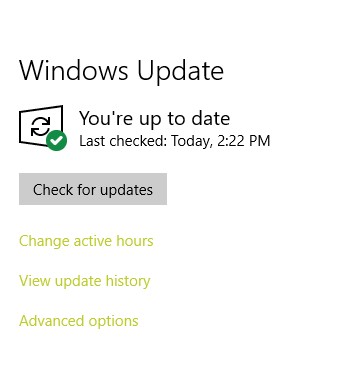
It start off as a normal day, a nice day, and a quiet day.  I was going to spend time designing and printing things on my computer.  But, the browser was hanging up.  Programs were slow to open.  I did what I always did when my PC is acting up, I checked Windows Update.  Click Settings -> Update & Security -> Windows Update.  There was an update.  No problem.  I will let the update finish and everything would be good again.  Wrong!  An hour later I checked and the update was at 70%.  Two hours later no change, and Adobe was reporting it failed to install.

The first step, do a web search to find out why it is stuck at 70%. Numerous website wants you to download their product to fix this problem.  I don’t know which ones to trust, so that is not the solution for me.  On one of the sites, it recommended downloading the update directly from Microsoft’s Catalog. 

https://www.catalog.update.microsoft.com/home.aspx

All you need is the Update Number to search and download the update.  For Adobe is was KB4467694.  There are multiple updates for each number, just make sure it matches the description as shown on the PC’s Windows Update.

I tried the Adobe Update first, because it had failed.  It opened a Window stating it was checking the system for updates.  So, I let it run.  Hours later, it was still running.   I rebooted the PC while it was still running.  I checked Windows Update again and the Adobe Error was gone.  I started the Windows Update again.  It failed, but this time I go an error message.  Error 0x800f0984.

The web search results said that Error 0x800f0984 was related to .Net Framework.  That did not help.  I booted my PC into Safe Mode.  I learned that you can’t install Windows Update in Safe Mode.  When I tried to run Windows Update again for the 100th time, maybe not the 100th, I got a new error code: 0x80073712.  That was better, It was pointing to a Windows Component.  

In my previous attempts to get my PC working after a Windows Update, one of the recommended actions was to boot the PC with only the Windows Processes running.

  • In the search box, type in MSConfig and open the System Configuration.
  • Click the Service tab and click Hide all Microsoft service
  • Click Disable All to stop all the remaining services

This time, when I opened the System Configuration, I noticed that it had changed.

Instead of going through the process of disabling the services, I selected “Diagnostic startup”, clicked OK and rebooted my PC.

After my PC rebooting, I ran the Command prompt, as Administrator:

  • Type CMD in search window
  • After Command Prompt displays, select Run as Administrator

In the Command Prompt window, I ran these commands:

  • DISM.exe /Online /Cleanup-image /Scanhealth
  • DISM.exe /Online /Cleanup-image /Restorehealth

Both commands gave error messages, but I tried Windows Update again and it successfully updated.  The next time, I may just give in and reinstall Windows.

I do not know if I fixed the problem, or Microsoft fixed the Windows Update.  Now, I off to reboot my PC in the Normal Startup mode.  Yes, I type this blog post in the Diagnostic startup mode.

Connecting Laptop to TV with HDMI

Traveling again!  Many of the hotels of today (at least the ones I stay at) offer many cable TV choices, but you can not longer purchase in room movies.  And, since we are in the rerun season there is not much on TV.   Amazon Prime to the rescue.

I plugged in my Laptop to the TV using a HDMI cable.  Yes, the cable travels with me.  However, this was the first time connecting the TV since the Windows 10 upgrade.  Easy enough, it like plugging in a lamp to a power outlet.  Then I switch the input on the TV to HDMI 1.  Nope, no signal.  Then I tried HDMI 2.  That was the input.  My laptop is displaying on the TV.

I logged onto Amazon, selected a video, and clicked play.  Wait, the sound was only coming out of the laptop speakers.  I’ve checked the sound settings, and there is no HDMI listed there.  Let me try installing new device drivers.

Click Start -> Settings -> in the search bar type Device Manager -> expand Sound, video and game controllers -> and right-click on the first sound device -> click Update device driver -> select Search automatically for updated driver -> wait for driver to install and repeat these steps for other sound devices.

windows 10 device manager

After all the sound devices were updated, I rebooted the machine. It was like magic. My video now has sound coming from the TV.

Yes, I am using the Chrome browser.  Amazon’s Instant Video would not play in the Microsoft Edge Browser.  That is another adventure.

Xbox Games on Windows 10

windows 10 xbox

There are several Xbox games that I have on my Windows 8.1 PC.  Lets see what happens when I try to access them from Windows 10.

Click Start (Windows Icon) to bring up the menu.  On the right-hand side of the menu there are several icon.  I’ve located the Xbox Icon and clicked on it.

After waiting many seconds for it to load, it displays a screen saying “Here’s how you look on Xbox Live”.  It important to note, but I may not use it is: “You can update these later in the Xbox app > Settings”.  I’ve looked over the other options on the screen, now lets click “Let’s play!”

windows 10 xbox lets play

The Xbox app loads and displays the Home screen which has the activity feed and list of friends and recommends friends.

On the left-side of the screen, it has menu of options:

  • My games – show the games installed on the laptop
  • Messages – I have no messages
  • Activity alerts – Again, nothing
  • Achievements – basically shows the last games played
  • Games DVR – shows the games clips and screenshots
  • Store – opens the Microsoft Store (this maybe what I need to get my games to the laptop)

windows 10 microsoft store

Where oh where are my games?  They are not under Home, Apps, or Games.  Wait, there is my picture in a little circle, hiding next to the Search bar.  Let me click on my picture -> My Library.  There are my games.  Yay!  Let me click the download arrow next to the name on the right side and download them.

But, one game is missing.  I think I will just download it from the Store.  I clicked Games and since I know the name, I click the search bar and type the name in.  I found my game.  I guess the differences between this game and the other games is:  this game wants to be Installed instead of Downloaded and every time I play this game it connects to Xbox Live.

Nothing appears to be happening!  I will give it time and check back later.

It worked!  The games are on my laptop.  However, the only game that keep my progress was the one that logs into Xbox live.  I expected that to happen.

An icons for the games were not placed on the desktop.  To find my games I had to click Start -> All Apps and scroll to the list.  Alternatively, I could open the Xbox app.

For some reason, the game Candy Crush Saga was installed on this laptop.  To my knowledge I have never played this game on any Microsoft device.  I know million of people are addicted to this games, not I.  Therefore, I will be uninstalling it.  Locate the item in the Start Menu -> Right-click on it -> click Uninstall.

The adventure to be continued….

Windows 10 – The Security Adventure

Windows 10 Users Account

During my exploration in the Microsoft Cortana, it prompted me to link my laptops  credentials with my Microsoft account.  I did.  No big deal.   I mainly only use this laptop when I am traveling, so I may want access to my Microsoft Apps from this device.  After the laptop was synced with the Microsoft Account, it prompted me to create a Pin.  Before I go through my experience of create and Pin and Picture password a little rant.

What I did not expect, once I linked the laptop to my Microsoft Account, it changed my background to this ugly yellow-gold background.  Looking at the Personalization settings (Right-click on desktop -> Personalization) under Themes -> Theme settings it had selected the Synced Theme.  Really, you just couldn’t keep the original theme?

What was even more unexpected?  Once synced, it changed my Windows 8.1 PC to the Synced Theme.  Really?  That is two PCs I had to change the Theme on.

Log on Credentials:

The current password to my laptop is my Microsoft Account’s password.  Lets add a Pin to the account.

Creating a Pin:

First lets ask Cortana to open the user account.  Nope, that didn’t work.  It opened Microsoft Edge Browser and did a search for user account.  To open user accounts select Start Button (Windows Icon) -> Settings -> Accounts -> Sign-in options.  Under Pin select Add.

Windows 10 Users Account Pin

Type in the Pin you would like to use.  It should be a 4 digit number.  I recommend not repeating a number or using a sequence number such as: “1111”, “1234”, “0000”, or “9876”.  Press OK.

I’ve locked my computer to test the Pin.  OK, I think I love this.  As soon as I typed in the last digit of the Pin, the computer unlocks.  I did not have to press the Enter key.  I know it is just one key.

Picture Password:

Now to setup a Picture Password.  This should be fun. From the Accounts/Sign-in Options select Add under Picture Password.

First it wants me to verify my account.  No problem, I will type in my Microsoft password.

Windows 10 Users Account Picture

Even though this is a nice picture, I think I want to use my own picture.  To change picture press the Choose picture button and find the picture you would like to use and press OK.  It will display the picture and you have the option to Use the picture or choose another.  I will be using the picture I found.  The next step, making the taps or gestures on the picture.

picture gesture 1 picture gesture 2

After I made my initial three gestures on the picture, the program prompted me to repeat the gestures.  Congratulation!  I have a picture password.  Let me lock the computer.

This is nice, but I think I like the Pin password better.  On the log-in screen, Windows 10 provides with the option of selecting what method you want to use to log-in: Picture, Password, or Pin.   You can select a different method and that will be the default method until you change the method.

Lock Screen:

If you scroll down on the Accounts/Sign-In options you will notice “Related settings”, under it there is “Lock screen”.  Let click on Lock screen.

I can select the Background for my Lock screen.  From the drop down list, I can either Windows spotlight, Picture, or Slideshow.  Under Picture, I can find a Picture on the device and use that for the lock screen.  Under Slideshow, I can select a directory or folder on the device and use all the pictures for the lock screen.  For this device, I will leave as the default.

The “+” under “Choose an app to show detailed status” let me select either None, Weather, Get Office, Calendar, or Xbox.

The “+” under “Choose apps to show quick status” has a few more options such as People, Alarms & Clock, Mail, and Store.

You do not have to select any, but I think I will select Weather for testing.

Screen Timeout Settings allows you to select when the screen will power off and the device will go to sleep.  It keep my settings from the before, so not changes there.

The Screen Saver Setting lets you specify what screen saver to use and how long the device is to wait with no activity before it locks.  By selecting Photos from the drop down list, you can tell it to show your photos.

I also recommend that you let Windows lock the device after a period of time.  This will help prevent unauthorized access to your device.  With the most innocent threat coming for friends and family thinking it would be funny to post something on your social media account a.k.a. Facebook, Twitter, Pinterest.

The adventure will continue….

Cortana – Windows 10 Personal Assistant

Microsoft-Cortana

Since June, my personal assistant has been the Amazon Echo (Alexa).  It mainly sets timers and alarms, but it also tells jokes, provide news briefing and plays music from my Amazon account and other sources such as IHeart Radio.  The ultimate test for Alexa was when she was ask “Alexa play WJBO.”  She from and played the specified  radio station from IHeart Radio.  Lets see how Cortana rates.

amazon edge

Amazon Edge (Alexa)

If you click in the Search box on the Taskbar it will provide you some information about Cortana and start with the setup.

Some of Cortana’s capabilities are:

  • Set Reminders, both Time and Places
  • You can tell it to remember Tasks, Dictate Messages or Chat
  • It can track status of Package or Flights
  • You can personalize it for News, Events, Weather and even Jokes

It wants access to everything that you do on the device.  If you don’t like that don’t agree to the license or disable Cortana.  Here are a few things Cortana accesses:

  • Location
  • Contacts
  • Search history
  • Calendar details
  • Communication history from messages – Skype communication may be included.
  • Other information on the device

Again, if you don’t like it, Tinker with the settings, Disable features, or just turn it off.

windows cortana agreement

Cortana Agreement

Next Cortana asked “What to call you”. If you want it to call you Master or Mistress, go right ahead.

It ran through some setup, and then it asked me to log on with my Microsoft Account (that is you Xbox Account).  Ok, not a problem.  If you don’t have a Microsoft Account, you can always set one up.

Now, we have a slight problem.  It wants to replace my log in credentials with my Microsoft Account credentials. But… Wait… OK!  I being dealing with this in Windows 8.1.   I’ve been thinking I would have to do this at some point to access my Microsoft Apps.  Credentials changed.

More security, it wants me to create a PIN.  Isn’t my account secure enough with the security code I have to type in every time I try to access my account from a new device, or browser, or after Norton deletes the cookies from my computer?  I will set up a Pin and a Picture log in, just for the adventure.

The Pin is a 4 digit number.  I would suggest something easy to remember and not “1111”, “1234”, “9876”, or any number that is repeated or in a sequence.

Yuck, it replace my desktop with this ugly yellow background.  I am need to change that.

Sorry for the side trip into security, it was just the sequence of getting to Cortana’s capability.

When you click on the Search bar at the bottom of the screen, Cortana display a news feed.  It picked out a few things to get you started, but press the “Get interests” button to customize it.  Clicking this brought up the “Notebook” menu.  You can always access the “Notebook” but click the third icon down on the left hand bar.

Some of the options listed are:

  • About Me – this is where you can change your name
  • Settings – Instead of clicking the button to talk with Cortana, you can set it to listen for you to say “Hey, Cortana!”  (On Android you would say “OK, Google!” and on Echo is you would say “Alexa”)
  • Cortana Tips
  • Eat & Drink
  • Event
  • Meeting & Reminders
  • News
  • Packages
  • and more…

Just click the option and adjust it to your preferences.

When I asked Cortana to play music the Groove Music opened.

Hey!  This might work.  When I asked Cortana to open the file explorer, it open.

Since the Echo is located in a more convenient location, I will be using it more for Timers, Shopping List, Alarms, and playing music.  Echo can search the web, but for true web surfing I will be using a computer and may use Cortana with it.

The Windows 10 Adventure to be continued….

Microsoft Edge Adventure

windows edge

Yesterday, I upgraded my little laptop (4GB Ram) to Windows 10.  Everything went smoothly, except it wanted to restart the laptop to finish an upgrade and the first link I click in the new Microsoft Edge browser, the screen went blank.  I did a hard shutdown (I pressed and held the power button until the laptop shutdown).  Now I ready to explore Microsoft’s Edge Browser.

Importing Favorites:

Today, when I clicked “Looking for your browser favorites?” Microsoft Edge opened a new tab with instructions on importing favorites.

Windows edge favorites

How to Import our Favorites into Microsoft Edge

Note: The words “More Action” is no where on the browser screen.  Just click the three periods “…”.  And, “Hub” is the three little lines (see image above, the pointer is on the lines.)  This process was done quickly – I had more favorites than I thought.

Exploring the Settings:

While I am in “Setting”, I might as well take a look around.

The “Favorite” bar is off by default.  Yay!  I hate the favorite bar.  Well, I hate most toolbars.  Google, Bing, ASK … I don’t like them, so I don’t use them..

The “Clear browsing data” is under Settings.  This option lets you specify the defaults for what you want to clear out when you select it from the Hub.

Advance Setting has the most interesting options.  Why is the “Home” button turned off by default?  After I turned it on, it prompted from a home site.   This is your decision.  If you want to drive Microsoft mad, set it to something not related to Microsoft.  Yes, I want it to block pop-ups.

“Use Adobe Flash Player” is turned on by default.  The flash player has been riddle recently with security holes.  For now, I think I will turn that off.  The other advance options I will leave those as the default from now.  I may come back later and change them.

Write on the Web:

I haven’t determine the benefits of this feature.  It may come is handy if someone is writing instructions.  Since the web is now our library, highlighting and taking notes may be a necessary.  But, when I was growing up, we were always instructed not to write in books.  To turn on “Write on the Web”, click the pencil/pen in the upper right hand corner.  In the top left, you have a pen, highlighter, eraser, notepad, and clip.  In the top right, you can save your changes and exit.

Windows edge write

I have seen this type of feature better.  Yes, it is a feature in some content management software.  The Microsoft’s Write on Web feature doesn’t have nearly has many options.  Maybe it is planned for a later upgrade.

Wait, the “Clip” feature maybe very handy.

Distraction-free Reading:

It appears that you must add something to your Reading List to use Distraction-free Reading.  Since I have a tablet for most of my reading needs, I will move on to Cortana.

Personal Assistant:

Cortana – This will be explored in a different article.

Search:

Is the most important aspect of a browser.  Let’s see how that functions.  By default, it is using Microsoft Bing.  After clicking on the “+” for a new tab, it said “Where to Next?” and showed some “Top sites”.

windows edge where to

I am only remotely interested in one of these sites, and have no interest in downloading the app on the Laptop.

For my test search I will use the term “disable Get Windows 10 icon” and I will compare the results to my desktop search with Bing using Internet Explorer 11 and Google using Chrome (latest version).

windows edge search

Search using Microsoft Edge (Bing)

chrome

Search Using Chrome (Google)

Internet Explorer search

Search Using Internet Explorer (Bing)

There are some differences, but that is how the search engine handles the search and some other factors.  The performance seem adequate.  Other websites appear to display fine.  Such as, Facebook, Pinterest, and Amazon.

Should I dare click “Show my news feed?”  I don’t particularly like the newsfeed, let me see if I can customize it.

windows edge customize

Since I do not like any of those options, I will be changing it or using a different browser.  Under More Actions (“…”) -> Settings, the only options three options for a new tab: Top Site, News Feed, and Blank Page.

The adventure continues….

Windows 10 – The Upgrade Adventure

windows-10

OK, I am a geek.  I have one desktop (only because the other desktop power supply went out and decided to get a new desktop once Windows 10 came out instead of fixing it), one all-in-one PC, two laptops, and two Android tables.  Yes, I am a geek.  Oh, and one Android phone.  You are probably wondering how can you be a geek without any Apple devices.  Well, I think that makes me more of a geek.  You see, I never wanted to be tied to the Apple Store.  But, I am off track.

Starting today, I am upgrading my little pink laptop, the one I mainly used when I am traveling, to Windows 10.  Since, I normally only turn it only when travel, I never clicked the “Get Windows” icon to sign the laptop up.  I don’t know if I need to do that, but I did and waited for five days for Microsoft to notify me that it was ready.  I’ve could have upgraded it using other methods, but I wanted to use the same method as the non-technical users.

Laptop Specs:

  • Sony Viao – 3.3 lbs. (that is irreverent)
  • Process: AMD E-250
  • RAM: 4GB
  • 64-bit processor

See, little laptop!

After Microsoft notified me the upgrade was ready, I clicked “I am ready, go get it” or something like that.  Then it prompted me to either schedule it or upgrade now.  I selected to upgrade now.  Then it started working and working.  An odd thing happened.  I got the message box wanted to reboot my PC because and update was just installed.  Well, duh, that is what I am doing.   It would not let me select the delay option, the only option was to “Restart Now!”  I rebooted my laptop.

After the laptop rebooted, I restarted the upgrade.  And, this time it gave me the “License Agreement” which I read in it entirety (yeah, right!)  The first part of the upgrade took about an hour.  This was running of the wireless extender.

Upon completion of the initial install, it prompted me to log in and then provided me with the opportunity to customize the setup.  Even thought I click the customized icon, nothing happened (or I was too impatient), so I click the quick customize.  I was going with this option any way since the majority of the Windows users would be taking this option.  The setup took about 10 minutes to run.  Now we are ready for some fun.

The first thing I noticed, once the setup finished, was the desktop looked about the same except with this ugly black bar at the bottom.  The second thing noticed, was Adobe Acrobat wanting to install another update.  Adobe you are like a virus, but I will save that rant for another day.  But, first thing first…

No, Windows you can not share my Wi-Fi password.  This especially important for Windows not to share my password when I am using my phone as a Hotspot.   Clicked Windows Icon -> Settings -> Network/Internet -> Manage Wi-Fi setting -> then turn off “Connect to suggested hotspots” and “Connect to networks shared by my contacts”.

Lets look at the new Edge Browser.  Norton (security software) immediately doesn’t like it because it does not support extensions.  And, prompts me to change my default browser to Chrome or Internet Explorer.  Not now Norton, and don’t bug me again.

The Microsoft Edge Welcome shows some of it features, such as: “Write on the web”, “Read Distraction Free”, and “Your built in personal assistant.”  I will have to explore theses later.  First I will import my browser favorite by click the link “Looking for your browser favorite?”  The screen just went blank.  Waiting, waiting, waiting….  Hmmm, guess it time for a hard shutdown (maybe just a little too impatient.)

The Windows 10 Adventure will need to end here for the day.  More to come later.