Railroad Town – Mayor’s House

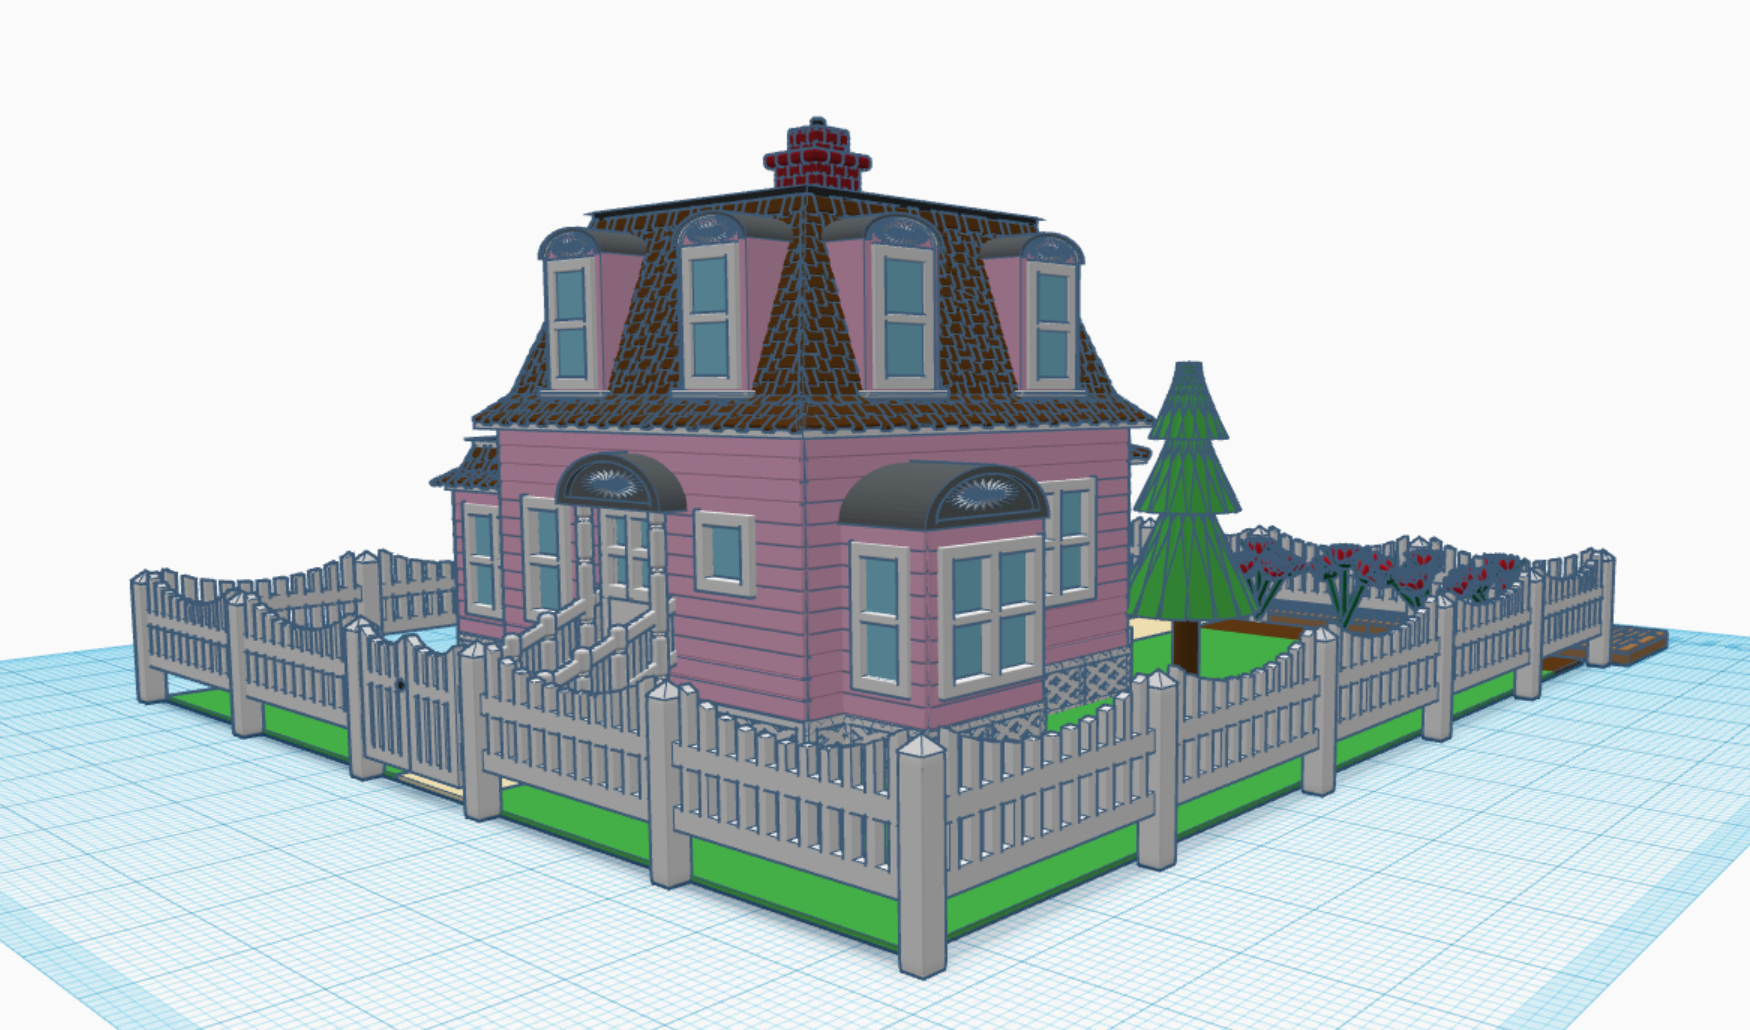
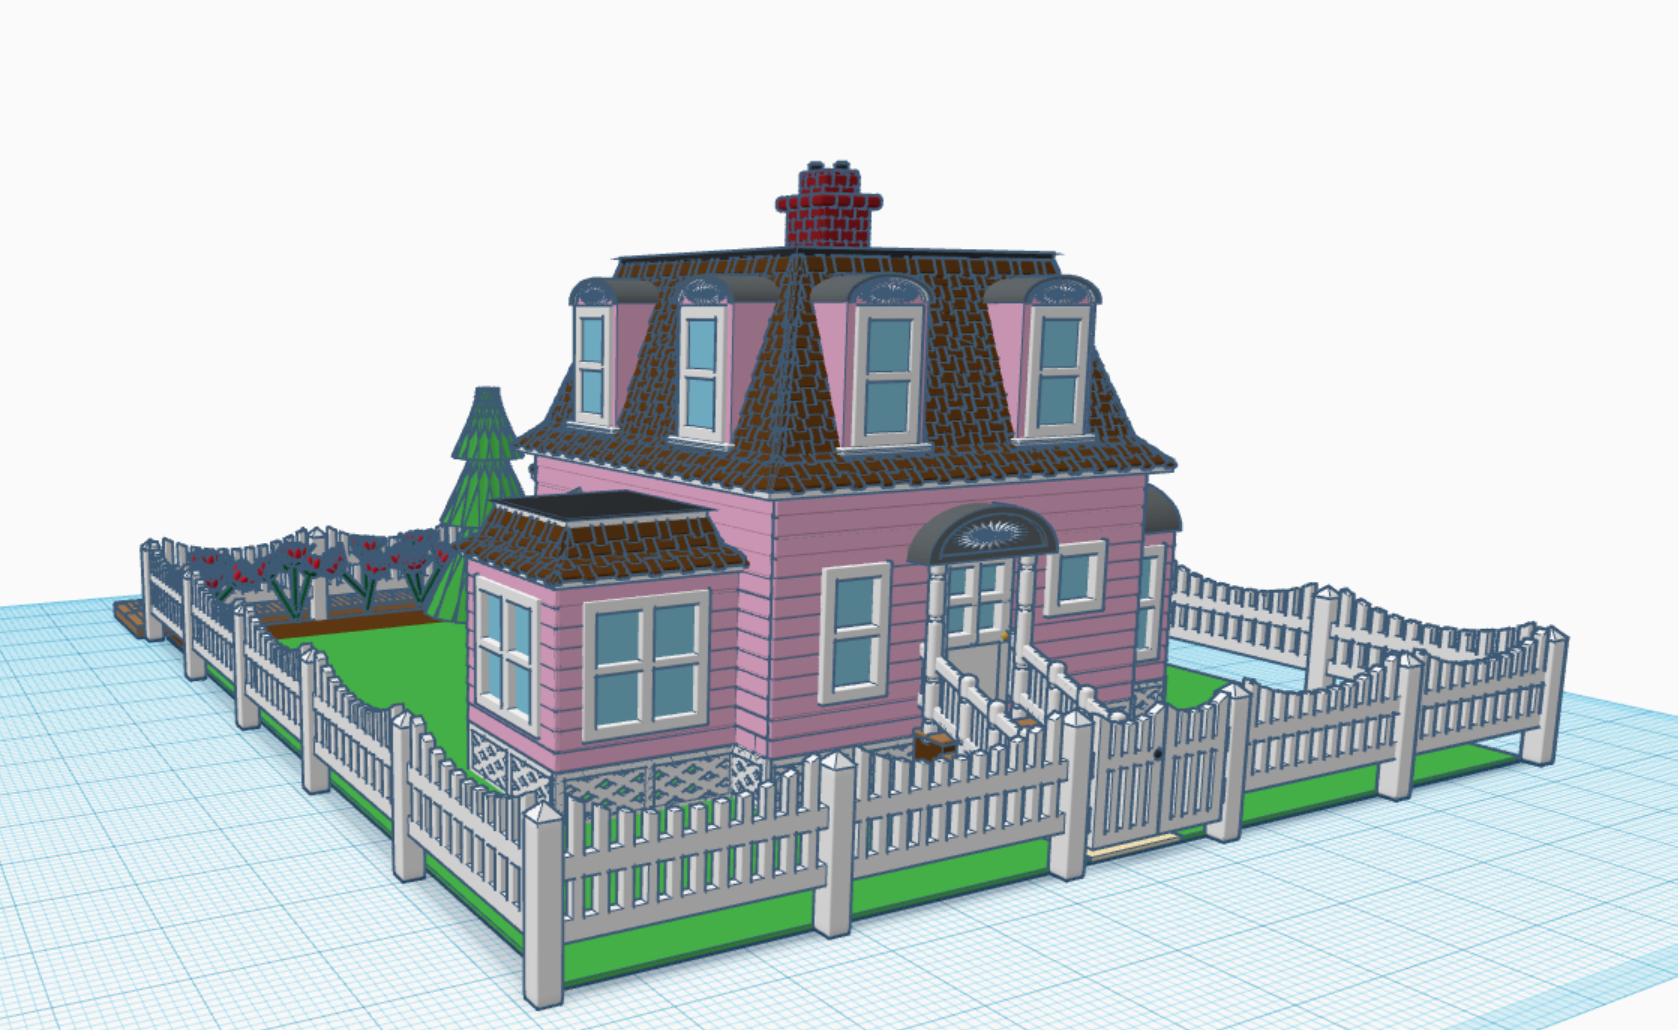
After I completed the Town Hall in Tinkercad, I knew I wanted a house for the Town’s Mayor. For months, I thought about what I wanted in the house. For example, I wanted a porch or balcony for the mayor to stand on the talk with the citizens of the town.

My inspirations come from looking at old buildings. All the pictures I saw for “Mayor House” was big opulent mansions that just did not fit my town. It wasn’t until I travel to Aurora, NE and visited their museum, that I found the style of the house I wanted for the town. Behind the museum was the Bate’s Houses. Its architecture and age was exactly what I wanted in my design. It was painted blue, but I wanted something special. I decided to color house pink with brown roofing to make it different from all other buildings in my town.

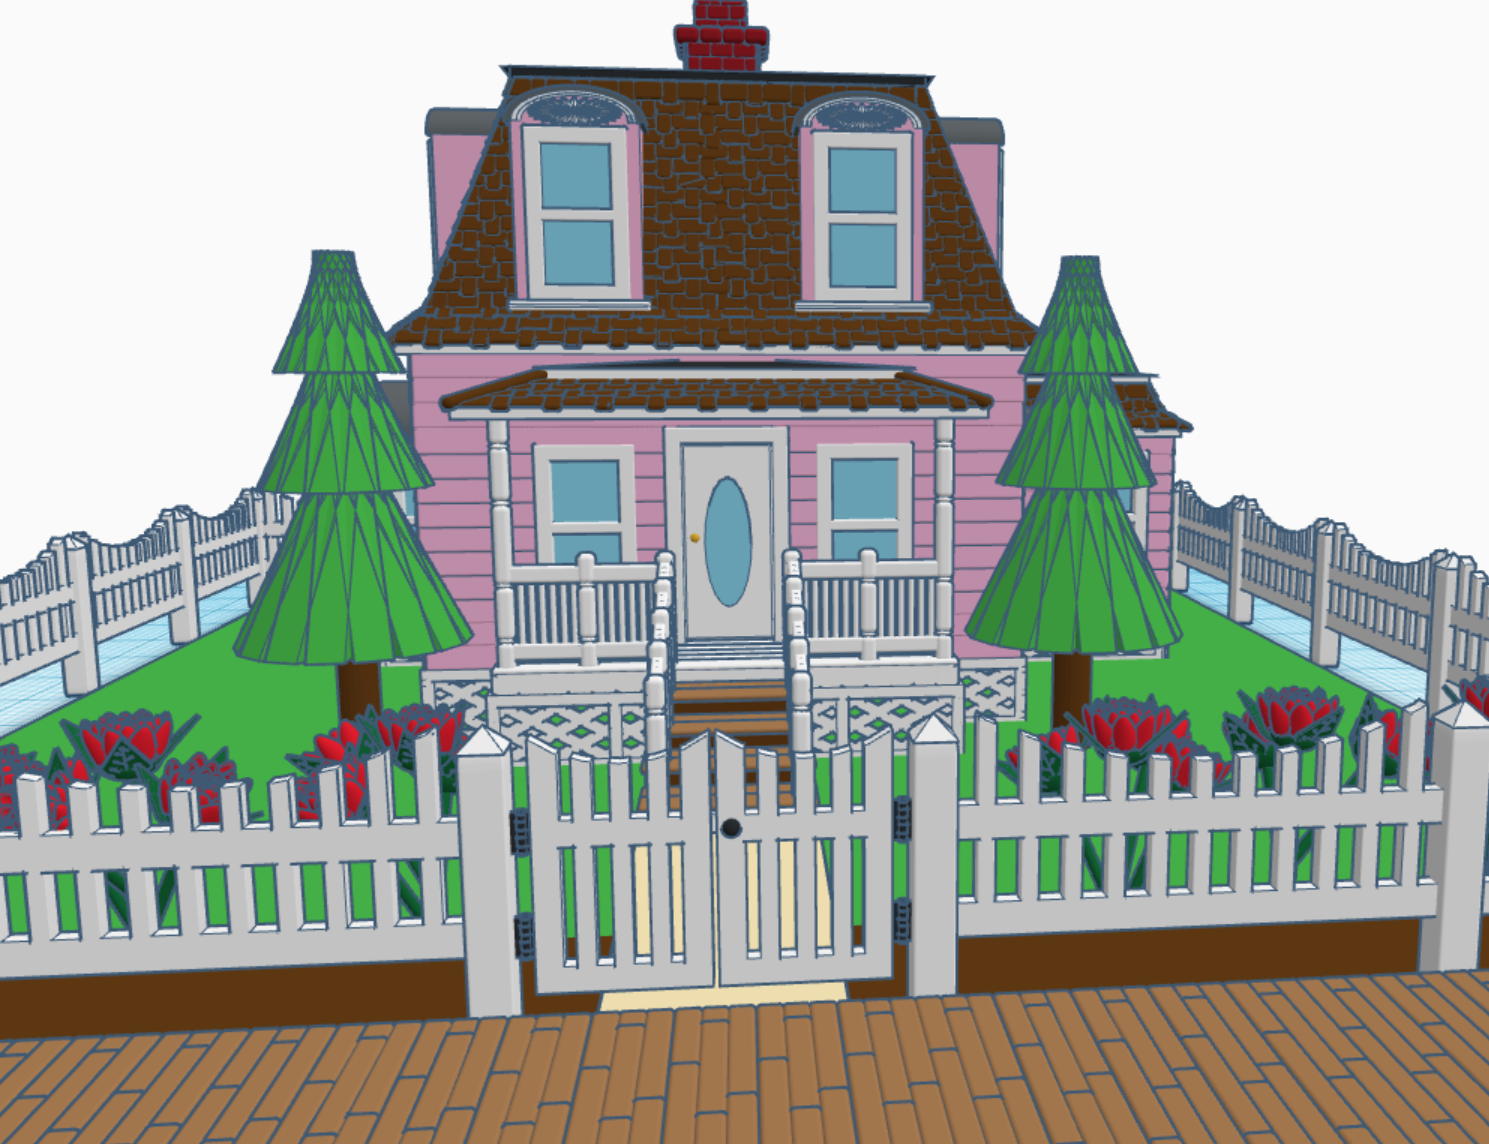
I placed the wooden path in front of the house, because the mayor’s house is located on Main Street in my Railroad Town. I placed a picket fence around the yard. I wanted the fence curved to add some character to the design.

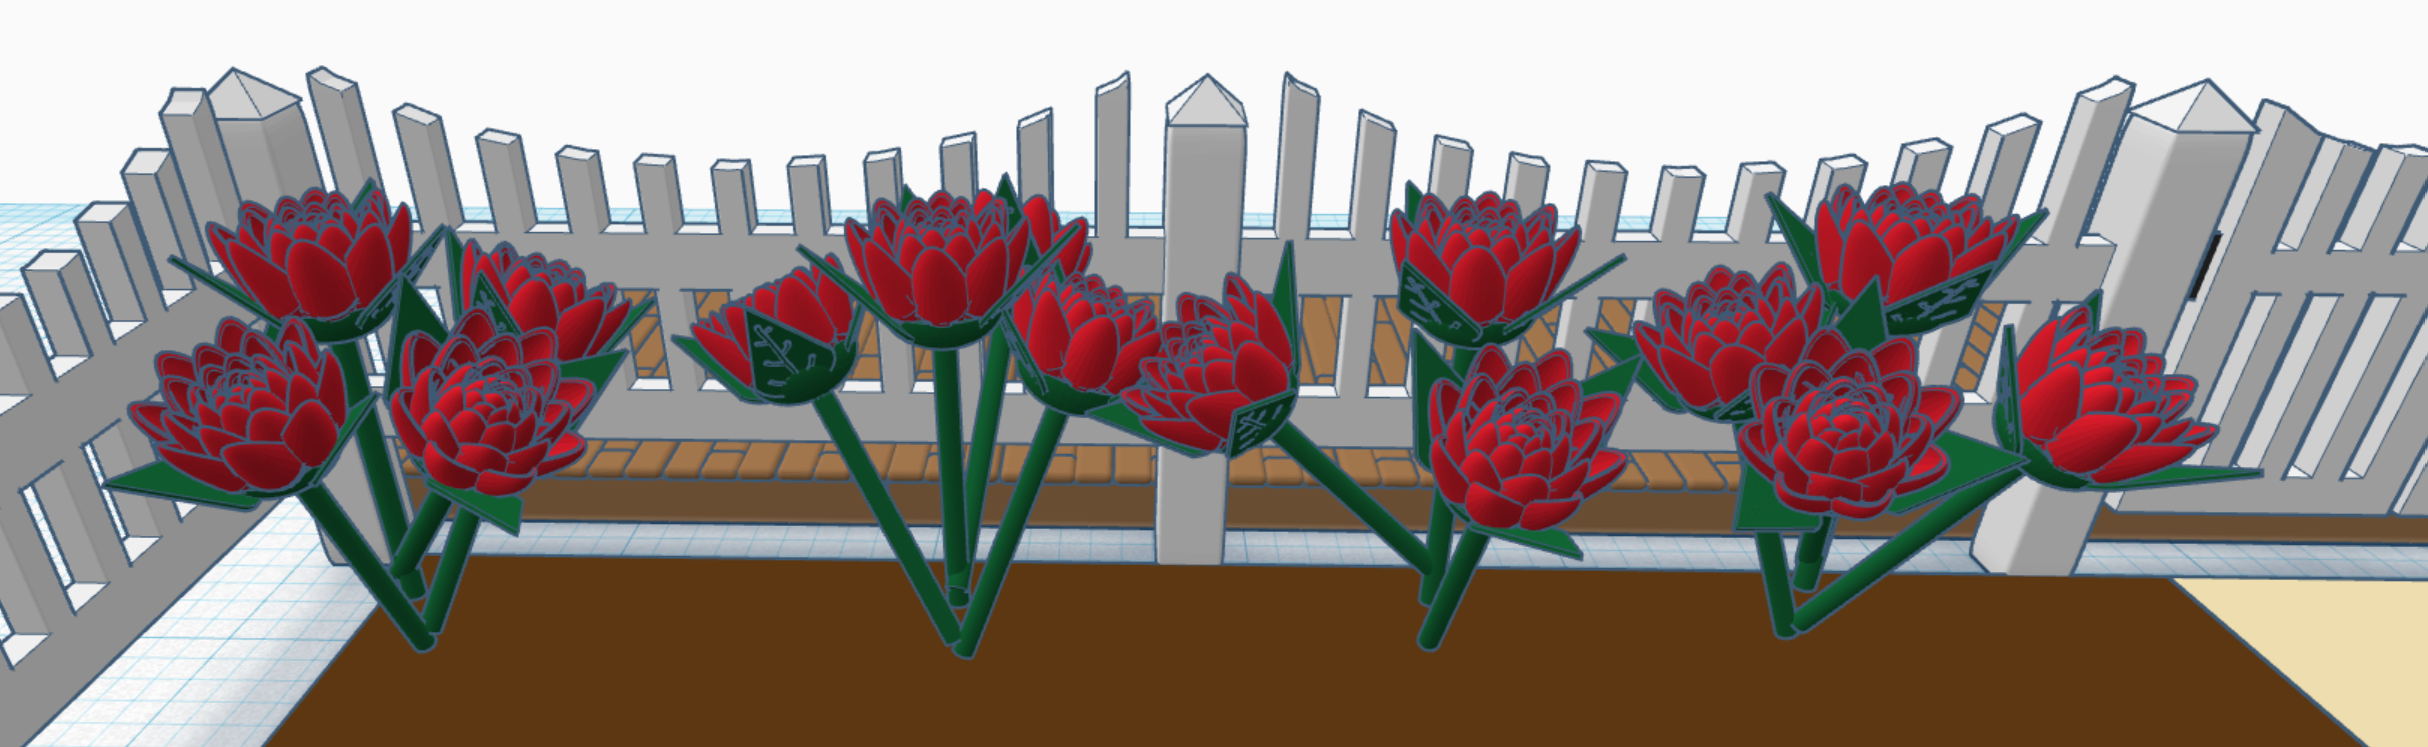
The mayor’s house needed a flower garden. I create one rose and stem; then to create the bush I duplicated it, changed the angle, rotation and position.

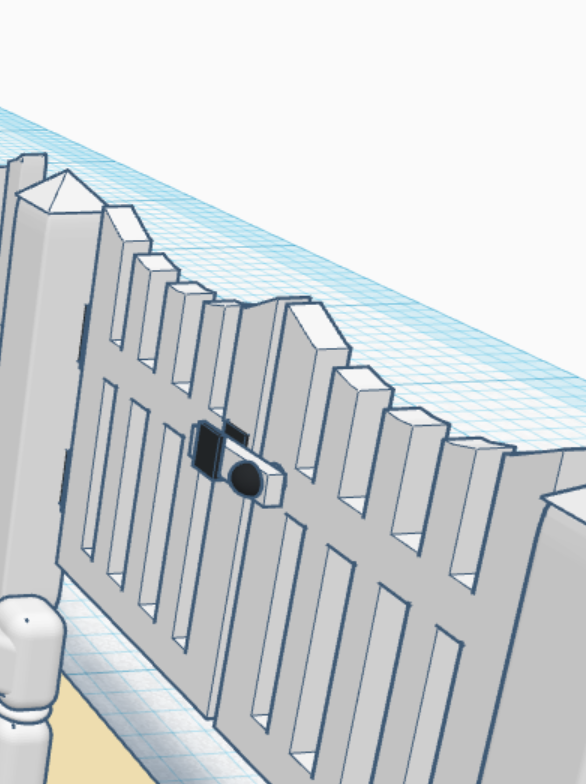
One detail that everyone will probably overlook is the gate. On the gate it has a latch and hinges that would actually function if they were 3D printer

You can view this design in 3D on Tinkercad at this link: Mayor’s House

Railroad Town – Town Hall

Using Tinkercad I have designs buildings to create a Railroad Town. It started in 2016 when I designed a Train Engine and related train cars. They were all based off the early train designs, when trains ran on coal and steam. Two of the building I designed for my town are, a Saloon and a Sheriff Office (a.k.a. a jail). If anyone was going to spend any time in the jail, and if the town kept growing, they would a Town Hall to provide administration.

The Town Hall often had a clock tower and consisted of numerous details. I incorporated these details by adding large columns and lots of windows.

The clock tower I frame in gold and set the time to after the start of the workday. I duplicated the clock and placed it on all four sides.

Clock Tower

Town Halls, in the Railroad Town days, had a bell to signal the town. The building appears to be only one story, and if I put the bell in a tower, it would look out of proportion. Therefore, I placed the bell on the stone platform.

Town Hall Bell

All of the buildings for the Railroad Town are based on the same scale. The doors and windows are approximately the same height. You can see and copy the 3D version at the Town Hall at this link: Town Hall. Sometimes, you learn more about how something is designed by deconstructing it.

Creating and Using Shapes in Tinkercad

The way I design in Tinkercad changed on July 20, 2022, when I learned that I could create shapes from my 3D Designs. For a lot of my designs such as the Cow Depot, Saloon, Mill, Barber Shop, Houmas House… anytime I wanted to reuse a shape I would save it out as an STL file and import a copy back into the design. Now, if the design is not to complicated, I can save it as a shape in Tinkercad and use it over, and over, and over again.

Since I am so excited about this feature, I wrote an instructable on Creating and Using Shapes in Tinkercad.

Here are some of the new shapes I have created:

The Chicken: This design answers the question of which came first, the Chicken or the Egg. The answer is the egg. Because only egg shapes were used to create the chicken, except when I used the cubic hole to cut the egg in half.

The Sheep: To create the sheep, first I made a fluff ball and saved it out as a shape and used the fluff ball to create the sheep. I also used the fluff ball to make a tail from my bunny.

The Mouse: There is nothing really special about the mouse, except a little cuteness.

I have created a Youtube video on Creating a Shape in Tinkercad.

As I was typing this, I realized some of my buildings are not covered in the blog. So, more posts about Tinkercad are coming.

Creating an Umbrella using Tinkercad

I am currently working on two projects in Tinkercad. One of the projects is huge and needs lots of parts. During the planning for this big project, I decided to create an umbrella. Not only did I create the umbrella, I also wrote instructions on how create an umbrella in Tinkercad. The instructions are available at on Instructables: Creating a Colorful Umbrella

The process is simple:

Add a Cone Shape
Duplicate the Shape
Change the Colors
Create a Hole
Create a Handle
Align the shapes
Add a little flare. You have an umbrella.

Okay, maybe it is simple for me. The video on how I created the umbrella is available on my YouTube channel.