Up Close To Fall

The Fall Season has beautiful colors. The leaves are falling from the trees. The berries are a bright red. The sky is a brilliant blue (or it is when I go out.) It is enjoyable to go and experience that colors of fall. Sometimes, I capture something special.

If you would like to see more of my Fall Photos, check out Photos by Sarah Facebook page.

Gradient Flower Vases

I can’t believe I am finally posting a couple of my vases. They have been done for over a year; sitting, waiting for their pictures to be taken so I could show them off in my blog. Other items were finished and posted after these vases were made. I thinks they are camera shy and hid everything I went to take pictures.

Some of my favorite flowers are the one that has multiple colors, especially the ones that go from yellow, to orange, to pink. My mother grew roses that were those colors and I thought they were absolutely beautiful.

I covered two glass vases with black Sculpey polymer clay. I blended yellow, red, and hot pink polymer clay and cut out each petal and center circles. I placed each petal on top of the black clay to make the flowers. After the flowers were formed I stamped each petal. I didn’t glue the petals on because it is clay,. Polymer clay items will stick to each other. Afterward, I baked to vases in the 275 degree over for about 10 minutes. When outside temperature was above 70 degrees, sprayed the vases with several coats of Minwax Polycrylic

The vases are not identical, but they are simular.

The roses were also made from Sculpey polymer clay. One day I should capture how I make roses.

Plastercraft Houses 2020

Okay, I only painted three Plastercraft Houses in 2020 – so far. After I finished the last two, I was looking through the box of houses that wasn’t damaged in the 2016 flood, and found the “Hot Rod Parts” building. Since I normally paint three houses at a time, I continue to look and found a second “Hot Rod Parts” building, and then I found a third “Hot Rod Parts” building. So, I decided to paint all three. One for my sister, who I started painting houses for many years ago. One for my other sister, who rescue the houses from the flood and one for me. They were surprise! Especially, since California Creations went out of business.

Art of Concentration: Day 13

Today’s line drawing is made up of hearts.

AofC hearts

The Art of Concentration rules are:

  1. Draw lines on a page.  Straight line, squiggly lines, circles, squares, triangles, stars, it does not matter.
  2. Color every other section a different color.  Start anywhere.  Use any color.  Typical you will only have a black pen, or a pencil, those are fine.
  3. If you desire, use multiple colors.  Sections of the same color can not touch.

My first color choice:

AofC hearts color 1

My second color choice:

AofC hearts color 2

Today’s hand drawing:

20180413_155734.jpg

Hearts Apart

You can download a PDF version of the line drawing on the Coloring Page, or click here.

Art of Concentration: Day 9

Today’s Art of Concentration drawing is more typical of the drawing I used to do in meetings and classes.  It wasn’t anything too complicated, just some lines and occasionally other objects.

Remember you can do these types of drawing on any size of paper from “Post-It” note size to letter size, or larger.  If you create them using ruled paper, you already have some lines premade.

The line drawing:

AofC flower mess

The Art of Concentration rules are:

  1. Draw lines on a page.  Circles, squares, squiggly lines, it does not matter.
  2. Color every other section.  Start anywhere.  Use any color.
  3. If you desire, use multiple colors.  Sections of the same color can not touch.

The first object created was the flower and than squiggly lines added.  Notice the top left of the circle in the middle of the page.  There are more than two section that are touching.  The rule “Section of the same color can not touch” will not work here.  To solve that dilemma, I used multiple colors.

AofC flower mess color 1 The flower petals were done in a deep red and white.  The center and background was done in black and white.   It doesn’t even look like a circle.  That is why I named today’s hand drawing “Squid”.  Looking at if after is was done, it looked more like a squid then a flower.

20180409_135311.jpg

Squid

Squid was done on a black Studio Series Artist tile using Sakura gel pens.

The line drawing was done in Corel Draw and exported as a bitmap to color using Microsoft Paint.  I decided to use three colors and black on the second drawing with white line.

AofC flower mess color 2

Click here to download a PDF version of the line drawing.  All of the line drawing are available on the Coloring Page.

Art of Concentration: Day 8

I must be crazy for drawing so many lines on a page and than coloring them.  And, on top of it all, doing two drawings.  I must be crazy.  However, they were so much fun.

That is probably another rule of Art of Concentration – have fun.  Enjoy what you are doing.

The Art of Concentration rules are:

  1. Draw lines on a page.  Circles, squares, squiggly lines, it does not matter.
  2. Color every other section.  Start anywhere.  Use any color.
  3. If you desire, use multiple colors.  Sections of the same color can not touch.

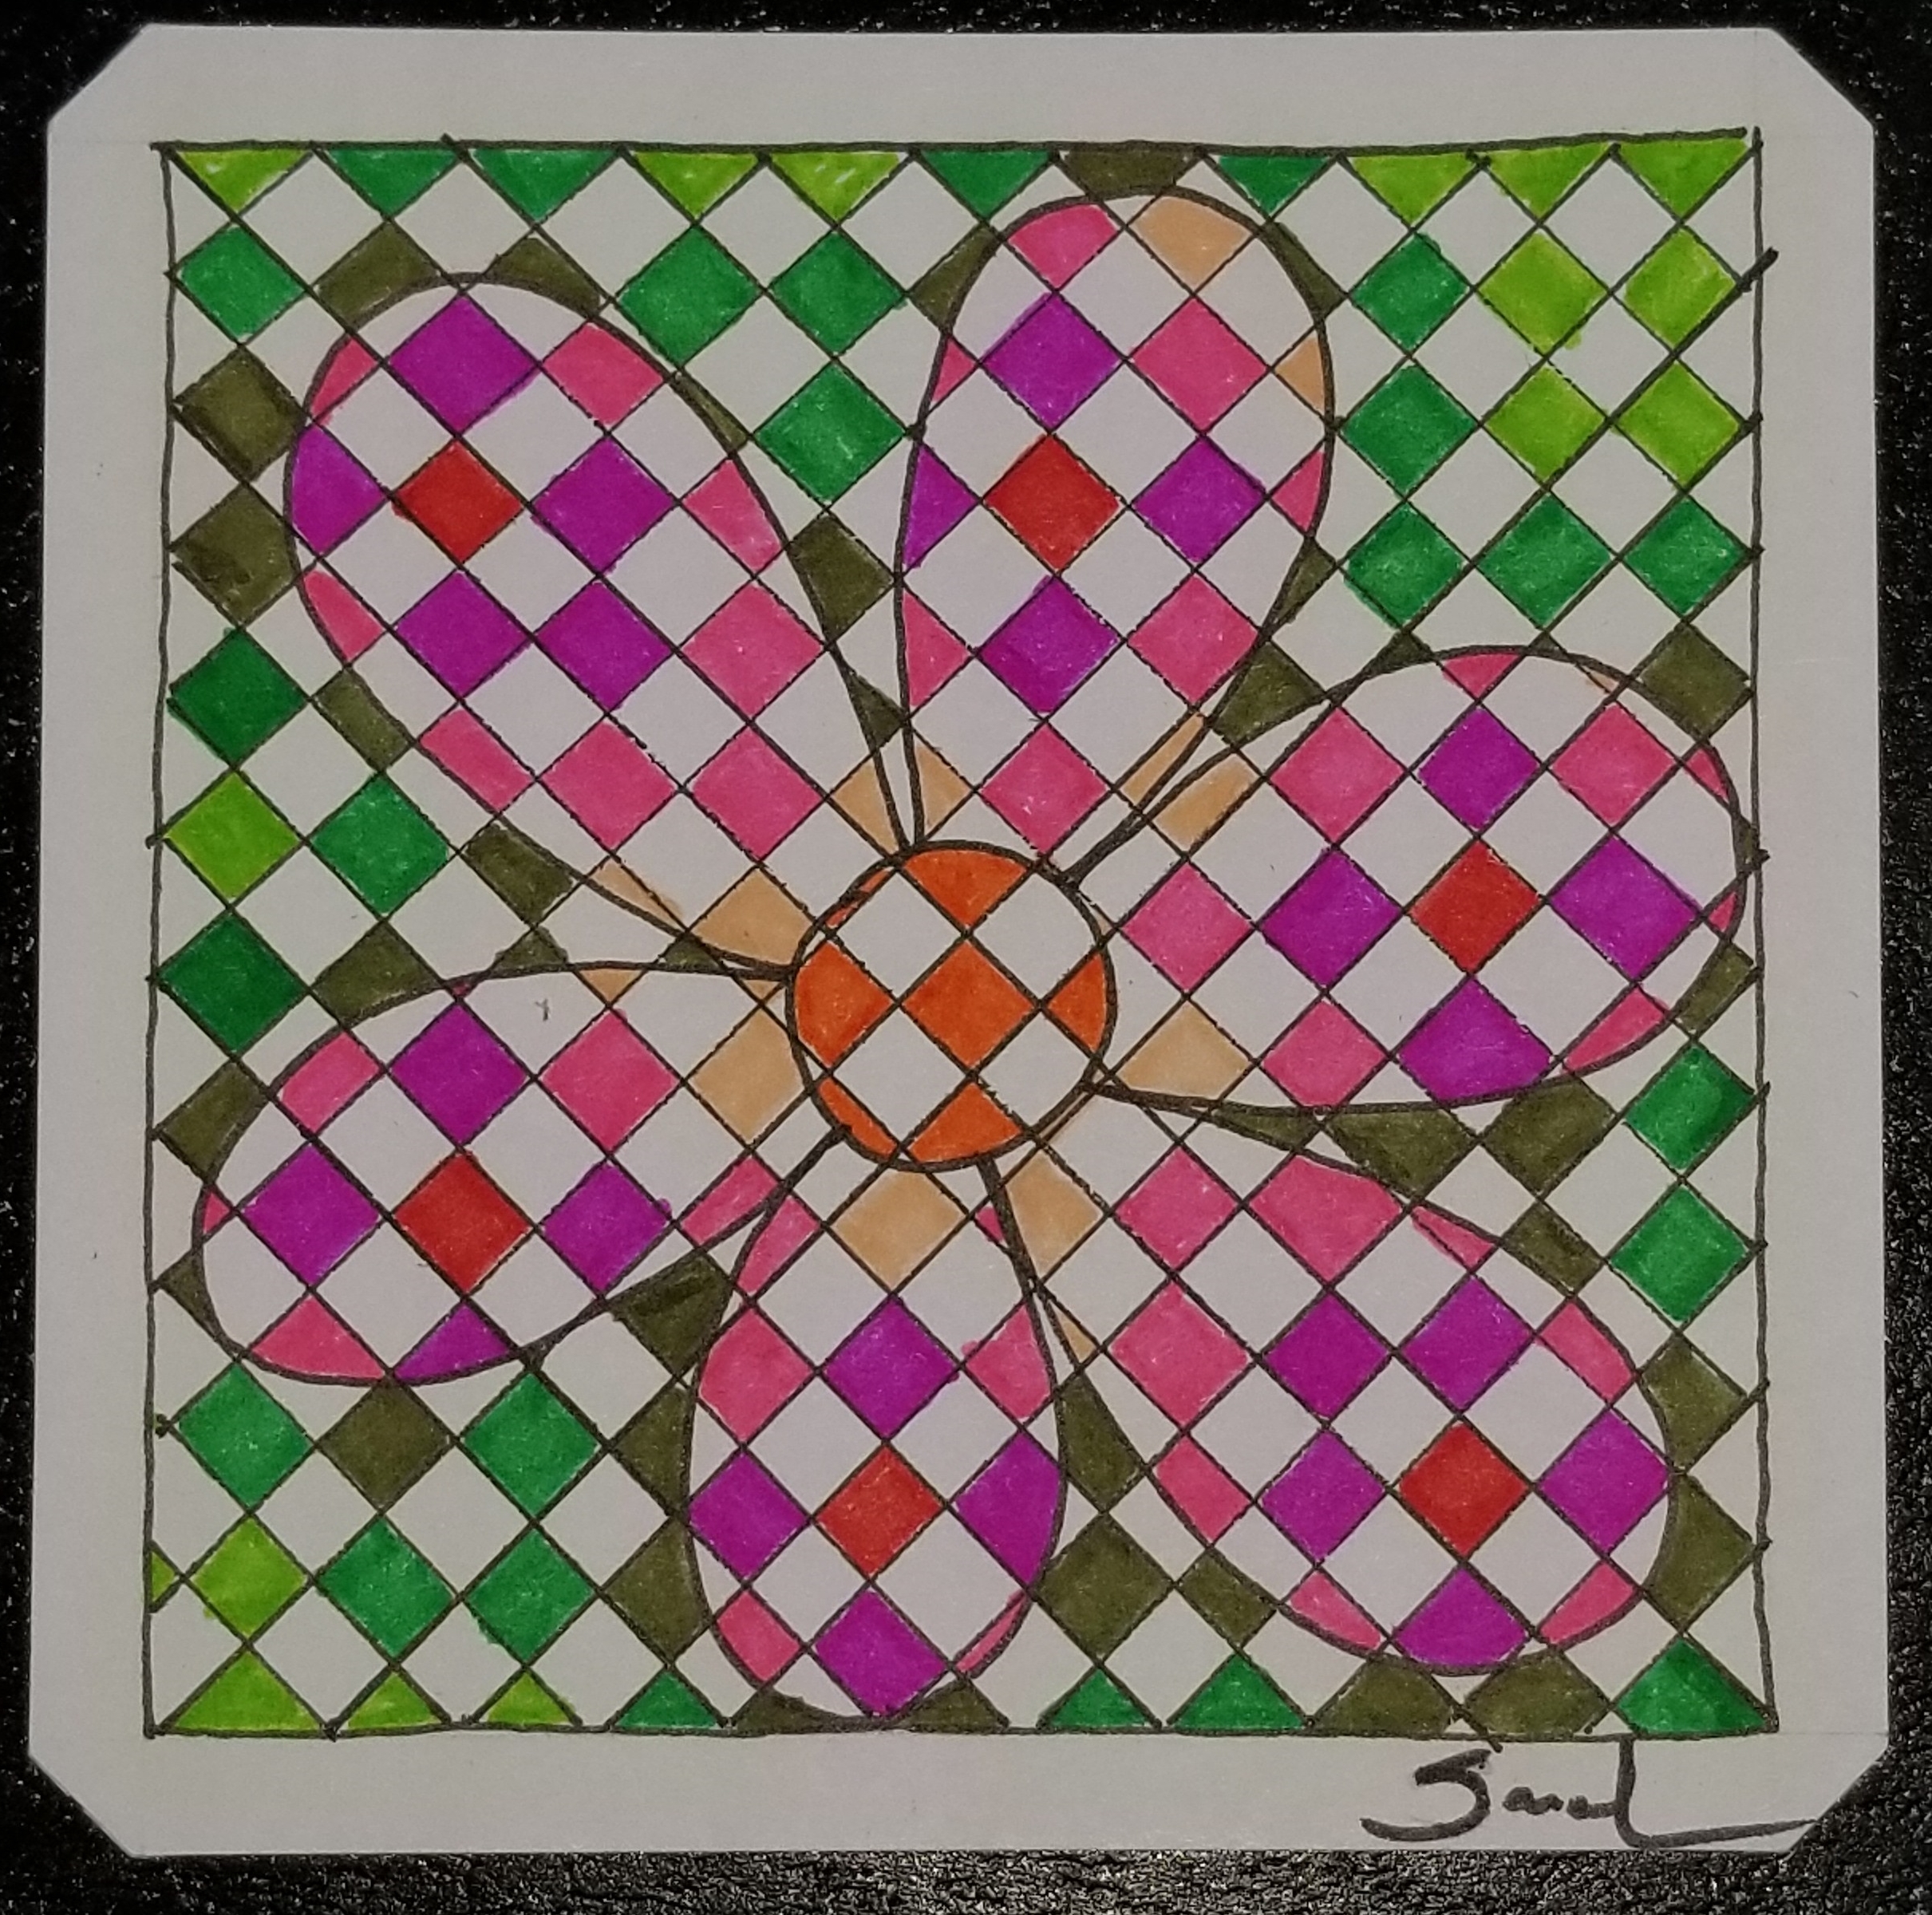
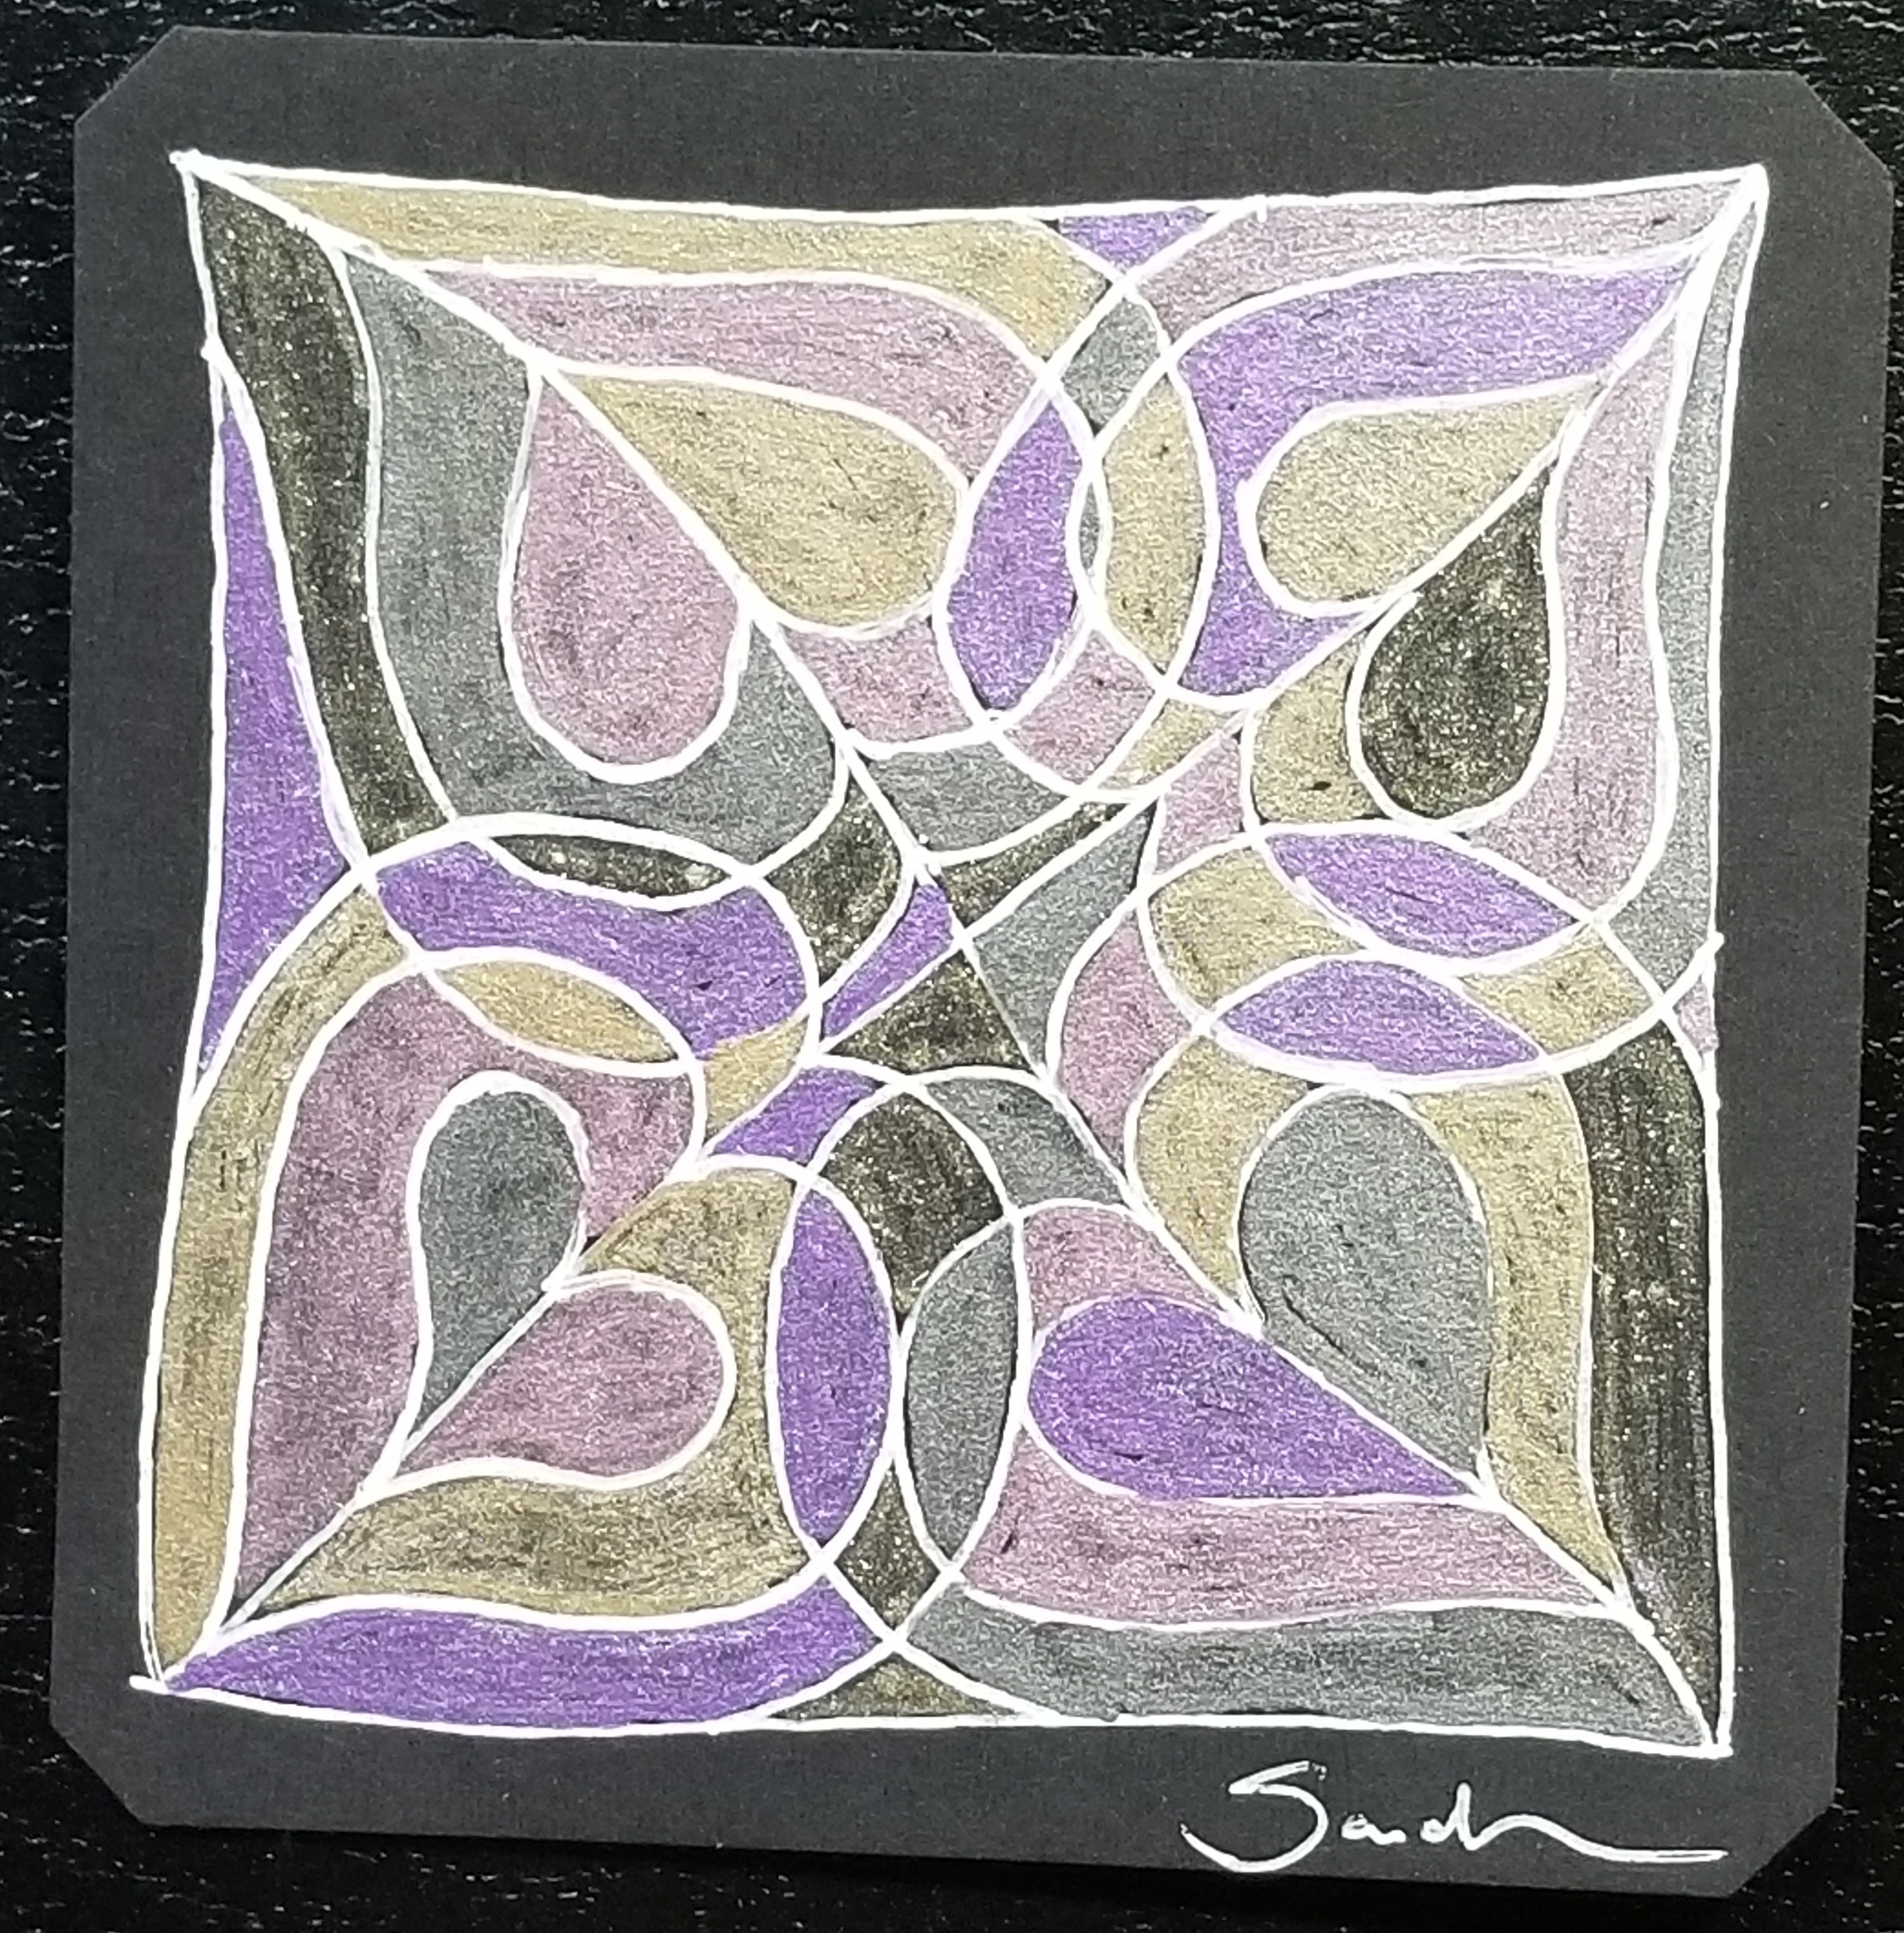
The first drawing was a small drawing.  It has a simple flower in the middle with a bunch of lines going through it.

AofC flower x-treme

There are some many colors that could be added to this line drawing.  The first example started out as a simple black and white, but I could not leave it as that.  The gray background the flower jump off the page.

flower x-treme color 1

The colored version is very busy, it draws your eye all around the drawing.  It reminds me of a out country kitchen pattern.

flower x-treme color 2

Below is the hand drawing of the x-treme flower.  It was done on a Studio Series Artist tile with Faber Castell Pitt Pens and Crayola markers.

20180408_085910.jpg

Boxed Flower

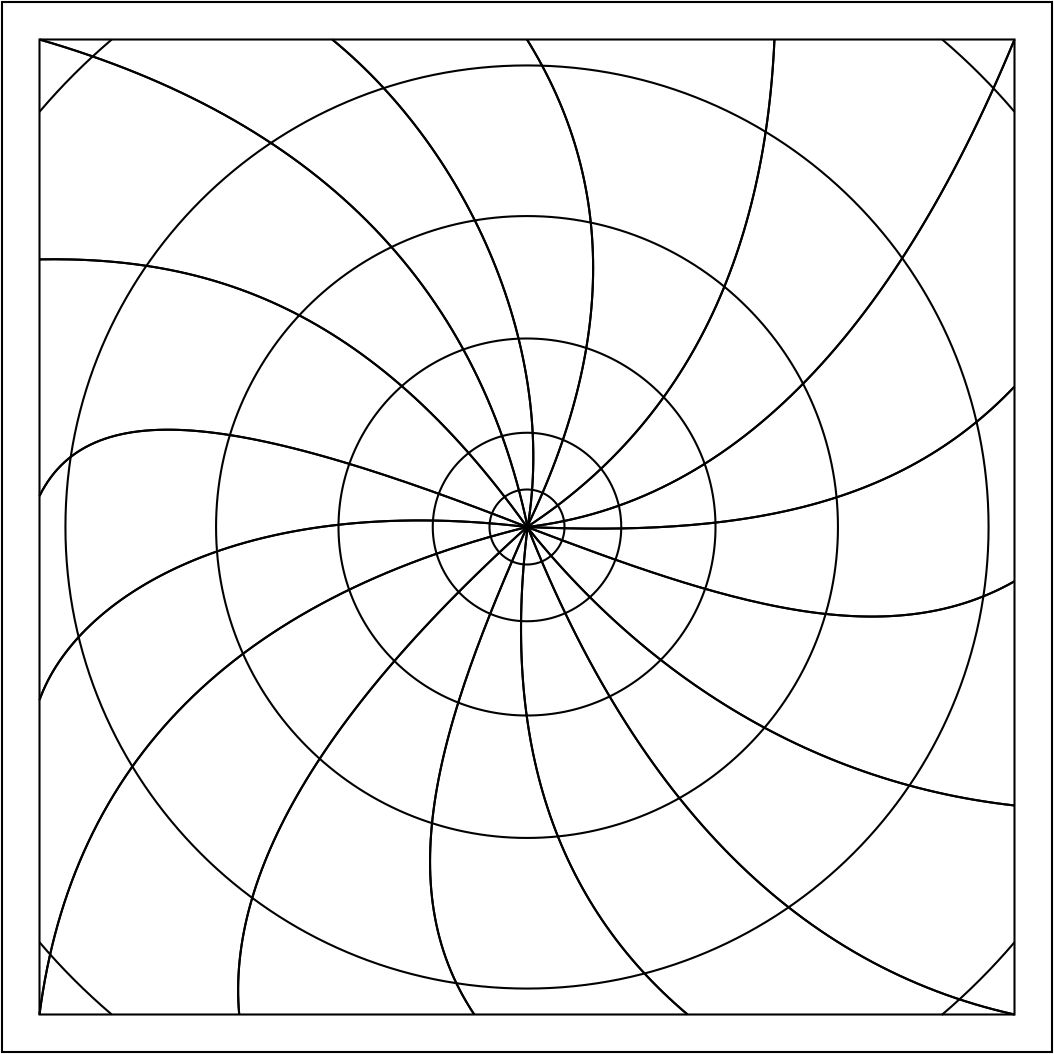
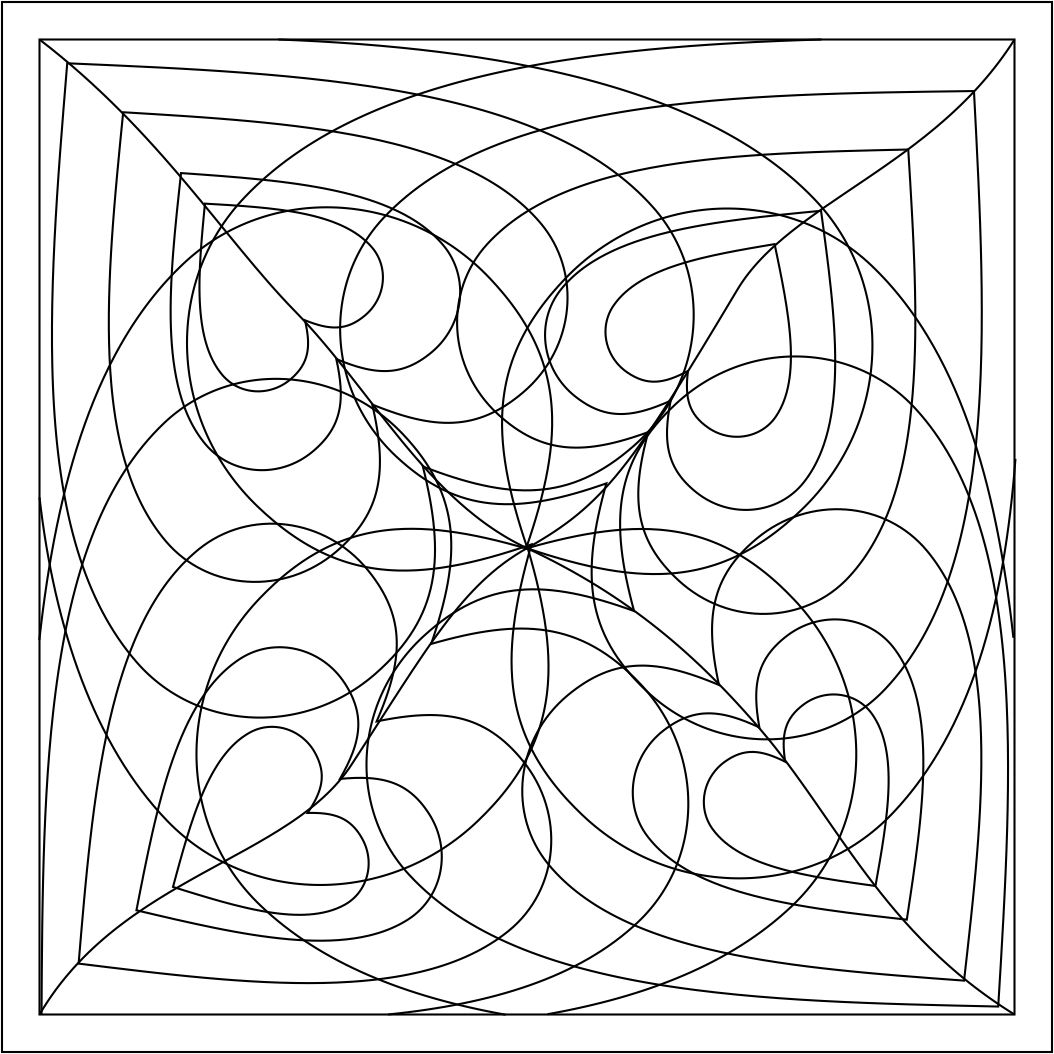
Even though this Mandala started out as a sketch, I thought I could not do it justice on paper, so I put it in Corel Draw, increase the size to 8.5″ squared, and drew circles to the extreme.

AofC Mandala

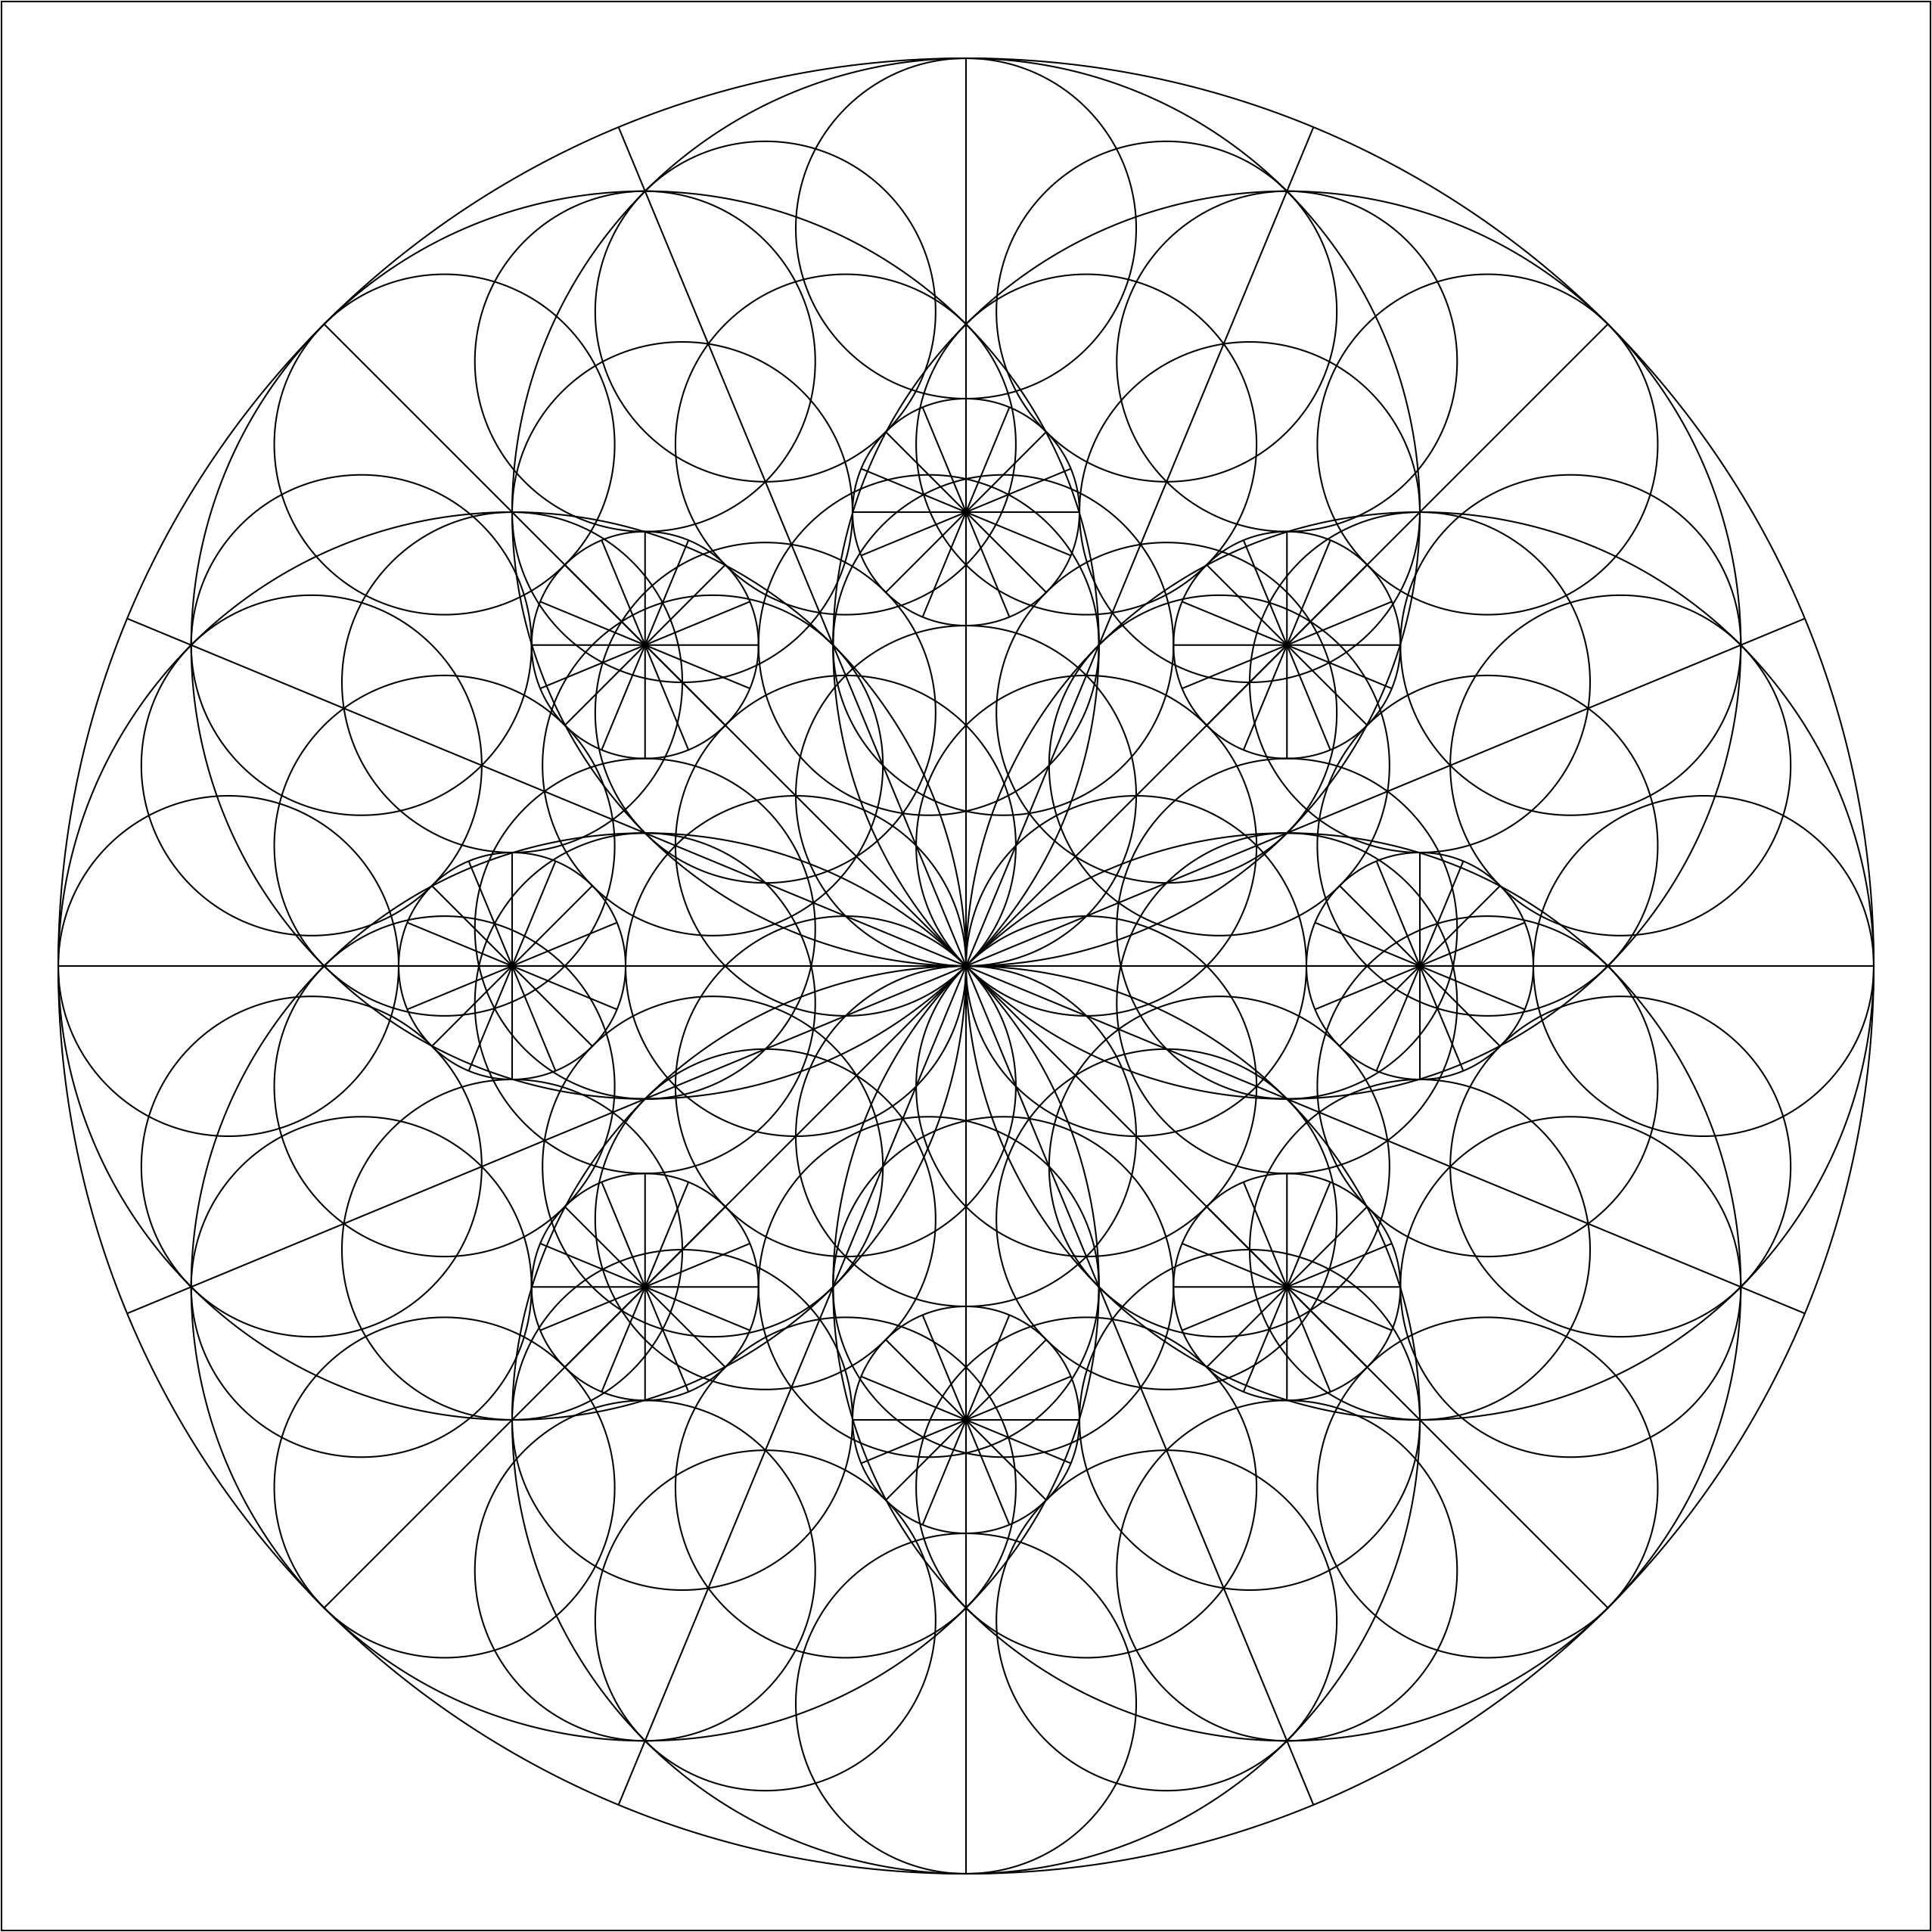
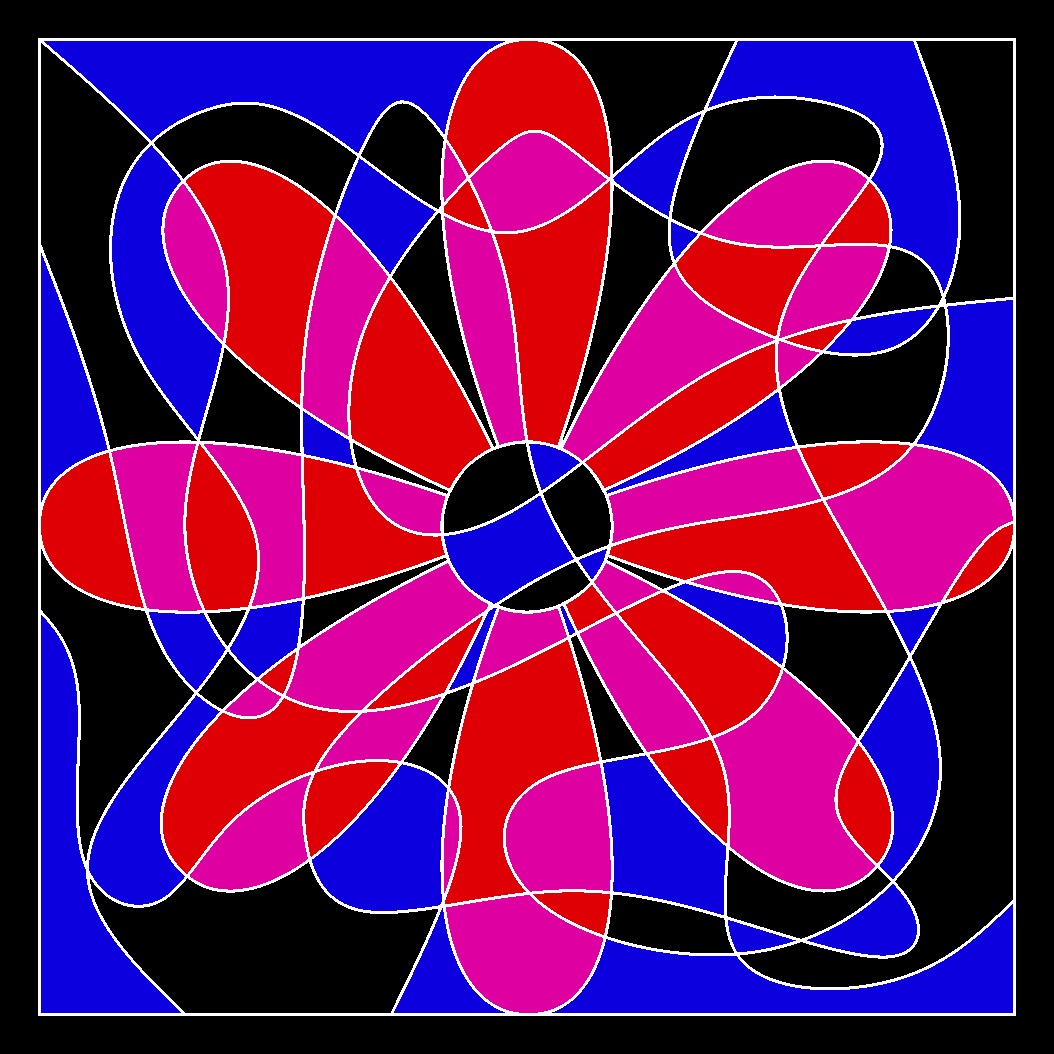
From the center, a beautiful flower appeared.  There are so many way this could be colored, so many possibilities.  After creating a bitmap and using Microsoft Paint to color it, below is the results at my first attempt to color the Mandala.  The black background made the color more vibrant.

AofC Mandala color 1

AofC Mandala

PDF versions of the today’s line drawings are available on the Coloring Page for downloading.  Starting with today, I will put the newest drawings at the top of the page.
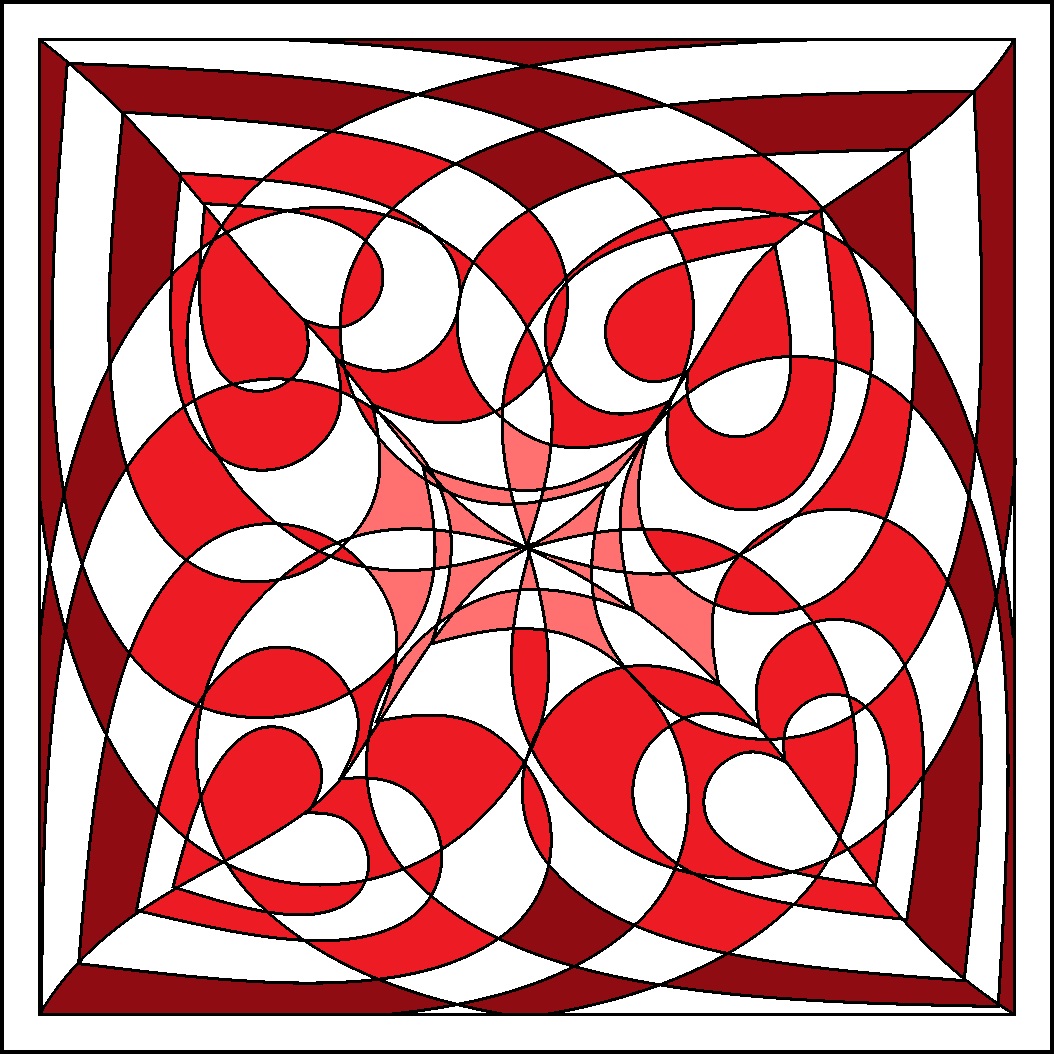
Art of Concentration: Day 4

The Art of Concentration can be a game, and it can a experience in the creation of art. The purpose is to help you focus while creating a masterpiece.

The rules are:

  1. Draw black lines on a page.  Circles, squares, squiggly lines, it does not matter.
  2. Color every other section.  Start anywhere.  Use any color.
  3. If you desire, use multiple colors.  Sections of the same color can not touch.

Circles and Swirls is probably one of the easiest, even though it may look complicated.  Today, was the first day, I did not turn the tile over and start again on the reverse side.

AofC circle swirl

This is a fun line drawing.  For today’s coloring, I decided to use the same line drawing to create two pieces..  One, I did in gray scale.  The other was colored in shades of red.  Yes, I believe pink to be a shade of red.

circle swirl color 1

The grayscale version appears to me that everything is falling into a funnel.  Where the shades of red piece, has a different effect.  Both were created in Corel Draw, export as a bitmap, and colored in Microsoft Paint.

circle swirl color 2

My hand drawn piece was done on a Studio Series Artist tile with brush marker and a Micron pen.

20180404_112821.jpg

Swirl to Purple

Click here to download a PDF copy of today’s Circles and Swirl.  It is also available on the Coloring Page.


Christmas Ornaments – Part 1

Around this time of the year, I work on something that has a Christmas theme.  This year I have painted some wooden Christmas ornaments.   Most of the ornaments were purchased from Michael’s Craft Stores in Oklahoma, Texas, and Louisiana.

The bell ornaments were painted with multiple layers of red and green acrylic paint.

For all the ornaments, I selected the DecoArt Americana Acrylic paint because it is thicker then most paint and covers better.  I used Delta Creamcoat for the gold metallic paint.  Then I covered the ornaments with Delta Creamcoat Sparkle Glaze.  The ornament probably didn’t need to be varnished after the glaze, but I wanted a good high gloss finish, so I put several coats of Miniwax Polycrylic on them.  The Polycrylic has worked well on my polymer clay creations.

The snowflake ornaments, yes there are two of them, the base was painted  with sapphire and then dry brushed with white paint.  I left the edges unpainted because I thought it gave them an old fashioned look.

The angel ornaments were purchase at Hobby Lobby.

I selected yellow and green paint for the star ornaments.  Before I applied the glaze, the green areas was dry brushed with gold paint.

The tree and bell ornaments were painted using the same process as described above.

The angel ornaments were purchased at Hobby Lobby.  I should have taken time to sand these ornament, because there are a few rough places on them.

This post is Part 1 because there are more ornaments that are unfinished.