Here is my 2019 Christmas Card.
Outside:
Inside:

Here is my 2019 Christmas Card.
Outside:
Inside:
It is the Christmas Season! All the presents are wrapped and all the cards have mailed; it is time that I share with you my Christmas Card of 2017.
I usually start thinking about my Christmas Cards around July. If I wait until Thanksgiving, I sure that disasters will strike and I would be force into buying Christmas cards from the store. This year the ideal was a Snow Globe Christmas card. I researched the ideal and knew it was possible.
But, I didn’t really want to put a piece of plastic wrap or it’s equivalent on the card. And, than I found Jullibean Soup’s Large Circles by Hampton Art. It was a quick Click and Order from Amazon. Once the circles came in, I started to work on the card.
I thought about designing a village scene to put inside the snow globe, but I wanted a little deep. Then it occurred to me; I have polymer clay, I have cutters for snowman and trees. The card was coming together.
The snowman, trees, and snow were made with Sculpey Polymer Clay using a setting of 3 in the pasta machine and cut with “cookie” cutters, bake and covered with sparkle varnish. (Which was the first mistake.) However, I need to draw the face and buttons, and color the hats on the snowman. I got out may Sharpie pens and colored the hats. They looked awful. I should not have varnished the snowmen first. What was I going to do, paint all the snowmen? Nooooo! I had just recent purchase a set of Chameleon Pens, which worked with beautiful results. It even covered where I used a Sharpie.


Since the Snowman were coming together, I could now design the inside of the card. This was done using Corel Draw. I probably spend too much time making snowflakes, but I was having so much fun. I hope the shading on the snowman gives it some dimension.

At Office Depot, I found dual color cardstock. It was light blue on one side and white on the other side. This was perfect for my card. It would give me the blue sky I wanted behind the snowman scene on the front and white on the inside. I found the snowflake paper at Hobby Lobby. I found some nice light blue glitter paper at JoAnn’s and had the silver paper left over from last year.
The Jullibean Soup circle comes with adhesive around the circle, so it was not necessary to stick it through the first layer of paper and glue everything down. I used Silhouette Studio to design the silver snow globe and the cut for the top paper layer. Everything was cut using my Silhouette Curio. I was really dreading gluing it all together.
More research. I found this wonderful blog that talked about ways to glue paper together. Did you know you can put cheap plastic wrap between two piece of paper and use a hot iron to fix them together. I didn’t use plastic wrap. The blog also talk about Xyron Creative Station for sticking paper together. This is the best machine I have bought all year. It did exactly what I expected. It basically creates stickers when you roll your paper through the machine. Afterwards, you just peel it off and stick it where you want it. It even handled the delicate “Merry Christmas”.
To assemble the card:
First step: print the inside of the card on cardstock on the correct side of the paper and cut everything. Run the snowflake paper, the silver snow globe, and the Merry Christmas through the Xyron Creative Station.
Second step: stick the snowflake paper to the correct side of the card.
Third step: Use glue dots to fix the snowman, trees, and snow to the card. Top with snow. (Second mistake.) After sitting in a box for several weeks, the trees and snowman started to come loose. The problem was I did not use permanent glue dots for those items. I had to gently open up at least half of the cards and redo the inside. I am glad I switched glue dots during the assembly.


Fourth step: Place plastic circle on tope of snowman and snow.

Fifth step: Place silver globe around circle and add Merry Christmas.
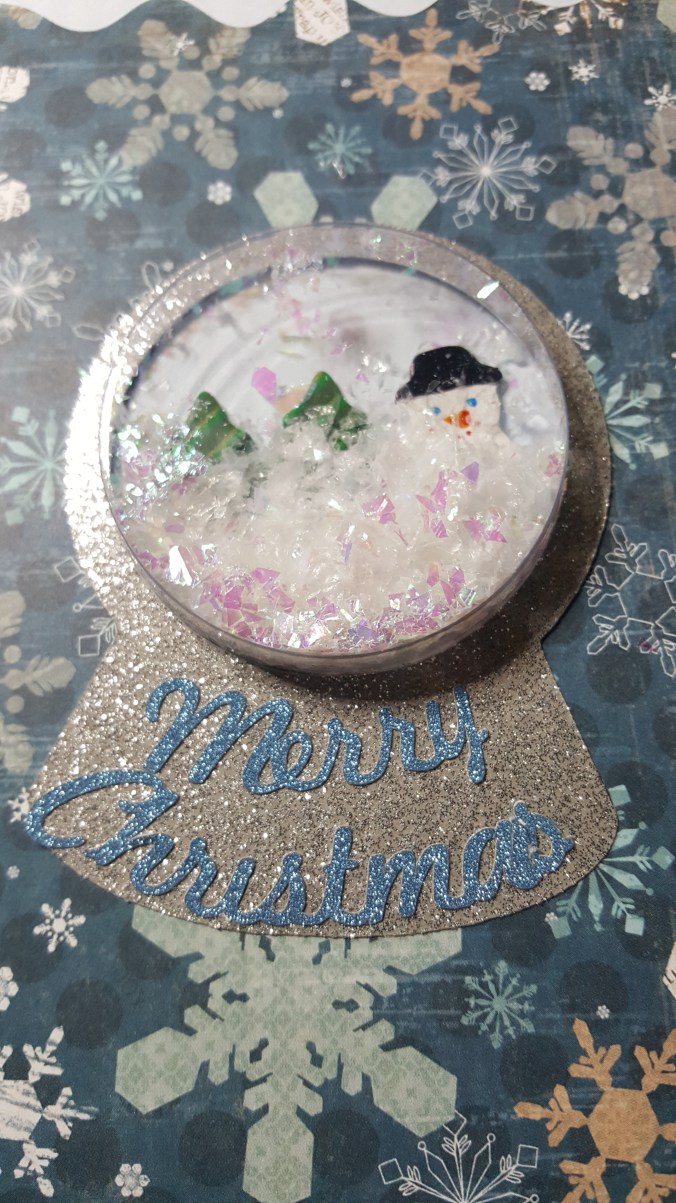
We have a finished card. Well, almost. It needed something else. I used glitter glue to around the border to give it more sparkle.

I put the card in an envelope that I stamped with snowflakes. Both, envelope and card was mail in a bubble mailer. Any thicker and the card could not be sent First Class mail.
When you find a great card design, you can use it for multiple birthdays!


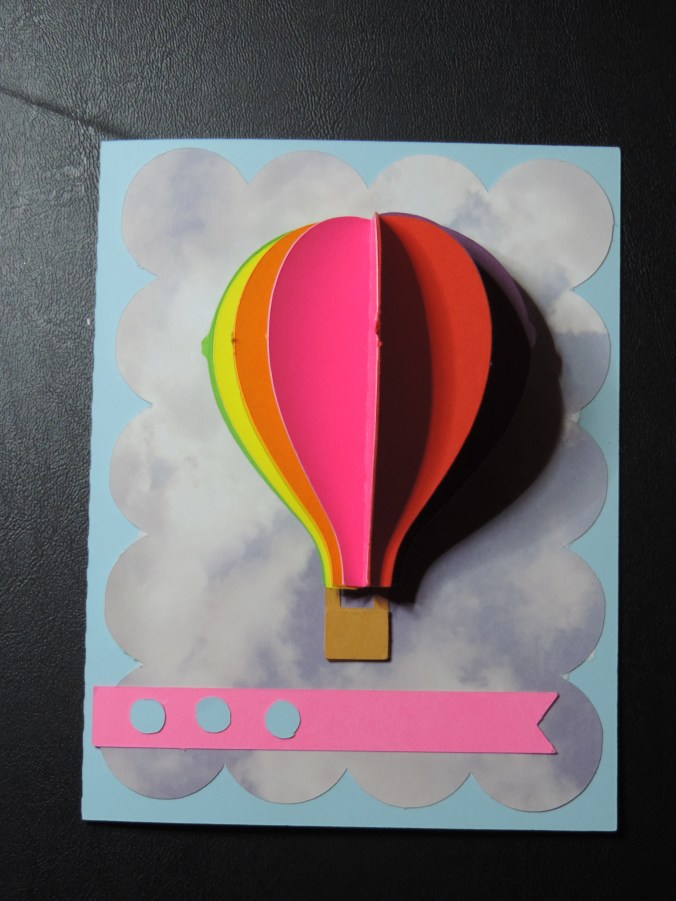

Look! It is 3d too!!!!
There are plenty of March birthdays in my family. I needed cards. Someone suggested buying gift cards for my dad. So, I needed some gift card boxes. Out comes the Corel Draw, the Silhouette, and the Ultimaker 2 to handle two of the birthdays.
Dad’s Birthday!
I used Corel Draw to create the background, then I printed it on metallic photo paper. I designed the rest of the card using Silhouette Studio.

I designed the gift card box in Tinkercad getting the dimension from a credit card. The box was printed on the Ultimaker 2 using semi-transparent filament.

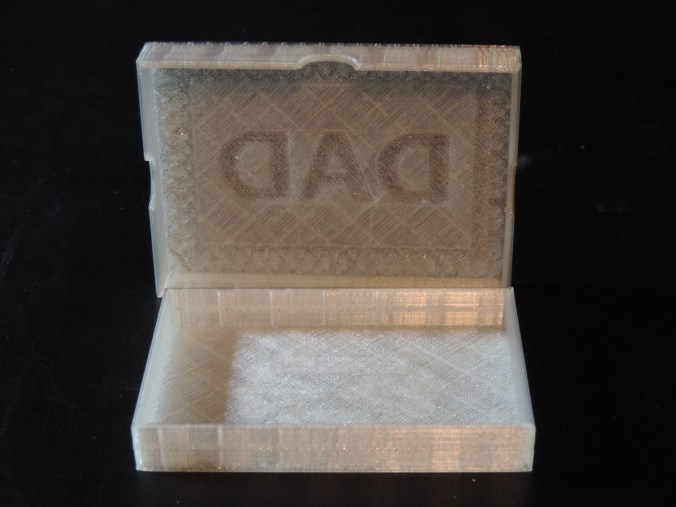
Print Time: 3 hours 45 minutes
Filament: PLA – 5.22 meters 41 grams
Layer height: 0.1 mm
Shell Thickness: 0.8
Object Size (W, D, H): 100.001, 164.001, 12.701 mm (Both pieces printed together)
Amanda’s Birthday!
I used a template for Amanda’s card and cut it on the Silhouette. However, I did design the envelope since no envelope was a good size.. Alas, I didn’t get a picture.

I tweak the gift card box after the other one was printed to make the top smaller and fit better. It was printed using pink filament.


Print Time: 3 hours 45 minutes
Filament: PLA – 5.25 meters 42 grams
Layer height: 0.1 mm
Shell Thickness: 0.8
Object Size (W, D, H): 100.001, 163.501, 12.701 mm (Both pieces printed together)
The boxes was printed with the top and bottom laying flat on the printer bed to make the boxes smoother.
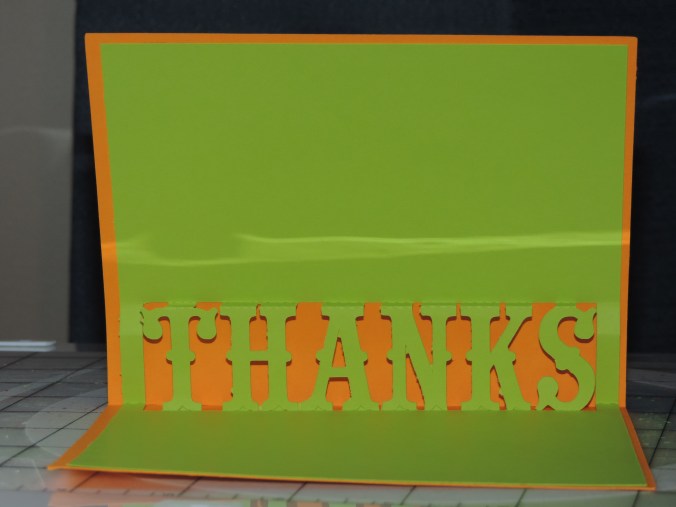
My nephews, ages 10 and 12, did me a favor by cleaning up my yard. It was a favor, so they did not want to be paid. This is how I thanked them.
First, I made them a Thank You card using a template I found in the Silhouette Design Studio. They are held together with double stick tape.
One for the SuperHero fan…

Another for the garden lover, orange wearer, fan…
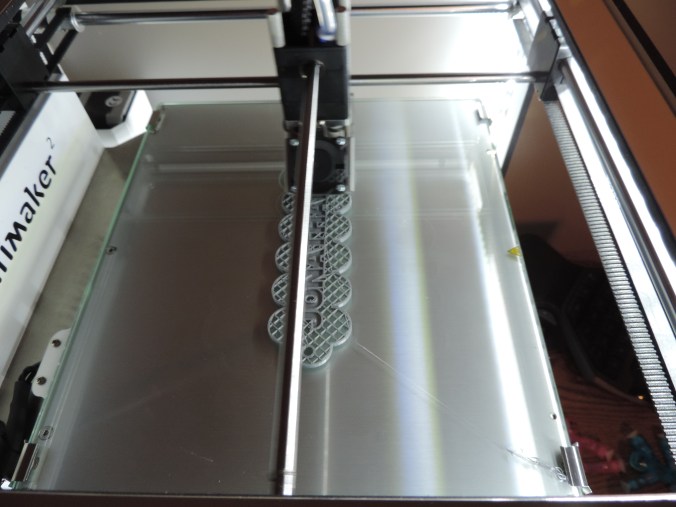
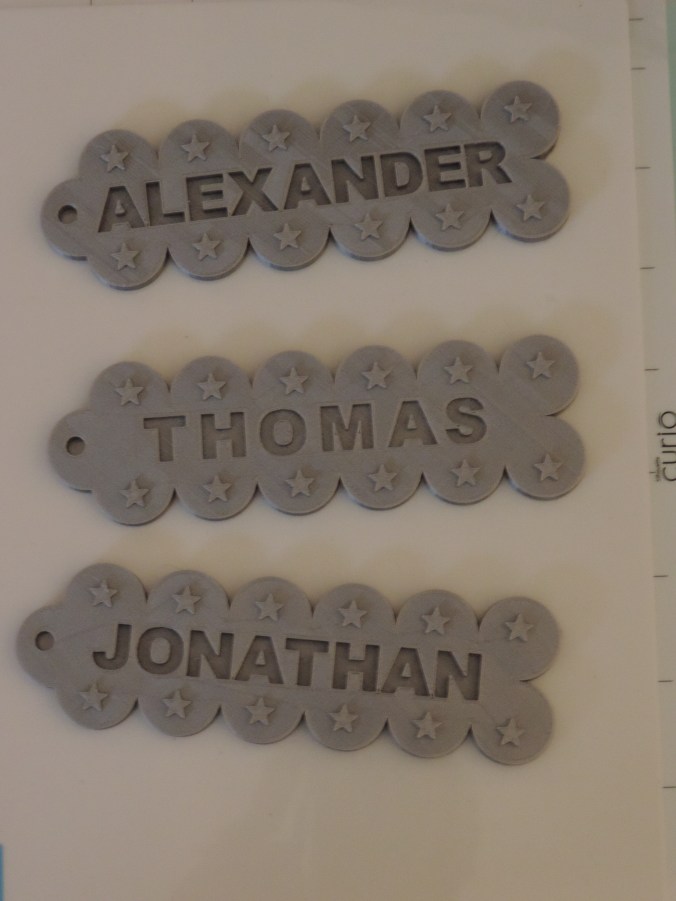
Then using my new 3D design skills that I learned in Tinkercad, I made them both a name tag and printed it on my Ultimaker 2 printer.


Print Time: 6 hours 54 minutes – for both
Filament: PLA – 3.52 meters 28 grams
Layer height: 0.1 mm
Shell Thickness: 0.8
Object Size (W, D, H): 130.5, 40.002, 6.0 mm – each
I then realized that their younger brother may feel left out. So, I made him a name tag too.
Print Time: 3 hours 28 minutes
Filament: PLA – 1.77 meters 14 grams
Layer height: 0.1 mm
Shell Thickness: 0.8
Object Size (W, D, H): 130.5, 40.002, 6.0 mm
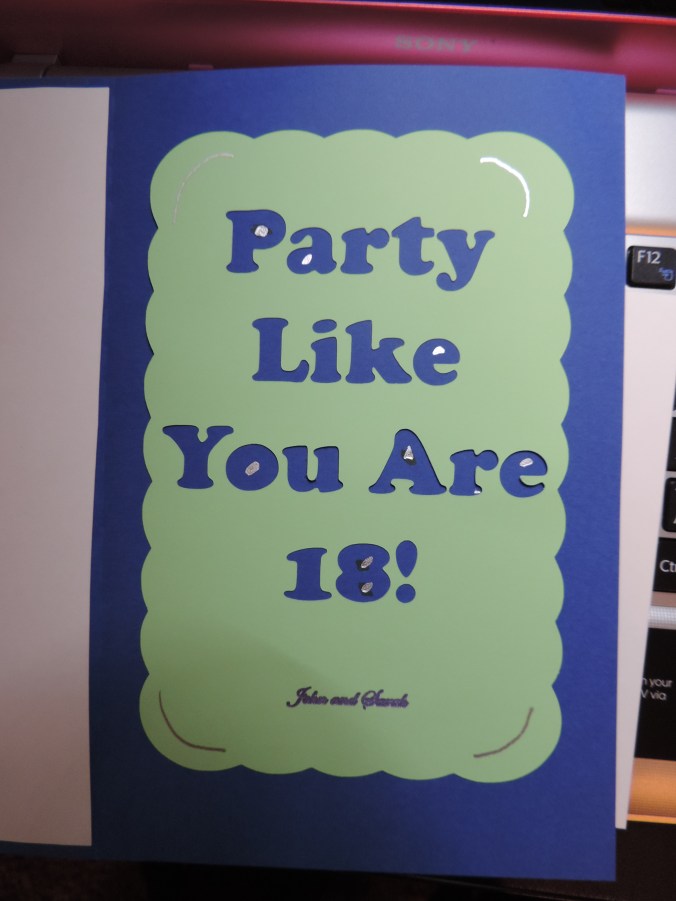
Here are my first two attempts at making Birthday cards. For the outside I used the templates from the Silhouette Design Studio. On the inside, I font was used and another template. Several cards will be made this month, because of the numerous birthdays in January.
I really need to learn how to get the insert correct if the card will have a background.
Instead of gluing the dots back into the letters, I used my metallic marker to draw the dots. Lazy? Maybe… but, more likely I am feed up with all forms of glue.
Note to self – Check the quality of the photo before mailing the card.

The signature was done with the sketch pen in the Silhouette while before the cutting was performed.
I did save the cut letters. I may want to used them in the future for another project.
Here is a preview of my handmade 2015 Christmas card.
The blue starry background was created using Coral Draw and printed on glossy photo paper. The star, trees, and windows were created using Silhouette Studio and cut using the Curio device. The star was cut on glitter paper, but the trees was cut on regular card stock and I glued the glitter on after they were cut.
Instead of having the window on the same cardstock, I thought using different pattern cardstock provide a wallpaper background and some uniqueness.
The inside of the card was the same for all the cards.
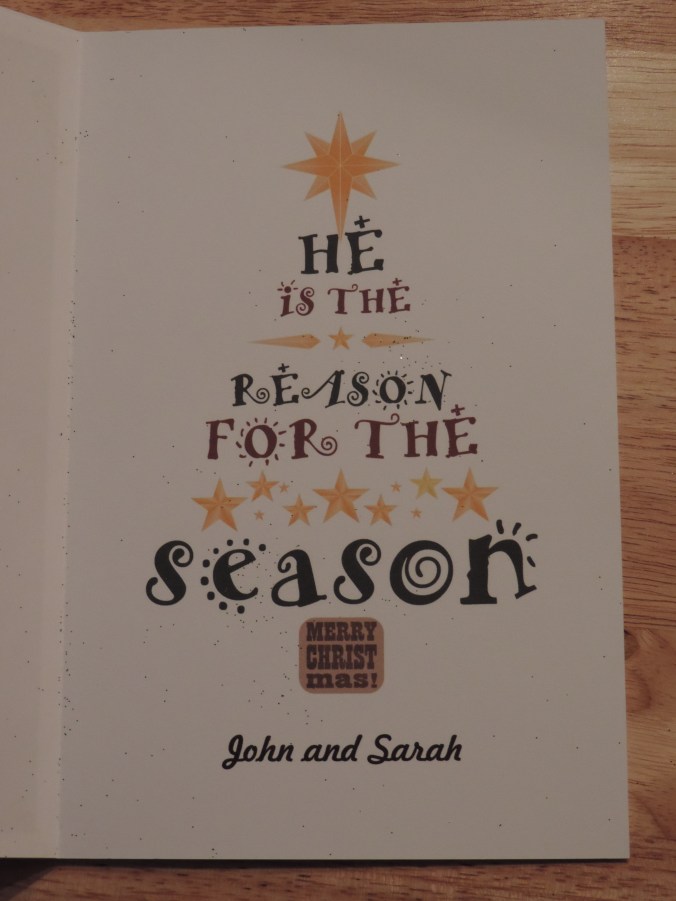
I got the text and layout from the internet, but I recreated it in Coral Draw and printed it on card stock. If I had thought about it before December, I would have created a inside scene and place it in a window frame. So, the outside of the card would be looking out and the inside of the card would have been looking in. But, there just wasn’t enough time.
The next card will have to be a birthday card. There are so many birthdays in January.
I would like to say the failure of this card resides in total, utter, and shear laziness. My laziness. I should have taken more time with the card. But, this is what I learned in making of this card.

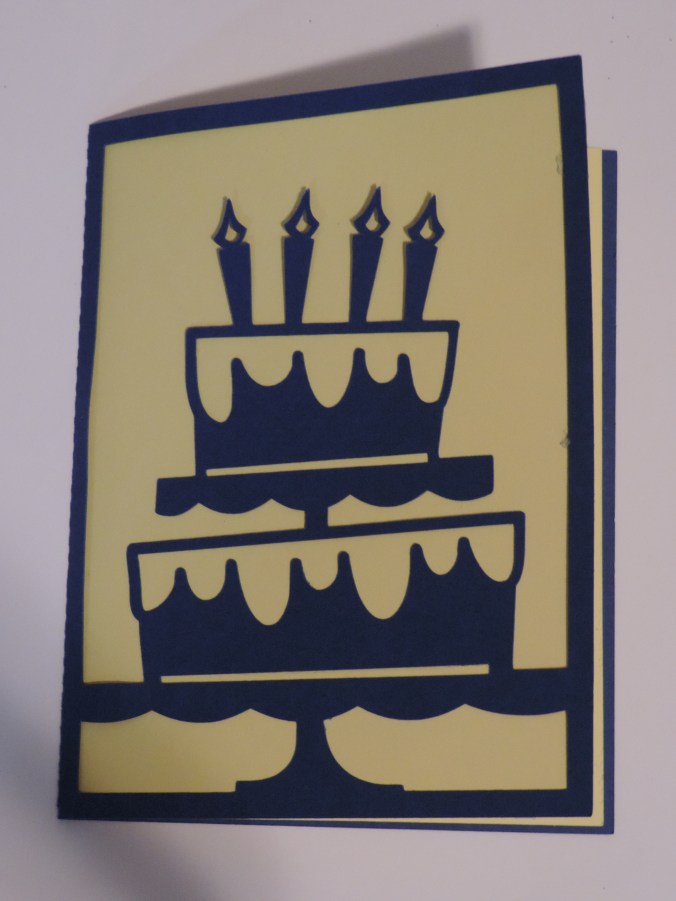
The background of the card was done in Corel Draw. It is just a rectangle with a fill image I found searching for “cupcake.” It was printed on photo paper. Everything else done with Silhouette Studio and the Curio Cutting Machine.
The “Happy Birthday” part was designed in the Silhouette Studio. I was able to place the text in the design, then I drew a copy of rectangles. I used the Curio to cut the rectangles from cardstock and the Curio Sketch pens to write-out “Happy Birthday!” I do like the sketch pens and I am impressed with their colors.
What I should have done for the “Happy Birthday” banner was to either have the Curio cut each letter or created a different type of banner. Maybe one that outlined the “Happy Birthday!” Why didn’t I? At that time, I didn’t want to have to glue each letter onto the card.
The cupcake turned out nice. However, this was an image I got from Silhouette for free. It should had some sparkles.
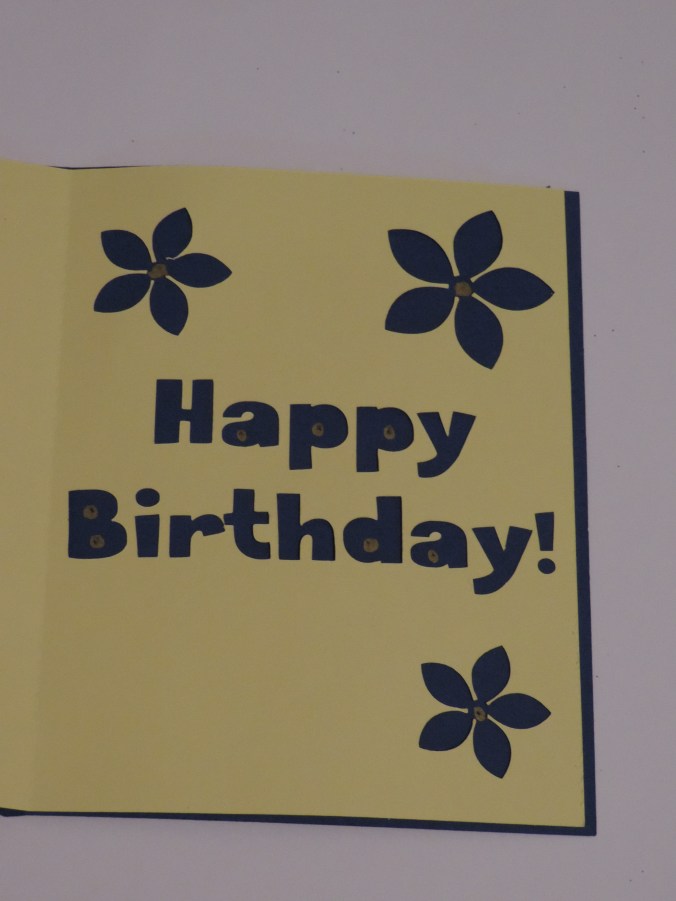
The inside part. Again laziness.

The text was another image from Silhouette. I failed in putting the image on paper and creating the border. I probably could have done a better job in cutting out the text by hand. The text should have been printed directly on the card using the sketch pens. And, if I would have added a few cupcakes to the inside of the card it would have been a nice touch.
After I glued everything onto the card, the card warped. The card is now in the garbage can where it belongs. Don’t use photo paper for the base of card. I am now working on another card. No laziness allowed.
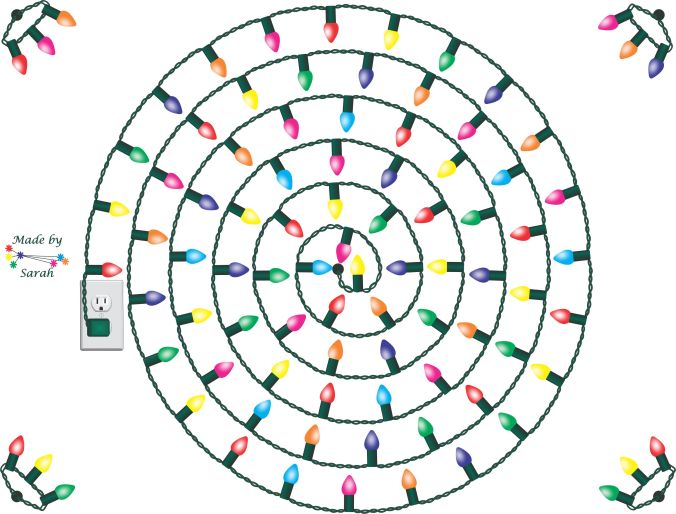
In my last post, Silhouette Studio – The First Design, I discuss creating a test design with the Silhouette Studio Software. Below is the design I created. It has some text and images.

My First Studio Design
The Curio came with a cutting mat, embossing mat, and three other mats that I later learned was platform mats. I removed the film from the cutting mat and place it onto Curio’s tray according to the image on the Silhouette Studio design screen. I carefully placed the card stock on top, since the cutting mat has a sticky surface.
I gently slid the tray into the machine. The instructions says “push into machine until tray sticks out back” and it says “push into machine until notch passes front of machine.” If you have trouble seeing the notch, push the tray into the machine until the top left hand corner of the material in directly under the cutting/embossing blades.
I looked at the cutting blade and it cut was set to zero. I figured out that the by placing the cap that came with the blade on to it and turning, I was able to adjust the cut size. I set it on 3. It seemed right, but the instruction manual did not specify. I placed the cutting blade into the Curio in the first slot and turned on the Curio. Now for cutting.
I went back to the software and noticed that the paper size didn’t match the Design Page setting. I adjusted the design page setting to match my paper size. Then I had to move a few of my designs so they would be inside the cutting area. Next I clicked Cut Settings ![]() icon. My design now has thick lines around it, see below. I assumed this is where the design would be cut.
icon. My design now has thick lines around it, see below. I assumed this is where the design would be cut.

I looked over the cut setting. The Standard mode was fine. I left the cut style on Cut. Tool 1 was selected, this was fine because that is where I put the cutting blade. Under Material Type, I clicked Cardstock was even though it was already selected. As soon as I clicked Cardstock the Editing menu opened and displayed the recommended blade setting. Sometime during the process of setting up the cut setting and cutting the design, this message appeared on the screen.
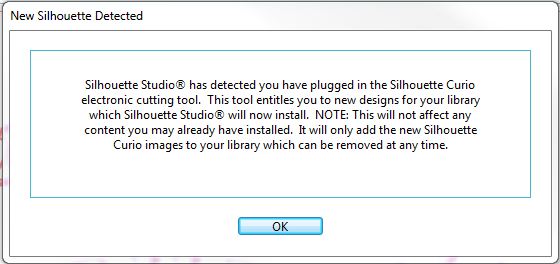
I have some new designs in my library! I clicked on the library and approximately 50 designs were added to the library. I am assuming since the it appears anyone can download the Silhouette Studio software, this is how the company distributes content to individuals that have purchased the device.

After I looked at the library, I finally went back to the cut setting and pressed Send to Silhouette. The machine is a little loud, but it is working. Wait, there is no cut on the paper. What did I do wrong? I looked over the cut setting again and made sure the blade was set on 3. I scrolled down in the cut setting and there are more options.
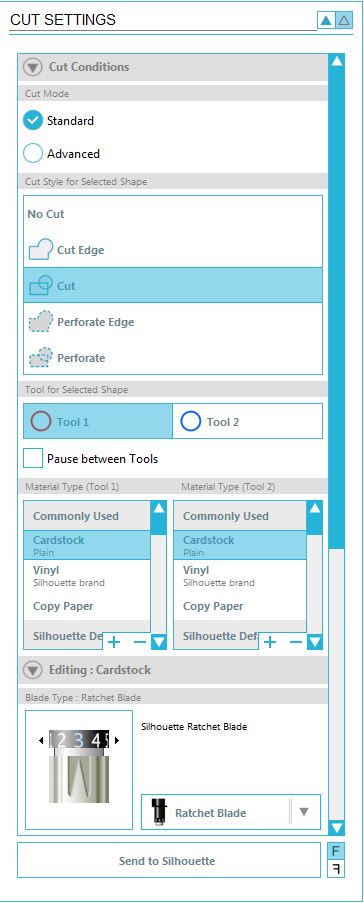

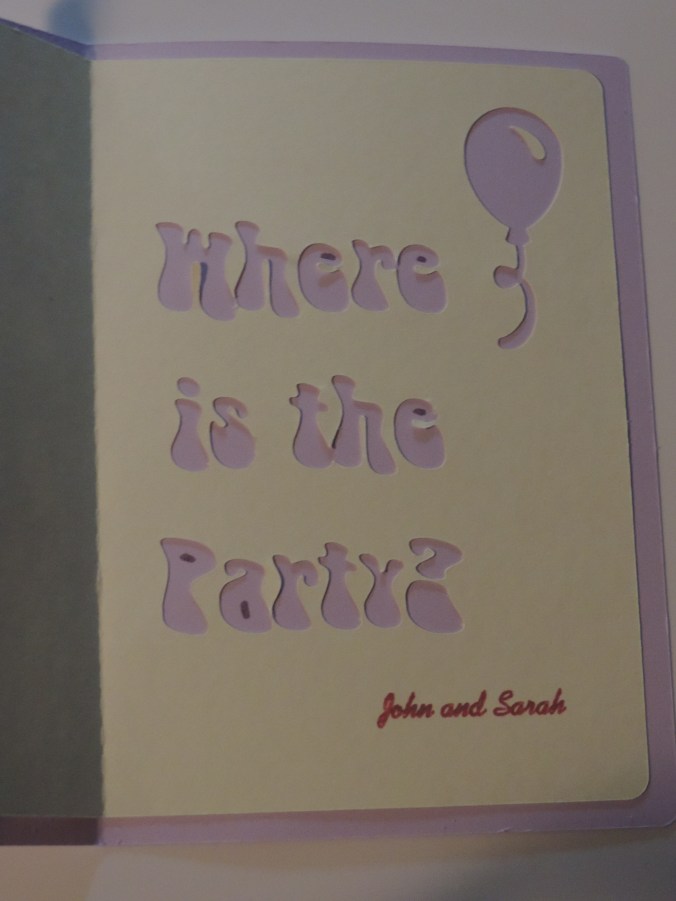
The platform setting showed that I needed 6 platforms on the tray. I added 6 platforms on the tray and sent the design to be cut once again. The paper cut this time. Yay! What I learned on my first design. The text is too delicate for my first cut. To remove it perfectly from the cutting board, will take time. The balloon came out great, and the border needs work because it came out is many pieces.
Next embossing….
In the last two posts, I talked about setting up the Silhouette Curio and installing the Silhouette Studio software. Click here to read those posts. This post covers the my first design.
This is my first design attempt. Nothing fancy.
My First Studio Design
To start a new design in Silhouette Studio double-click on the icon and click Design. The design window opens with a clean working area.
I clicked the Text ![]() icon to begin to place text in the design area. On the right-side of the screen, a Text Style menu appeared. The menu let me define my text attributes before or after I put the text in the design area. Scrolling through the fonts, I noticed that it allows me to use any font that is saved on my computer. Yay! No, limits there.
icon to begin to place text in the design area. On the right-side of the screen, a Text Style menu appeared. The menu let me define my text attributes before or after I put the text in the design area. Scrolling through the fonts, I noticed that it allows me to use any font that is saved on my computer. Yay! No, limits there.
I noticed the little circle  to the bottom right of my text. Looking through the manual, I discovered this allows you to fit the text to a path. I drew a couple of wavy lines on the screen using the curve
  tool. I doubled clicked on the first line of text, to select it, and dragged the text to the first wavy line and than I repeated the process with the second line of text. Easy enough, my text was now wavy.
Selecting the text that was fit to path, I was no longer able to rotate it or change it size by dragging a corner. I was able to adjust the rotation  by selecting it’s line. There was also a slide bar that allowed me to change the text position on the line.
If I am doing a birthday theme design, some balloons are needed. I knew the oval  would not work for me because balloons are bigger on the top than the bottom. I selected the curve tool to draw my balloon. I put multiple points around the balloon to get the general shape I wanted. The bottom point, where the balloon ties, is still too round. I clicked the Edit Points
Just for fun I drew a few more balloons. Balloons usually have a shiny spot on them that is reflecting the light. I use the rectangle  tool to draw this area on a couple of balloons. It didn’t look quite right, so I selected the rounded rectangle
  tool to draw the shiny spot on the other balloons.
If I move the balloons around the canvas, I wanted the balloon and shiny area to move together. I dragged my curser over both objects and selected the grouping  icon to keep them together. To separate items after they are group, select the Ungroup icon next to the Group icon.
A border for my birthday theme design would be nice. I drew a couple of rectangles and I drew numerous ovals . First I drew one oval, then I used the copy/paste feature so all the ovals would be the same size. I tried rotating a oval from the design area, but I found for a precise rotation the Rotate option for the Object menu worked better. I used the Align option under the Object menu to align, center, and space the ovals on around the rectangles.
I didn’t like how some of the lines in the design. The Erase and Knife  was a nice feature for removing unwanted lines. I was able to adjust the settings in the right menu as each tool was being used.
A feature that the Silhouette Studio software is missing, is the ability for me to zoom in and out using the scroll button on my mouse. Zoom in and Zoom out is available from the top icon bar.
The manual that came with the Curio did not cover all of these functions. But, the manual that is available from the Help Menu in the software does provide detail information about all tools, menus, and functions. I like to play around with any software before reading manuals. However, this manual is beneficial for using the software and Curio.
The next blog will cover my experience with cutting and embossing. For now, I will save my work. This isn’t the first time I have saved my work. One of my saying is “Save Often! Save Regularly!” You can’t press save too often.
