Rescued Houses – Part One

In August 2016, the storage unit where I kept my belonging flooded.  In those belonging was all my Christmas Village Plastercraft Houses.  Many of the houses, painted and unpainted, was either wet or underwater for about a week.  I was going to abandon them because I had no means of drying or cleaning them.  My sister, who showed up to help me salvage what belonging I could, insisted that I could not abandon my houses.

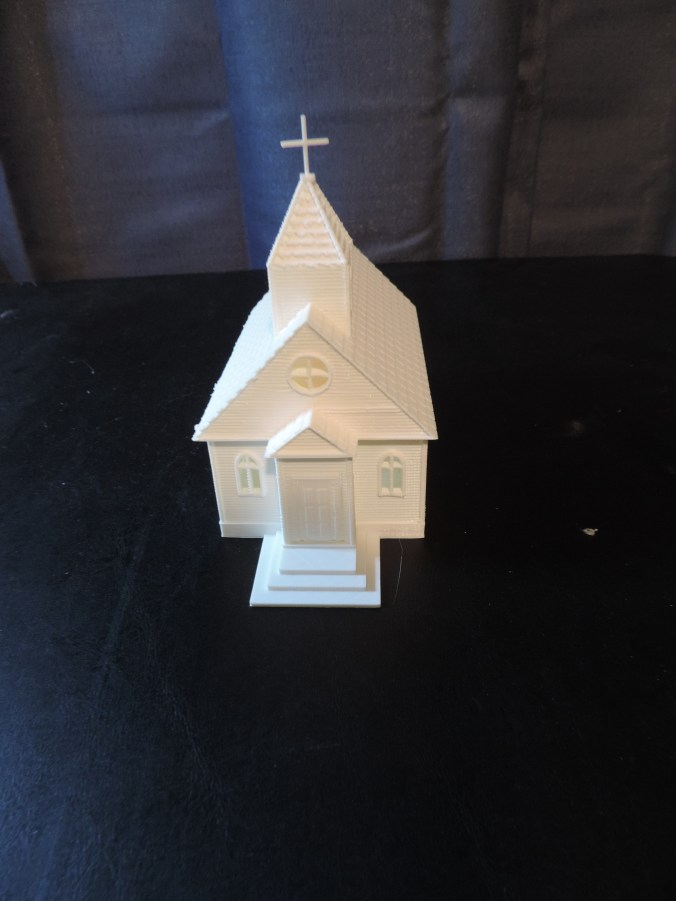
She took all the wet houses to her flooded house, unwrapped, cleaned, and let the houses dry out while her house was drying out.  After everything was dried, she carefully packed the house.  In June, I was able to retrieve the unpainted houses from her.  She did an amazing job.  All three of these houses have minor damage, but no house is perfect.  Of course, the inserts with suggested painting is gone, so I choose the colors myself.

These are the first three houses that she recovered that I have painted.

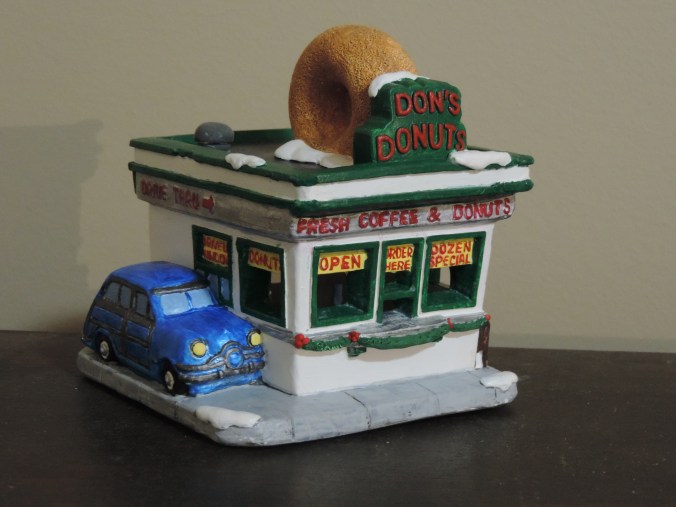
Don’s Donuts:  I decided I would paint it the colors of the best donut shop, Krispy Kreme.  The car had to be blue.

DSCN4657
.DSCN4655

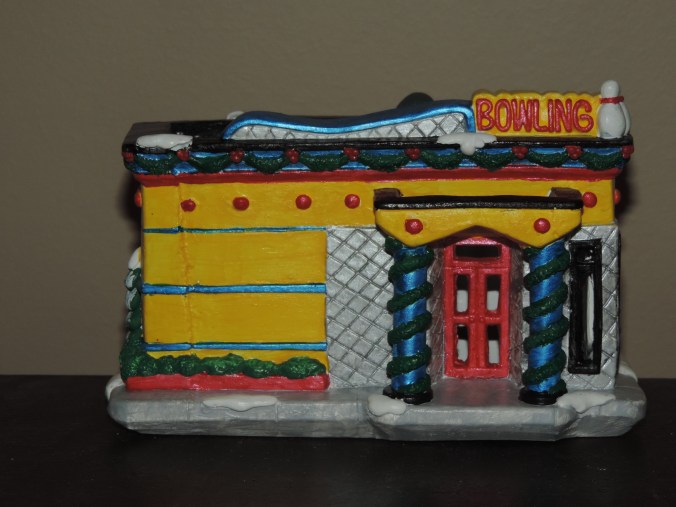
Bowling Alley:  I thought this building needed to be bright and metallic.

DSCN4676
DSCN4673

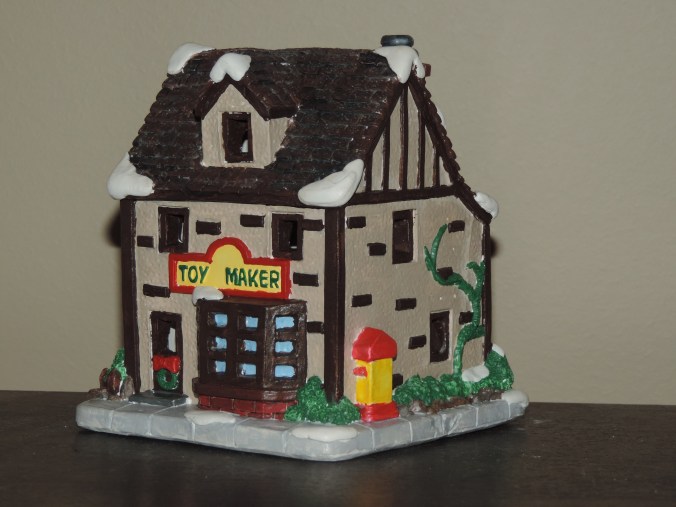
Toy Maker:  Deciding the colors were a little difficult.  What colors would Santa have on his shop?

DSCN4665
DSCN4663

There will be more houses to come.  I usually paint three at a time.

Dominoes

My father-in-law has shown very interested in the 3D printing.  Asking questions about how it works and what can it print.  Before Father’s Day, I sat down in from of the computer and said “What can I print for my father-in-law?  He plays dominoes every Friday!  I can do that!”

I looked up the dimensions for Dominoes; design the dominoes; and created the case to look like a domino.

DSCN8355DSCN8351DSCN8349

His own personalized dominoes.  I also printed a set for my dad for Father’s Day with his last name on them.

The .stl files can be downloaded from youmagine.com.

https://www.youmagine.com/designs/dominoes/embed

Tinkercad – the free, online 3D CAD app

3D Print – Birthday

There are plenty of March birthdays in my family.  I needed cards.  Someone suggested buying gift cards for my dad.  So, I needed some gift card boxes.  Out comes the Corel Draw, the Silhouette, and the Ultimaker 2 to handle two of the birthdays.

Dad’s Birthday!

I used Corel Draw to create the background, then I printed it on metallic photo paper.  I designed the rest of the card using Silhouette Studio.

DSCN7169DSCN7175

I designed the gift card box in Tinkercad getting the dimension from a credit card.  The box was printed on the Ultimaker 2 using semi-transparent filament.

DSCN7192DSCN7195

Print Time: 3 hours 45 minutes
Filament: PLA – 5.22 meters 41 grams
Layer height: 0.1 mm
Shell Thickness: 0.8

Object Size (W, D, H): 100.001, 164.001, 12.701 mm  (Both pieces printed together)

Amanda’s Birthday!

I used a template for Amanda’s card and cut it on the Silhouette.  However, I did design the envelope since no envelope was a good size..  Alas, I didn’t get a picture.

DSCN7166

I tweak the gift card box after the other one was printed to make the top smaller and fit better.  It was printed using pink filament.

DSCN7183DSCN7187

Print Time: 3 hours 45 minutes
Filament: PLA – 5.25 meters 42 grams
Layer height: 0.1 mm
Shell Thickness: 0.8

Object Size (W, D, H): 100.001, 163.501, 12.701 mm  (Both pieces printed together)

The boxes was printed with the top and bottom laying flat on the printer bed to make the boxes smoother.

3D Print – Church

I love old buildings, especially churches.  They have a lot of character and details you do not find in modern buildings.  My first major 3D design project was not modeled after any one particular church building, but after numerous churches I have seen through out my lifespan.

DSCN7176

The building was created in 3 main sections:  The foundation, the walls, and the roof.  I wanted the ability to put furniture inside the building.  I also wanted the doors to open, but the 3D print was too small to support hinges that actually worked.

DSCN7181

The foundation include the steps, simulated wood flooring, and the cross display.  It contains groves in the foundation to hold the walls in place.

DSCN7179

The walls contains simulated wood siding, the windows and the doors.

DSCN7151

The roof contained the bell tower with simulated wood shingles.  The cross was printed separately and placed in the hole bell tower.

DSCN7182

The furniture was originally designed on a larger scale and shrunk down.  But, it had to be tweaked at the small scale since any support not being at least 1 mm did not print correctly.

DSCN7177

Foundation:

Print Time: 6 hours 53 minutes
Filament: PLA – 3.76 meters 30 grams
Layer height: 0.1 mm
Shell Thickness: 0.8

Object Size (W, D, H): 64.001, 140.8, 36.5 mm

Walls:

Print Time: 3 hours 18 minutes
Filament: PLA – 1.69 meters 13 grams
Layer height: 0.1 mm
Shell Thickness: 0.8

Object Size (W, D, H): 64.474, 113.752, 32.252 mm

Roof:

Print Time: 10 hours 28 minutes
Filament: PLA – 7.12 meters 56 grams
Layer height: 0.1 mm
Shell Thickness: 0.8

Object Size (W, D, H): 89.501, 117.201, 65.217 mm

The estimated print time for the entire building as one object is 21 hours 19 minutes.

Pew:

Print Time: 8 minutes
Filament: PLA – 0.04 meters 0 grams
Layer height: 0.1 mm
Shell Thickness: 0.8

Object Size (W, D, H): 19.252, 5.453, 8.993 mm

Pew:

Print Time: 16 minutes
Filament: PLA – 0.11 meters 1 grams
Layer height: 0.1 mm
Shell Thickness: 0.8

Object Size (W, D, H): 16.801, 5.745, 16.213 mm

Podium:

Print Time: 16 minutes
Filament: PLA – 0.11 meters 1 grams
Layer height: 0.1 mm
Shell Thickness: 0.8

Object Size (W, D, H): 16.801, 5.745, 16.213 mm

Communion Table:

Print Time: 10 minutes
Filament: PLA – 0.09 meters 1 grams
Layer height: 0.1 mm
Shell Thickness: 0.8

Object Size (W, D, H): 15.001, 7.858, 8.5 mm

3d Print – Flowers

In an earlier post, I talked about printing a vase.  Once I had the vase, I decided it needed some flowers.  Instead of putting real flowers in the vase, I decided to design and print 3d flowers.

The first flower’s petals had the shape of a sunflower.

DSCN6959

It was necessary to print the flowers with the supports or the petals and leaves would have collapse while printing.  Yes, I learned this from trail and error.

DSCN6967

Print Time:2 hours 35 minutes
Filament: PLA – 3.93 meters 31 grams
Layer height: 0.1 mm
Shell Thickness: 0.8

Object Size (W, D, H): 77.728, 122.481, 24.834 mm

The second flower.  Not really sure what it is modeled after.  But, I did put more detail into the leaves.  They are in the shape of hearts.

DSCN6981

DSCN6982

Print Time:3 hours 53 minutes
Filament: PLA – 6.05 meters 48 grams
Layer height: 0.1 mm
Shell Thickness: 0.8

Object Size (W, D, H): 101.001, 137.788, 24.86 mm

3d printed flowers in vase.

DSCN7093

3D Print – Tablet Holder

I take a lot of pictures of different objects.  My tablets protective case holds it at an angle that is not very suited for taking pictures.  I designed a tablet holder that would hold my tablet at a slight angle which was needed to keep it from falling forward.

This is my first attempt.

It came out pretty good.   But, there was one main issue.  There was no way to plug the micro-USB power cable into it.  I do not want the tablet to die during a video shoot. It needed a hole on the bottom of the stand.  Also, it was printed without the support structure, so there was strings of plastic on the stand.

DSCN6927

Second attempt:  Better – however, the hole for the micro-USB cable could be a little larger and when I placed the “holes” for the dish part overlapped in the printing part.  There are still some plastic strings hanging down.

DSCN6952

DSCN6951

Third attempt: Success!

DSCN7061

DSCN7063

DSCN7064

DSCN7065

DSCN7069

DSCN7074

DSCN7075

Print Time: 12 hours 37 minutes
Filament: PLA – 7.32 meters 60 grams
Layer height: 0.1 mm
Shell Thickness: 0.8

Object Size (W, D, H): 125.087, 102.268, 95.598 mm

Published on Youmagine.com:  https://www.youmagine.com/designs/tablet-holder-b4c1eceb-f198-4414-81b8-d43c3be6afa6


3D Print – My First Failure

I designed a vase in Tinkercad using several of the techniques I learned through the lessons on the website.  I used the workplace feature to place the stars and circles on the vase.  I used the hole feature to hollow out the inside of the vase.

vace2

In the end, I thought I had a good result for my first vase attempt.  I saved the object as an .STL file and loaded into Cura and created the .gcode file.

DSCN6862

Into the first hour of printing, I noticed that I had a bit of a problem.  One of the holes I had put in the vase had cause the bottom of the base to become unstable.

DSCN6864

Examining it carefully, I determine at this stage, the vase would still hold water, so I let the printer continue.

DSCN6865

Three hours into printing the vase, the printer stopped.

DSCN6867

There were no mechanical problems with the printer, it just though the print was finished.

DSCN6868

Researching this problem, I found out it was not a unique problem.  It happens when the .gcode file is not completely created.  Steps to take to make sure the .gcode is created correctly are: 1) Wait until the object completely loads into the software package (Cura).  2) Do not print through the USB cable this may interfere with the printing.  3) Make sure the .gcode file is saved to the SD Card.  4)  Always eject the SD Card from computer before removing the SD Card.

I did not attempt to reprint the vase.  I need to tweak it first and other design have capture my attention.

Thanks!!!!

My nephews, ages 10 and 12, did me a favor by cleaning up my yard. It was a favor, so they did not want to be paid. This is how I thanked them.

First, I made them a Thank You card using a template I found in the Silhouette Design Studio.  They are held together with double stick tape.

One for the SuperHero fan…

DSCN6849

Another for the garden lover, orange wearer, fan…

DSCN6852

Then using my new 3D design skills that I learned in Tinkercad, I made them both a name tag and printed it on my Ultimaker 2 printer.

DSCN6843

DSCN6846

Print Time: 6 hours 54 minutes – for both
Filament: PLA – 3.52 meters 28 grams
Layer height: 0.1 mm
Shell Thickness: 0.8

Object Size (W, D, H): 130.5, 40.002, 6.0 mm – each

I then realized that their younger brother may feel left out.  So, I made him a name tag too.

DSCN6860

Print Time: 3 hours 28 minutes
Filament: PLA – 1.77 meters 14 grams
Layer height: 0.1 mm
Shell Thickness: 0.8

Object Size (W, D, H): 130.5, 40.002, 6.0 mm

DSCN6870