This year Tinkercad is hosting a #tinktober event to provide design prompts to their tinkers. Here are the designs I have created for days 11 through 20. Not all days have designs.
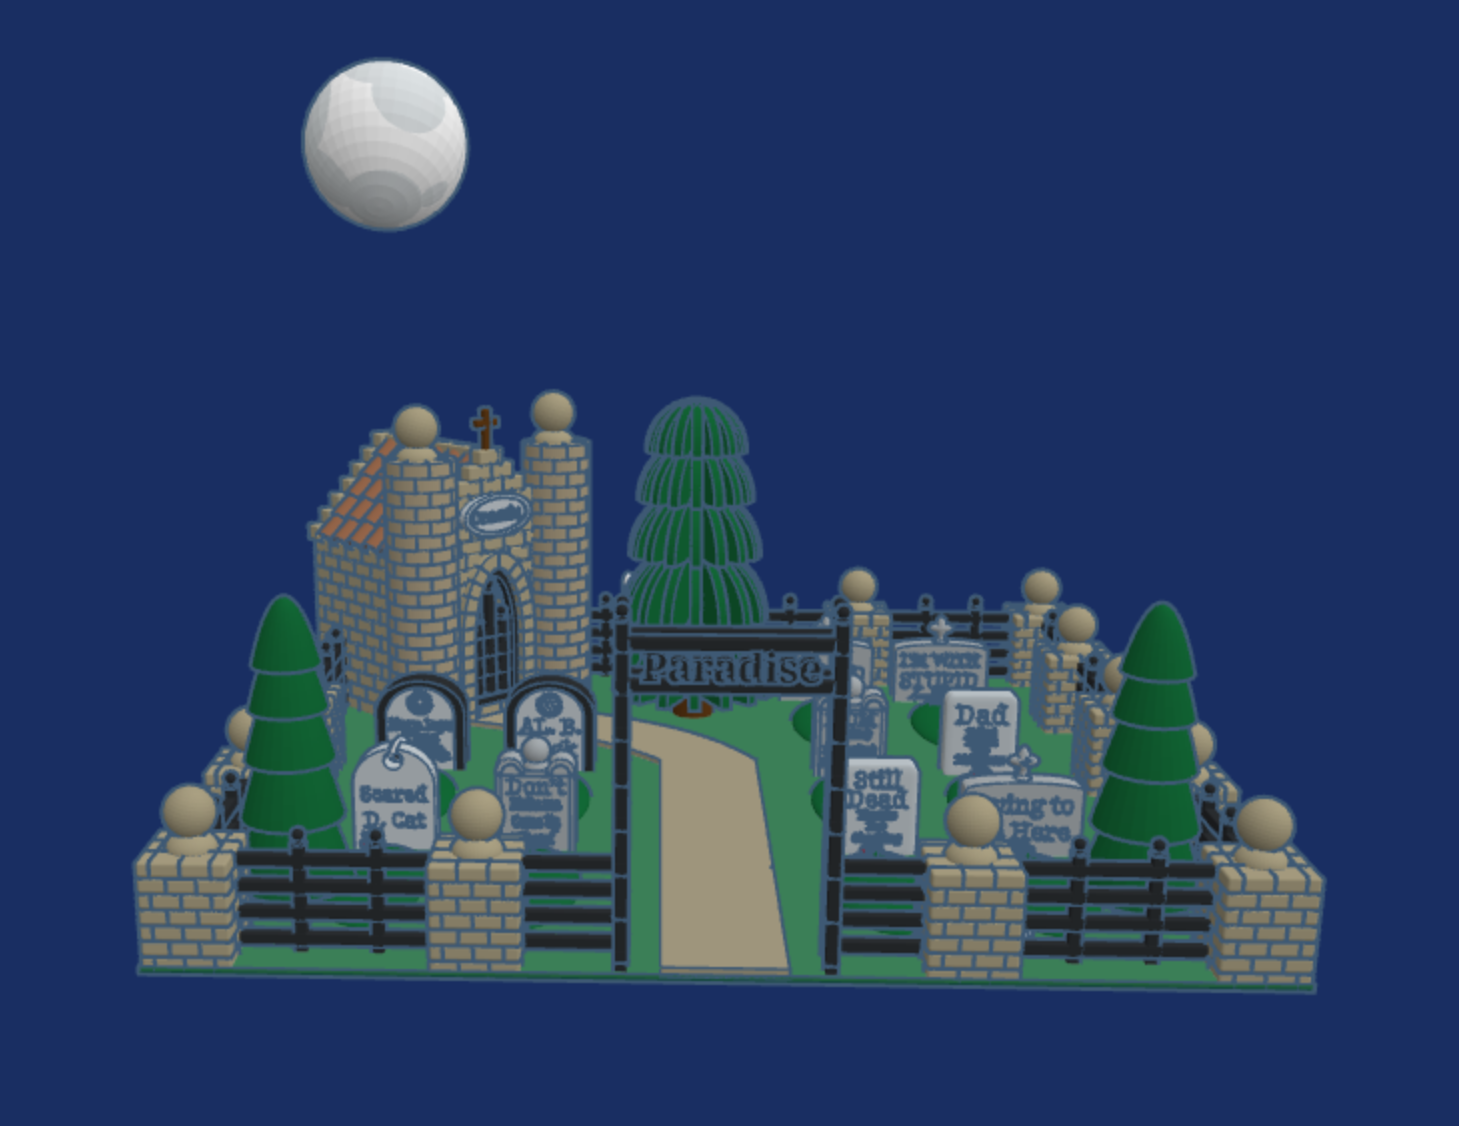
Day 17: Cemetary – Click the link to read the tombstones.
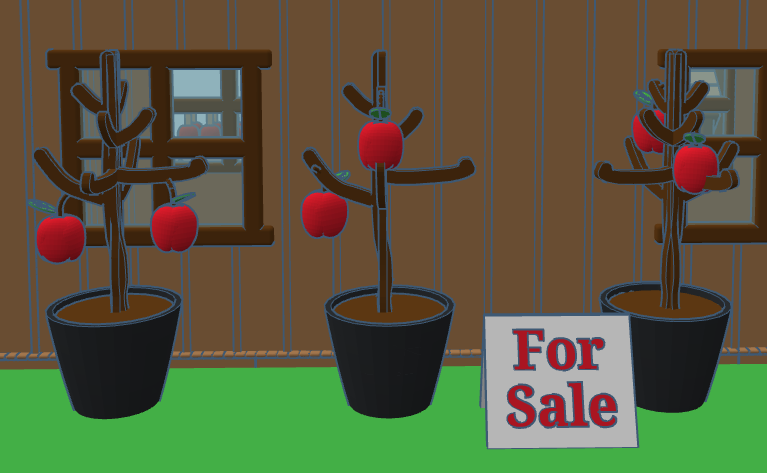
Day 15: Apples – The Apple Store sells all things apple.
Day 14: Skeleton – The skeleton come up from out of the grave to witness the solar eclipse on October 14. He protected his eye sockets by wearing appropriate black out glasses.
Day 13: Friday the 13th – When I think of Friday the 13th, I do not think of the scary movie, I think of my sister who was born on Friday the 13th.
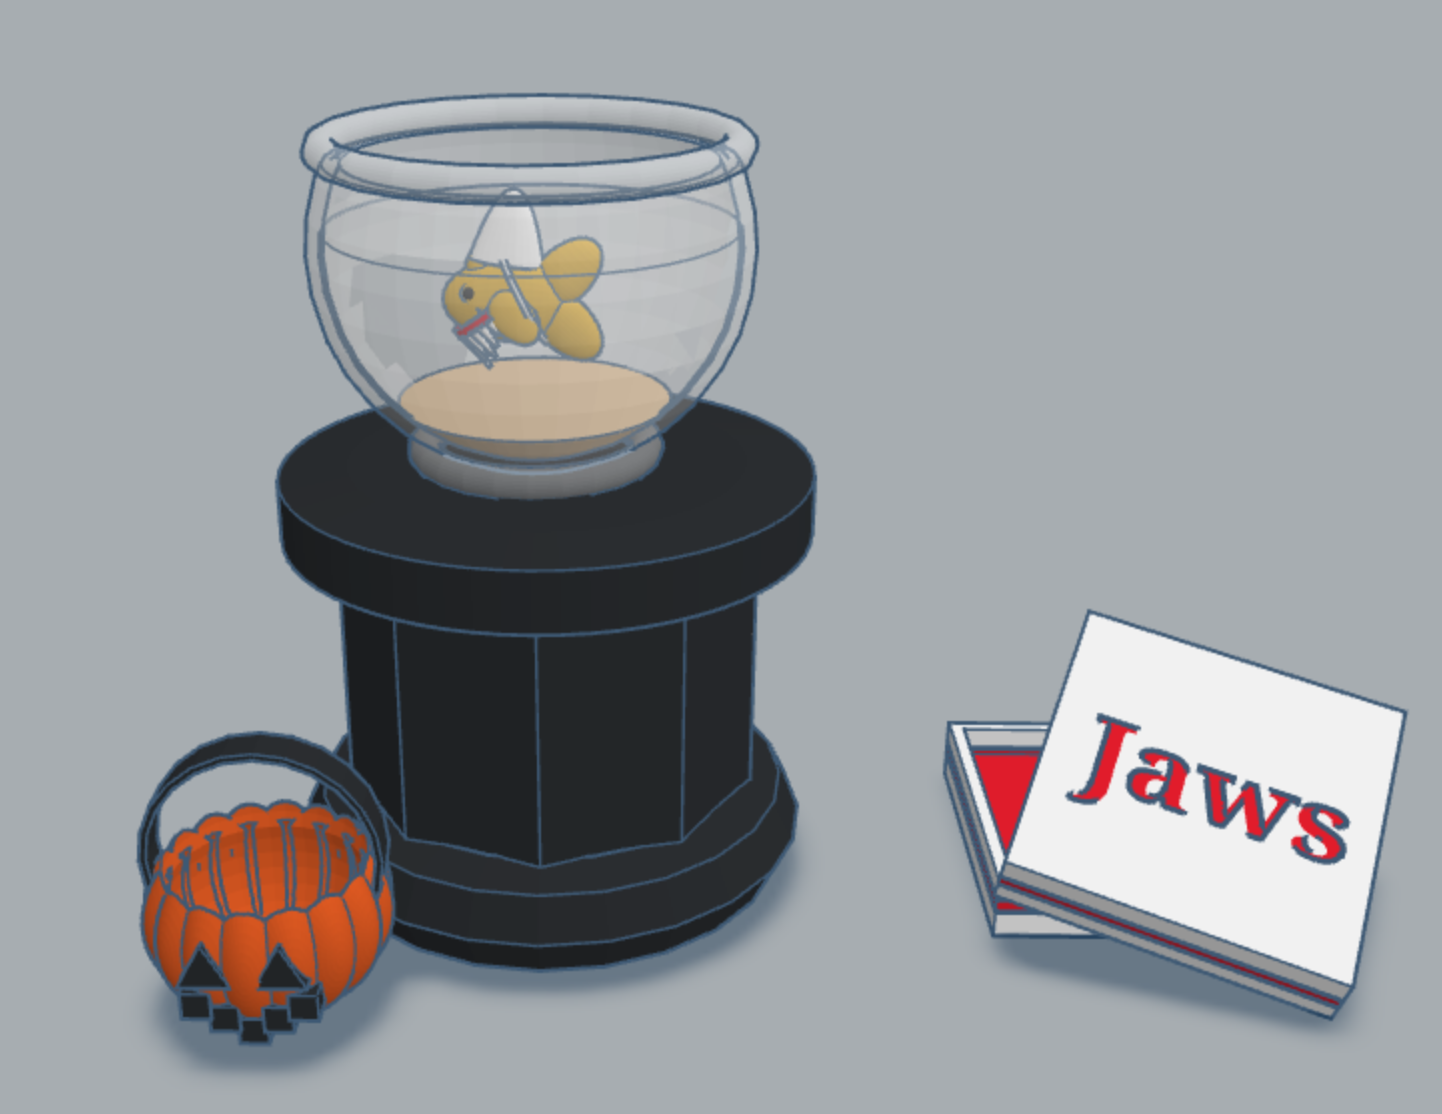
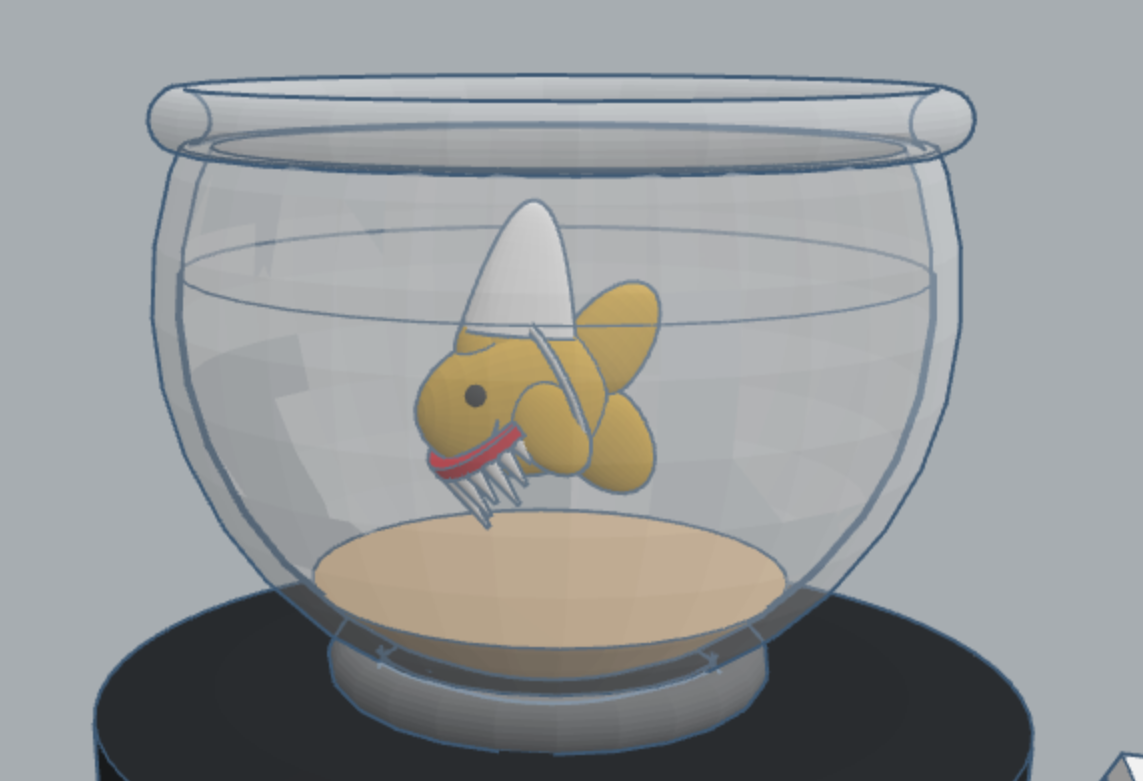
Day 11: Pet Costume – last year I created a fish in Tinkercad. This year I created a pet costume for the fish.
This year Tinkercad is hosting a #tinktober event to provide design prompts to their tinkers. Here are the designs I have created in the first ten days.
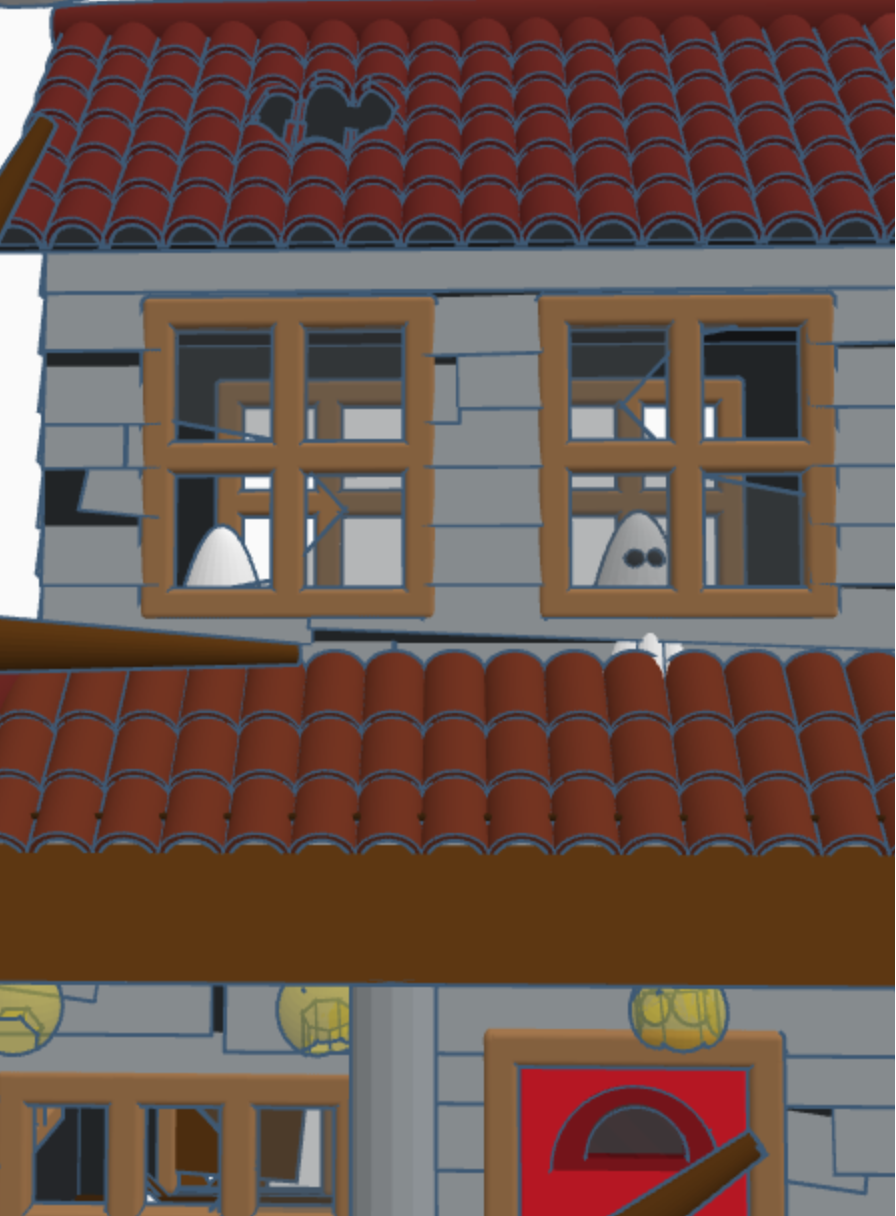
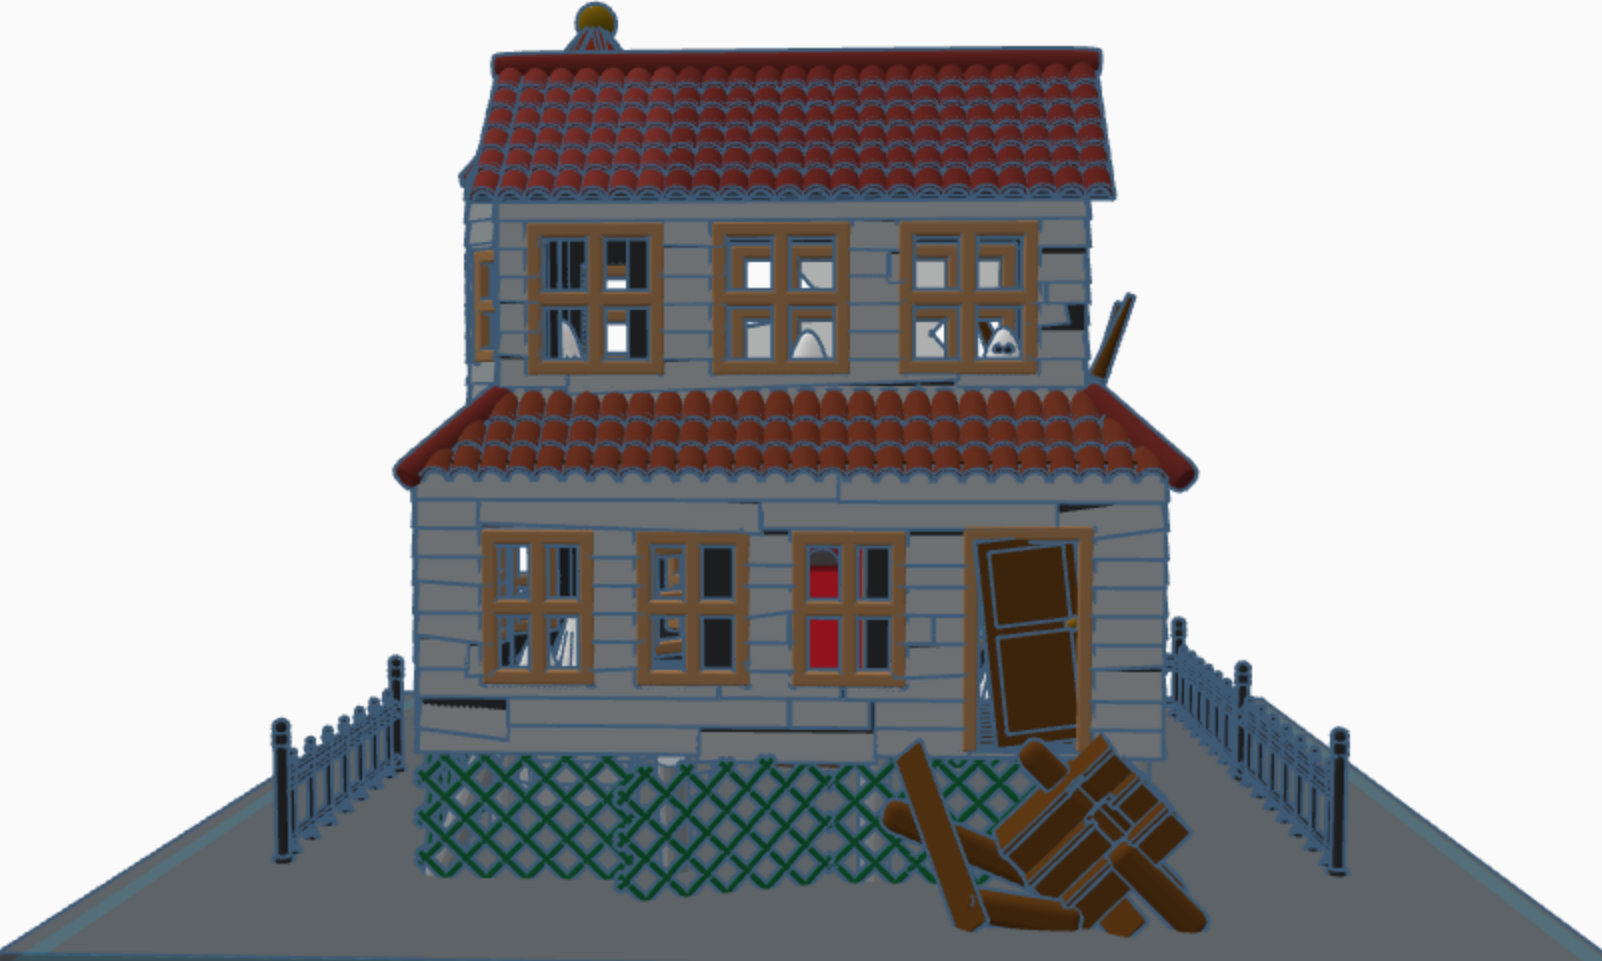
Haunted House – Day 10: Notice the ghosts in the windows. If someone really wanted to, they could fix up the house and rid it of the ghosts. Or, they could make it scarier.
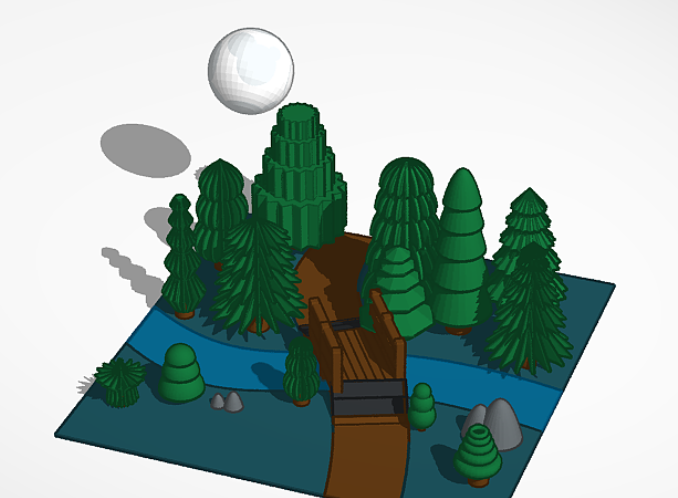
Full Moon – Day 6: Each of the trees are made with at different basic Tinkercad shapes.
Pumpkin Carving – Day 4: Check out Day 2 to see where I got the idea for the carving. I also placed a candle on the inside of the pumpkin.
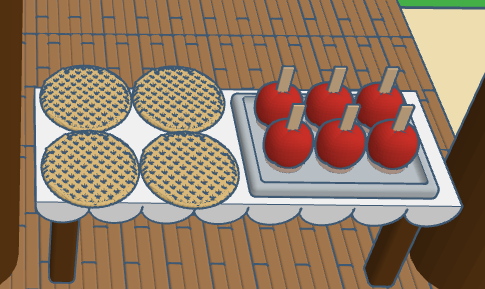
Candy – Day 3: Don’t forget to dump out the candy so you can see what types are inside.
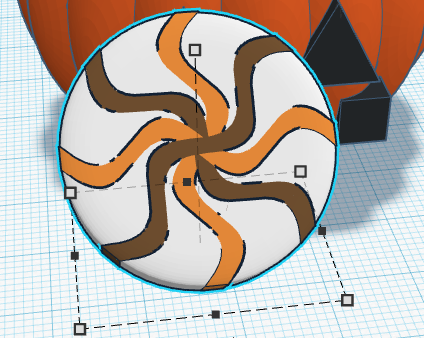
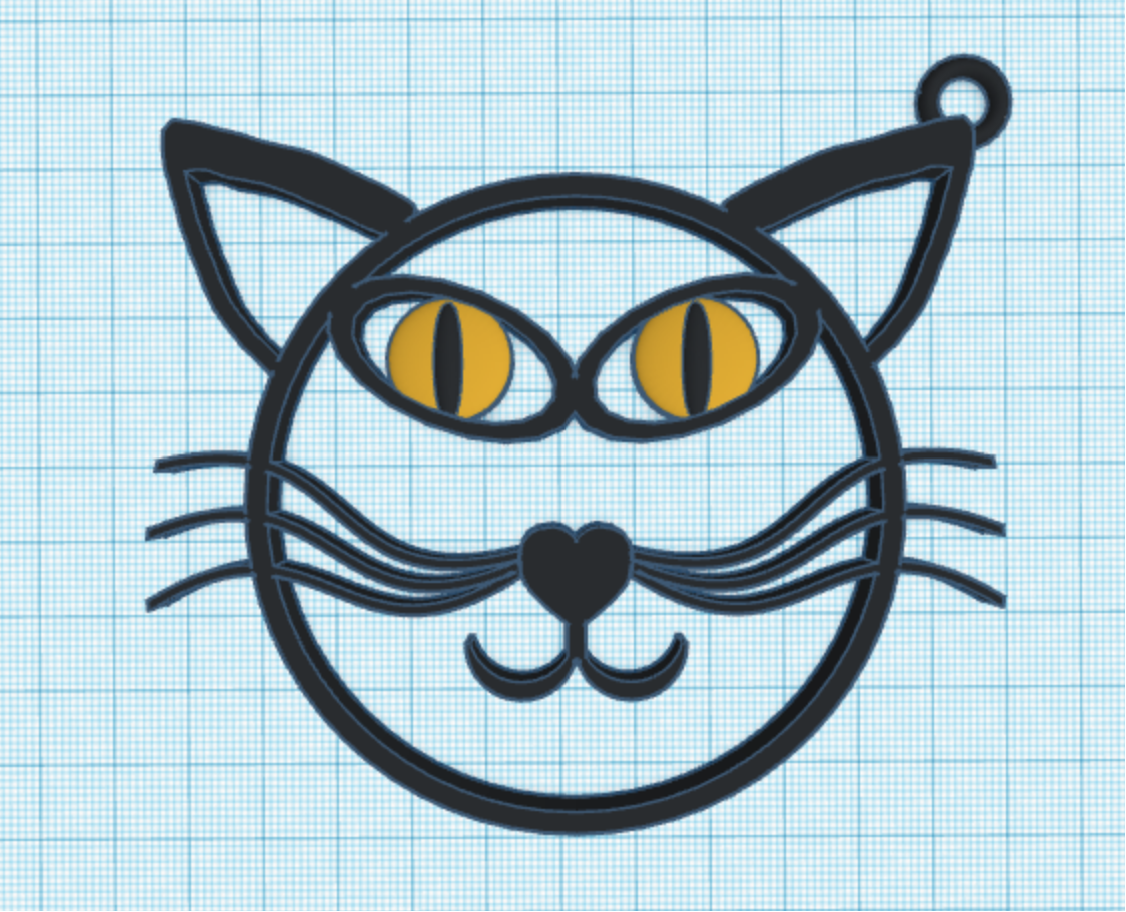
Black Cat – Day 2: Okay, it is just an outline of a black cat, but I added a loop so it can be used as a keychain or a charm. You can easily print this design. The others would be a little bit tricky.
Costume – Day 1: I decided to design a fairy costume. Since my fairy lives in a forest, the costume was made out of leaves.
I did not participate in all 10 days, because there were some prompts that I wasn’t interested in recreating, like bugs.
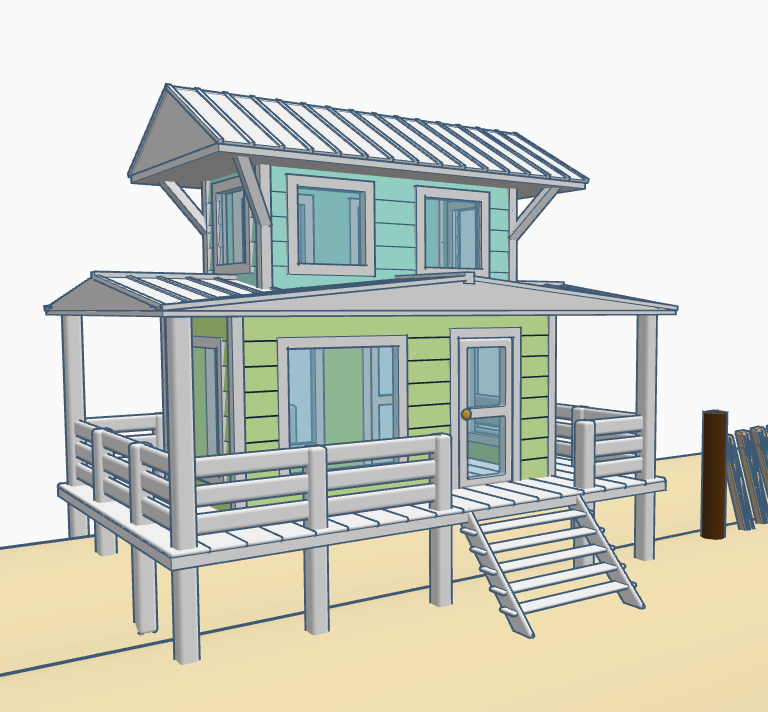
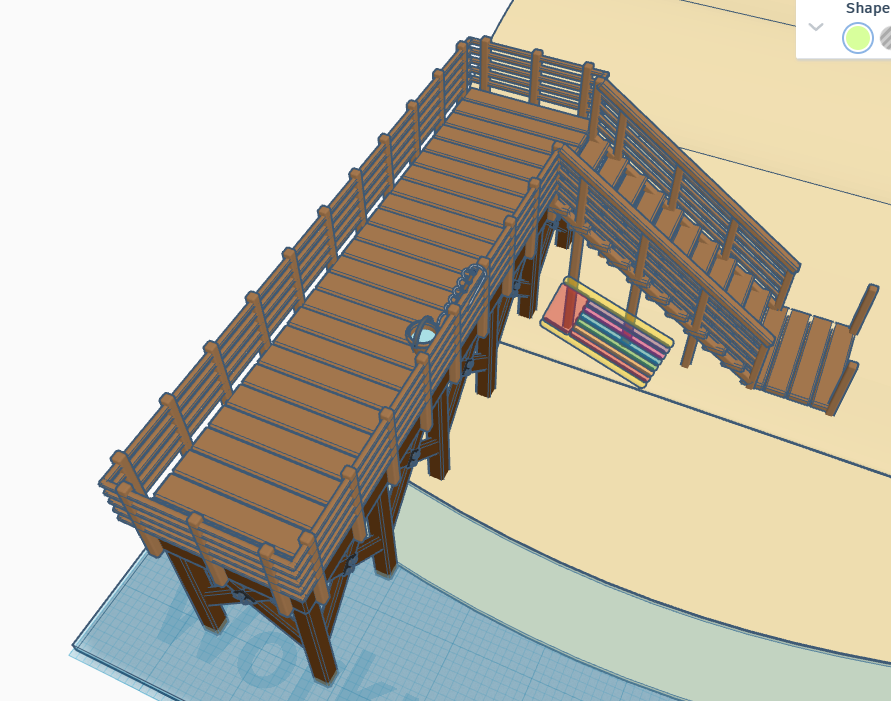
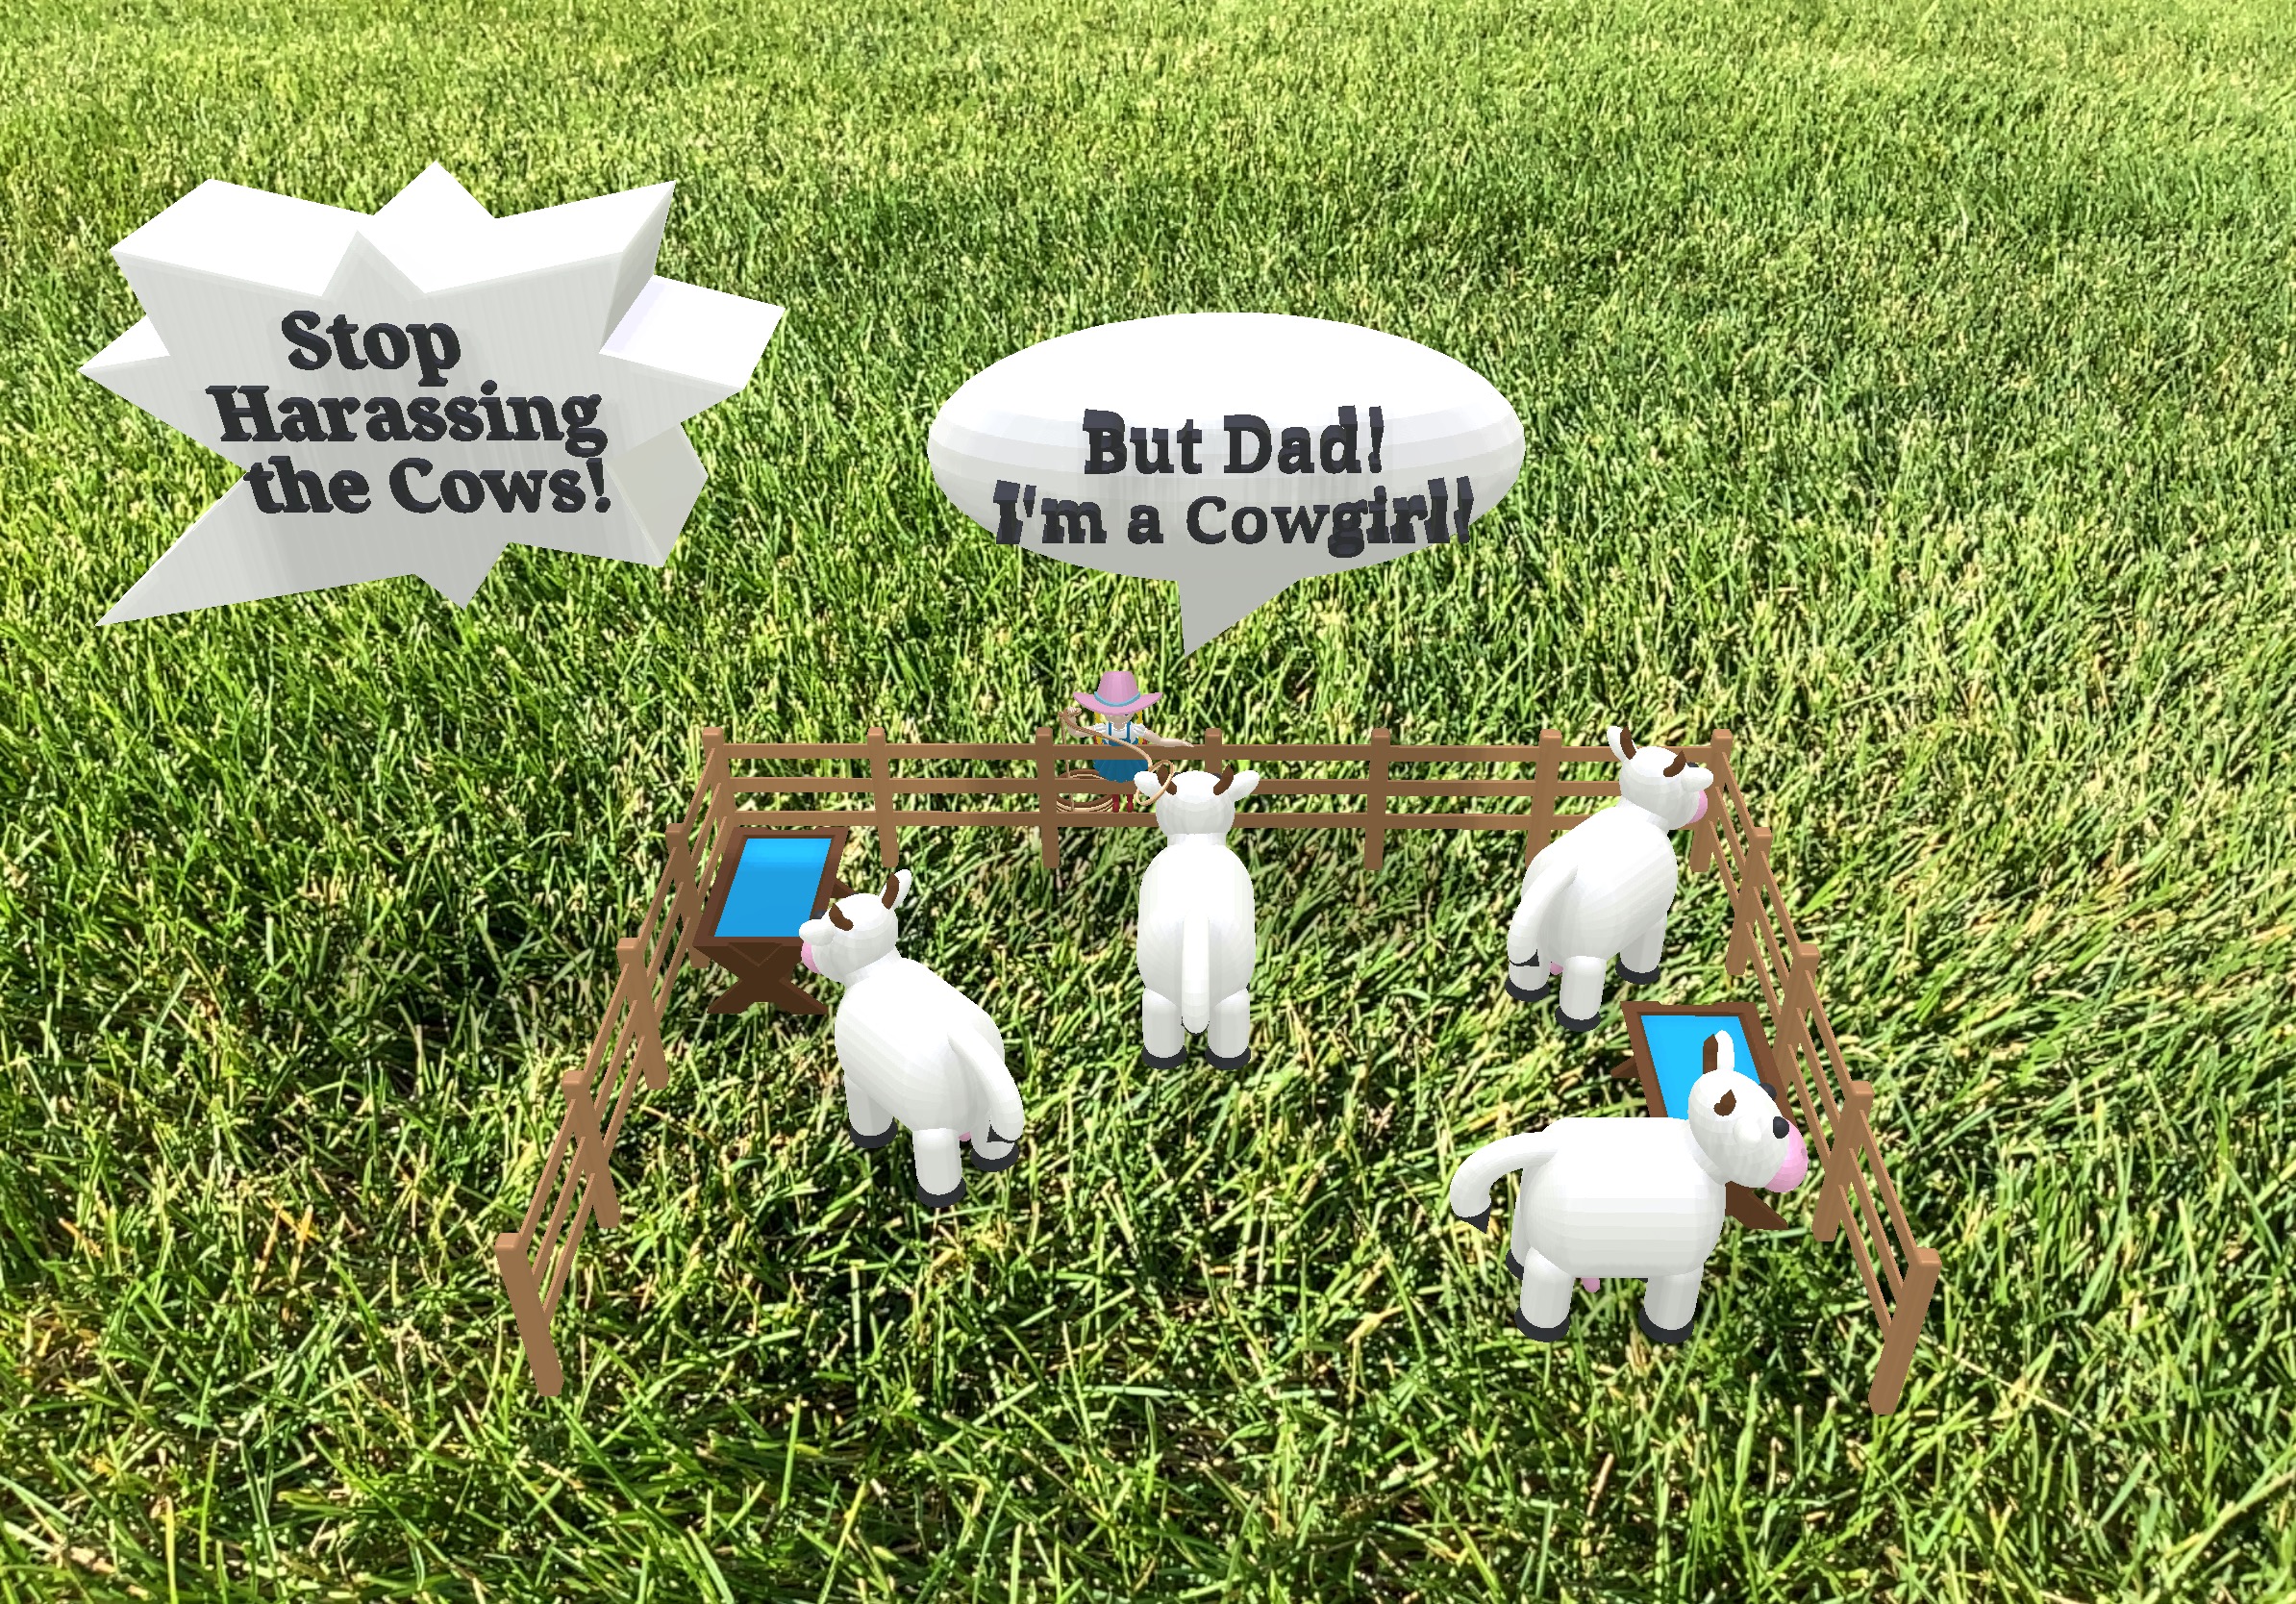
Summer is dwindling down. All the kids are headed back to school. Let’s enjoy summer a little longer and head to the beach without leaving our rooms. Below is a beach scene I made in Tinkercad. It has a house, lifeguard station, pier, changing rooms and a sandcastle, with a moat. There is so much more that this beach needs. Where are the boats, the people, the beach chairs? Looking inside the beach house, there is no furniture. Looking at the lifeguard station, the first aid kit is missing. There are no chairs on pier and nor fish in the water. How are the missing people supposed to catch fish?
Solution: I have made this design available so anyone that has a Tinkercad account can go an edit this design. For instructions on how to edit this design, check out my posting on Instructables – Let’s Go to the Beach.
For those experienced with Tinkercad, here are the links your will need.
To edit the design: Let’s Go to the Beach – Please add a note to any changes you make. I would like to give you the credit.
To copy the design for personnel or classroom use: Beach Scene
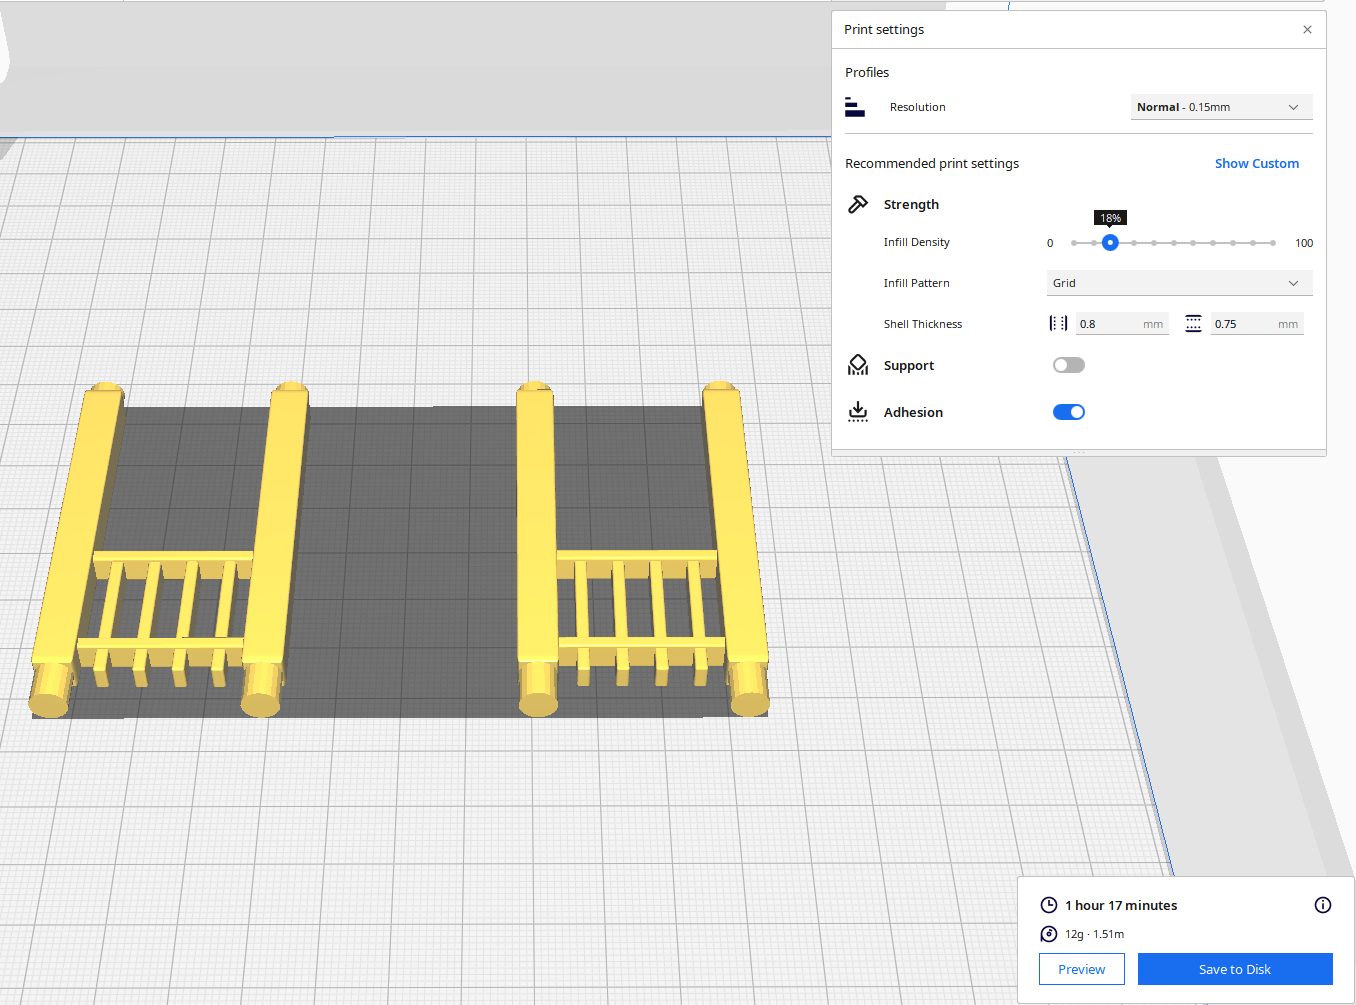
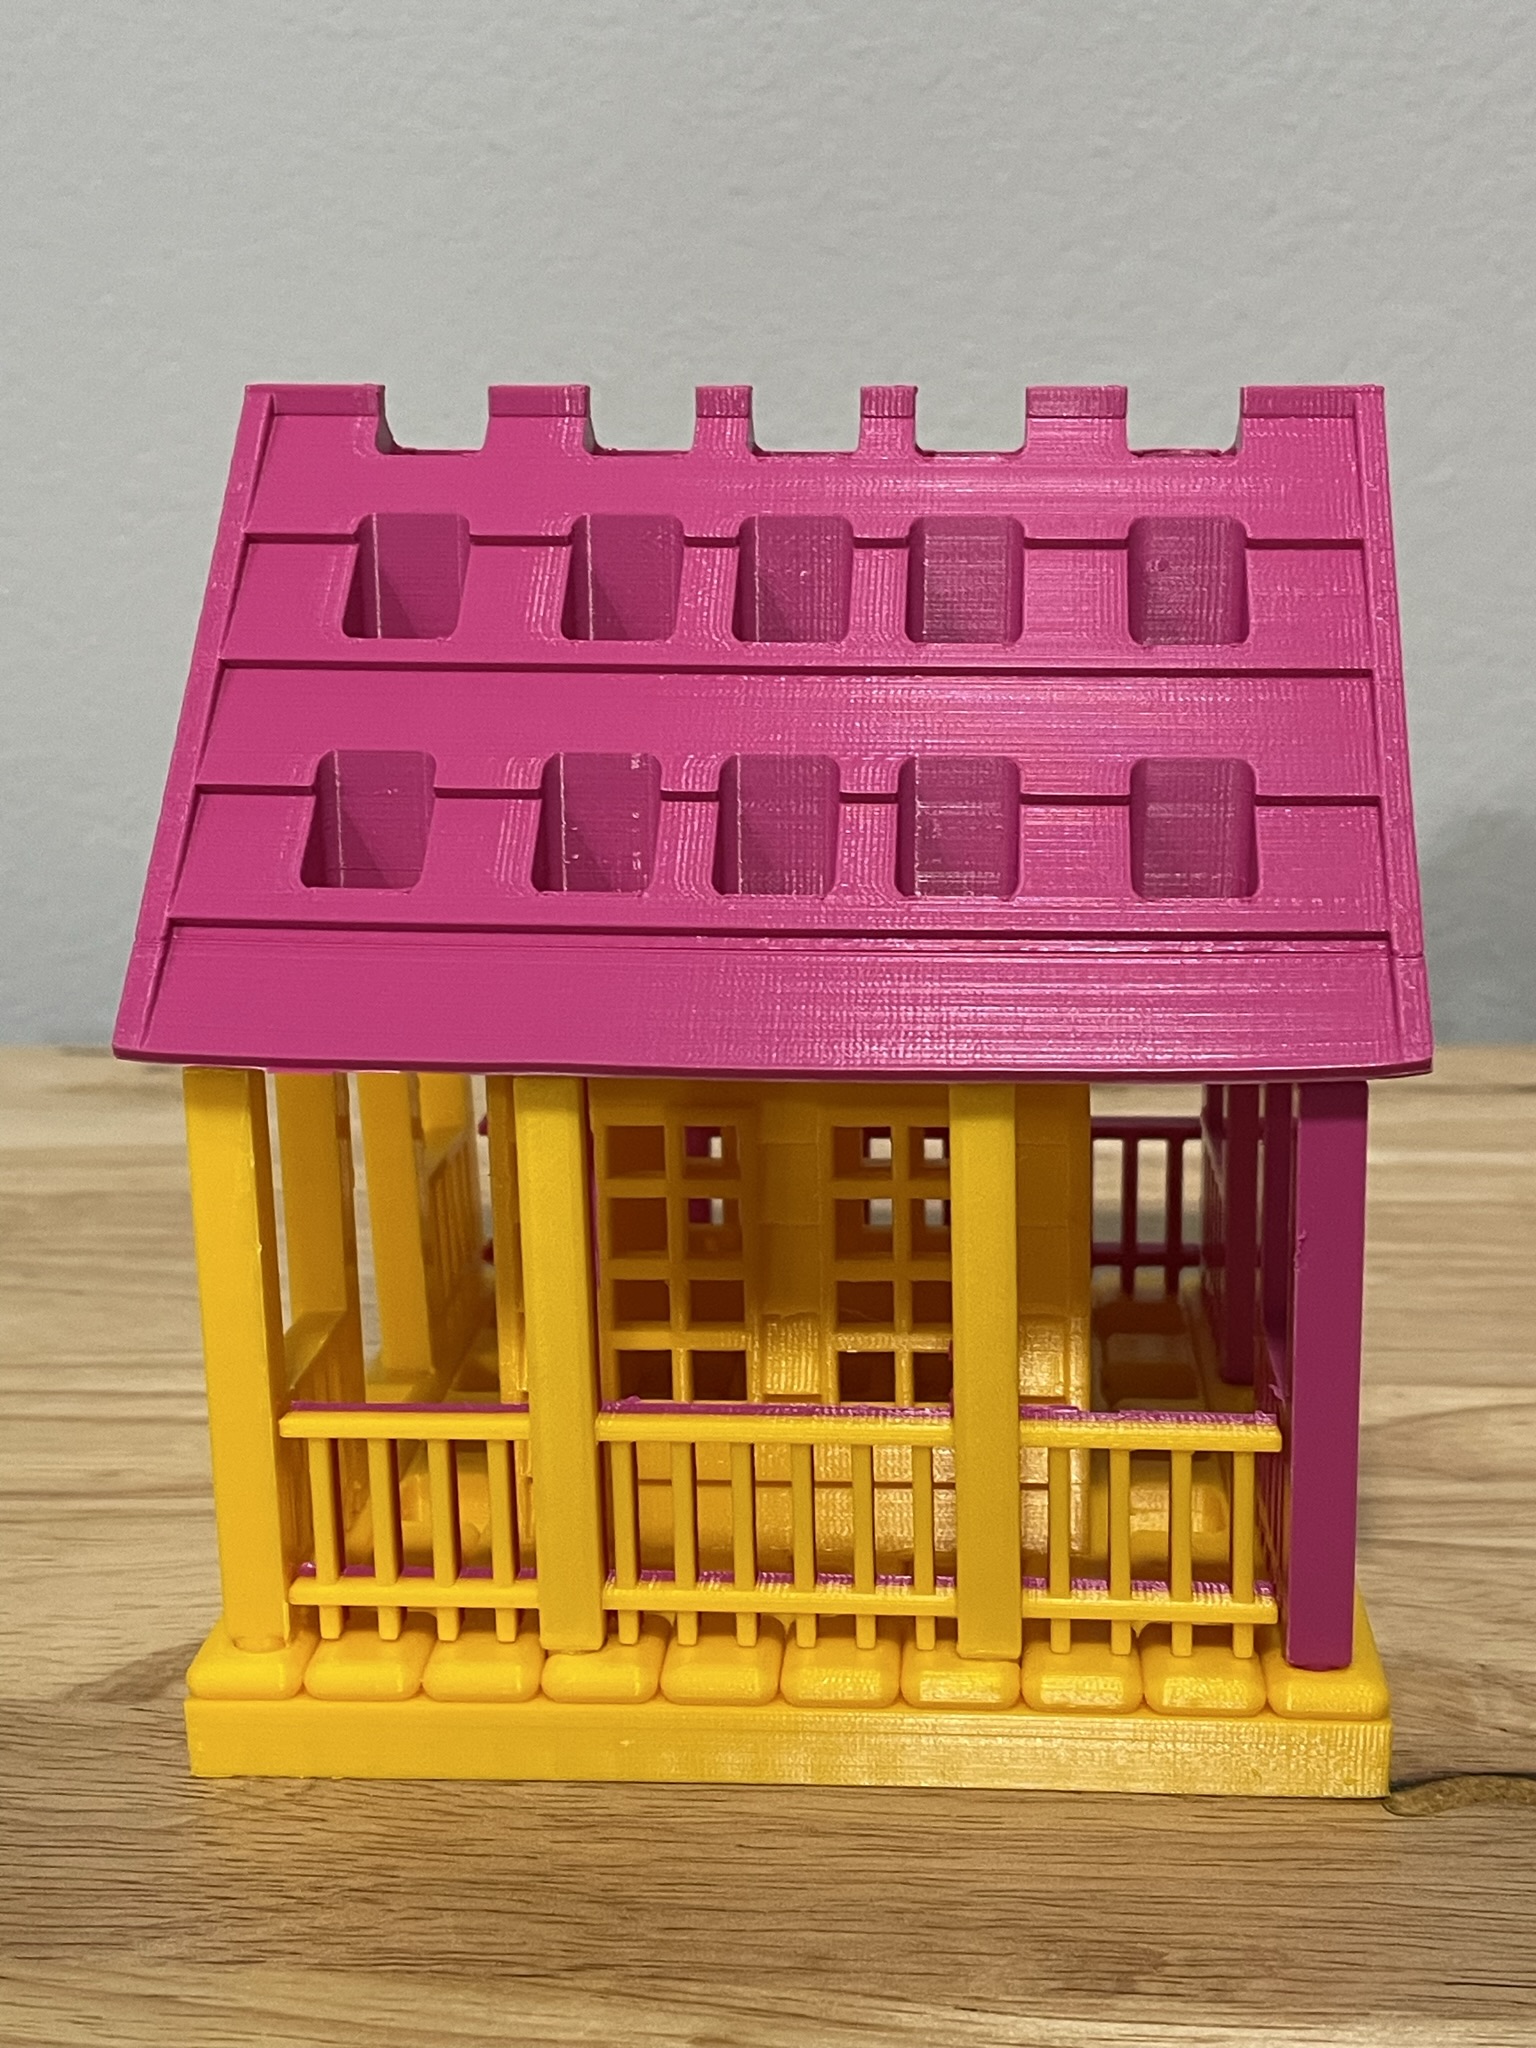
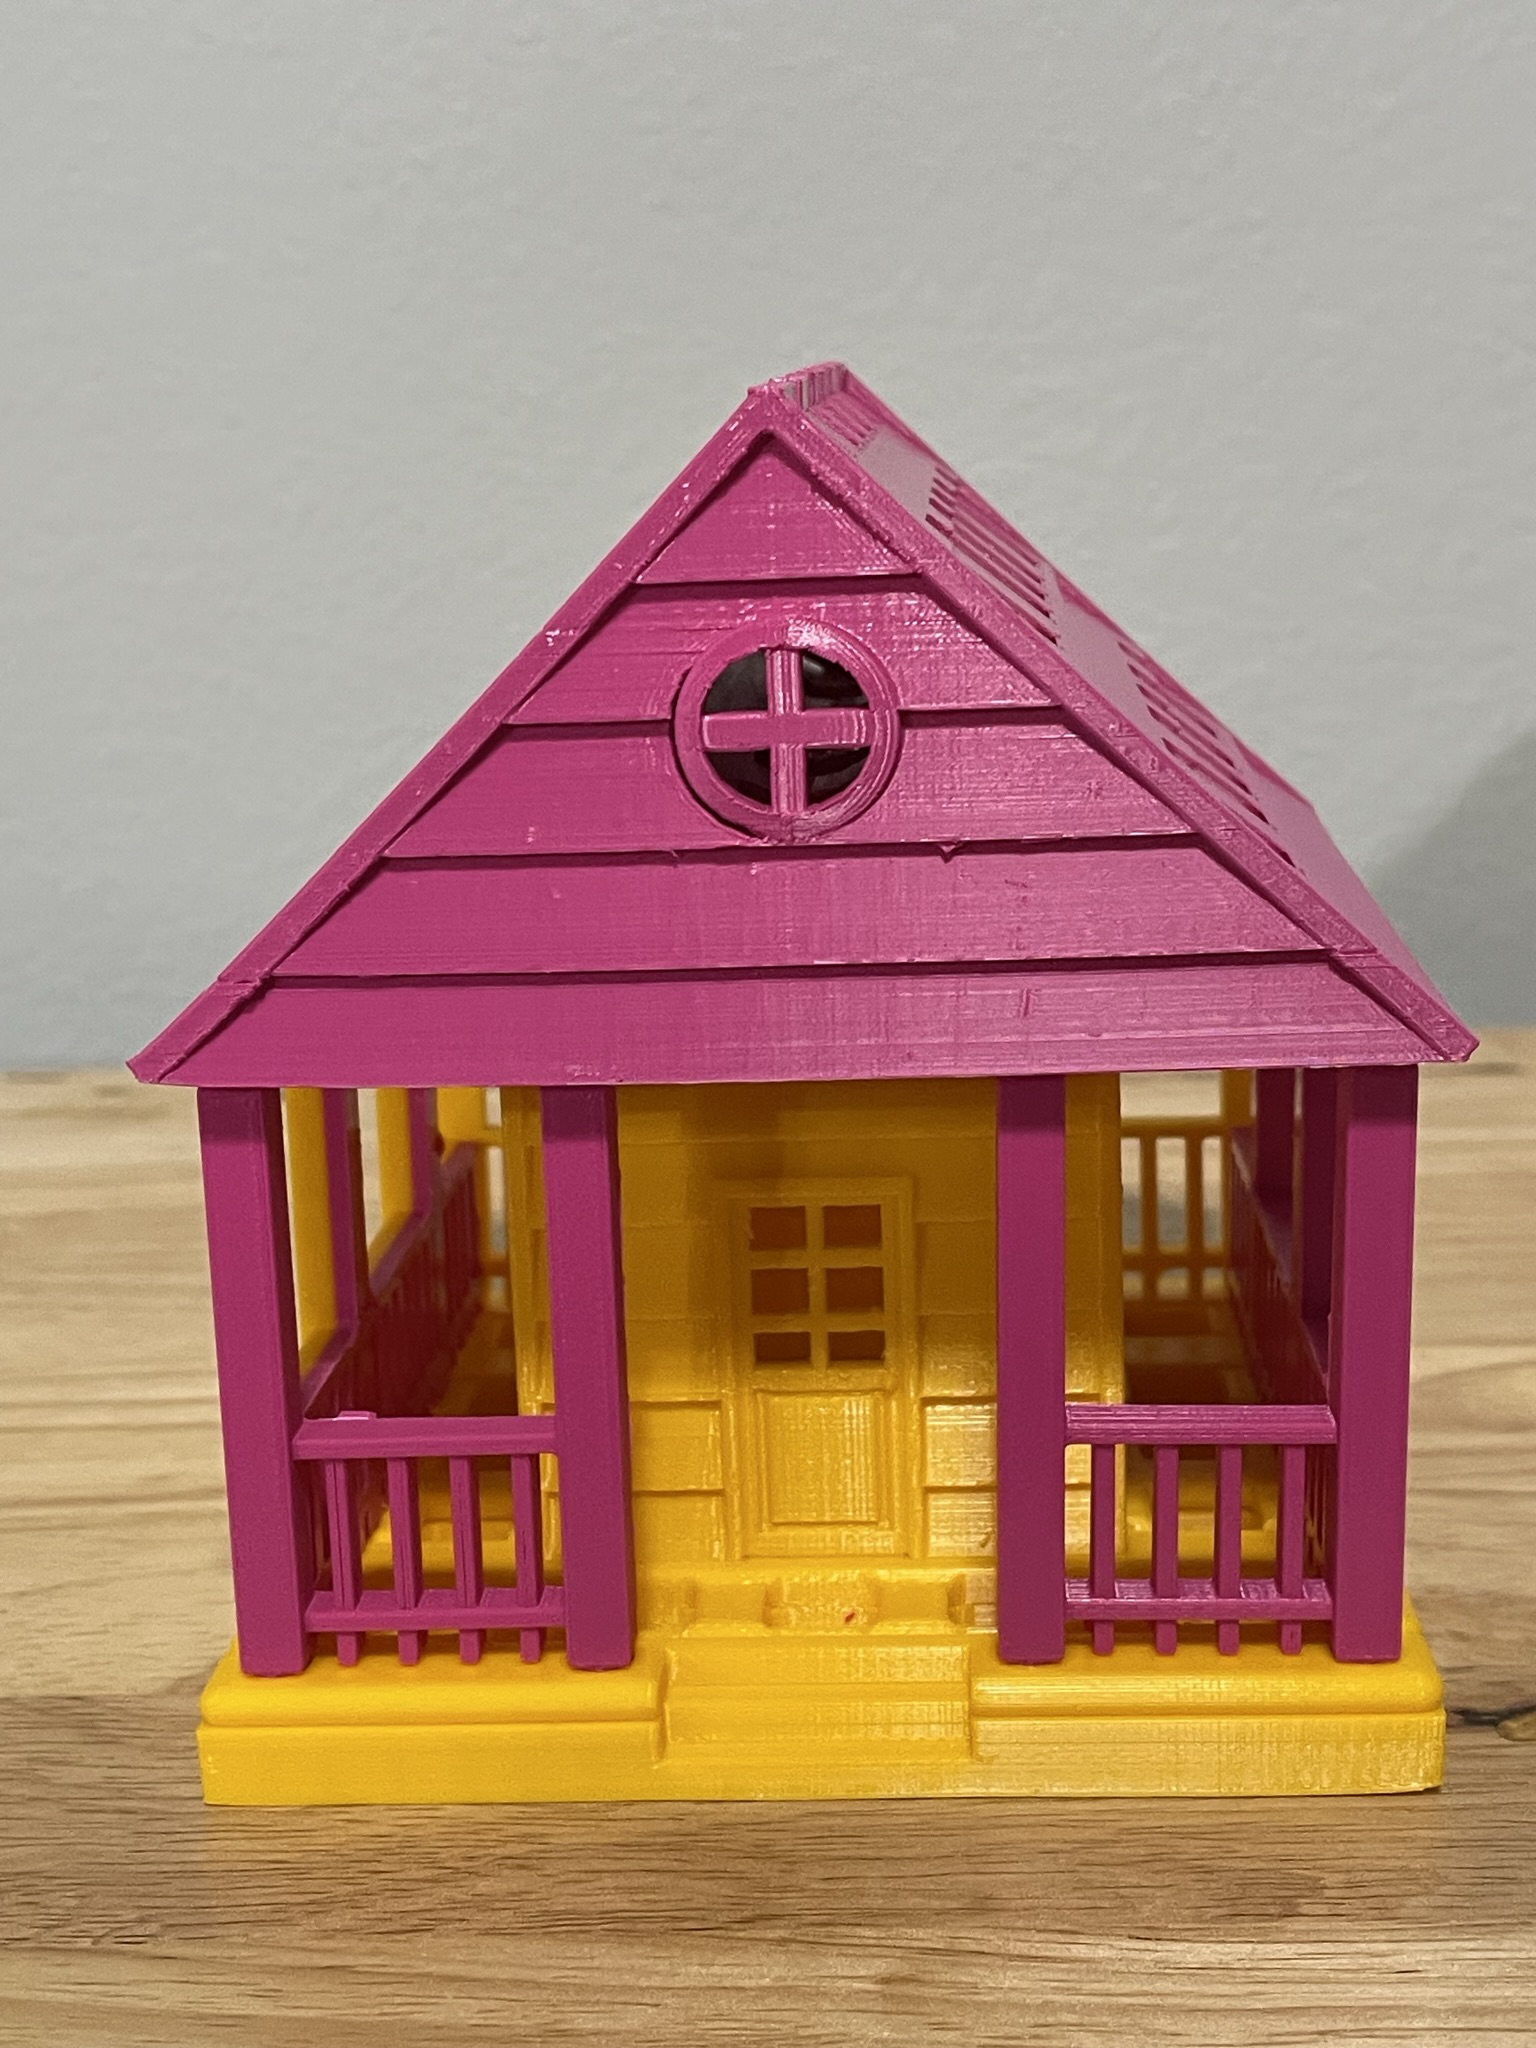
If you have seen some of my previous posts, you know that I paint little plaster houses. While I was painting a new set of houses, I decided it would be nice if I had a paintbrush holder. Yes, I could have purchased one on Amazon, but what is the fun in that. I decided to design a paintbrush holder that looked like a house. The size was not important as long as I could print the design on my 3D printer. The base is 120 mm or 4.724 inches x 120 mm x 8 mm. It provided the design with enough weight and support to prevent it from tipping over. This is the final version of the design in Tinkercad. It was tweaked several times for printing. Paintbrush Holder – Tinkercad
If I printed the design as shown in the picture, it would require a lot of support. My first attempt to print, I split the design into two pieces; roof and building. The roof I selected the Support Type of Tree. There is a lot that can go wrong with printing something for hours and hours, however the roof printed beautifully, and the supports detached easily.
The next print was the bottom piece. Again, a lot can go wrong when something prints for hours and hours and hours. First, after 12 hours the printer would not allow me to pause the print. Second, when the print finished the build plate did on return to its lower position, so extra filament built up on its final print location. Third, the support around the railing was impossible to remove without damaging the railing, which was 2mm in diameter. I went back to Tinkercad and tweaked the design.
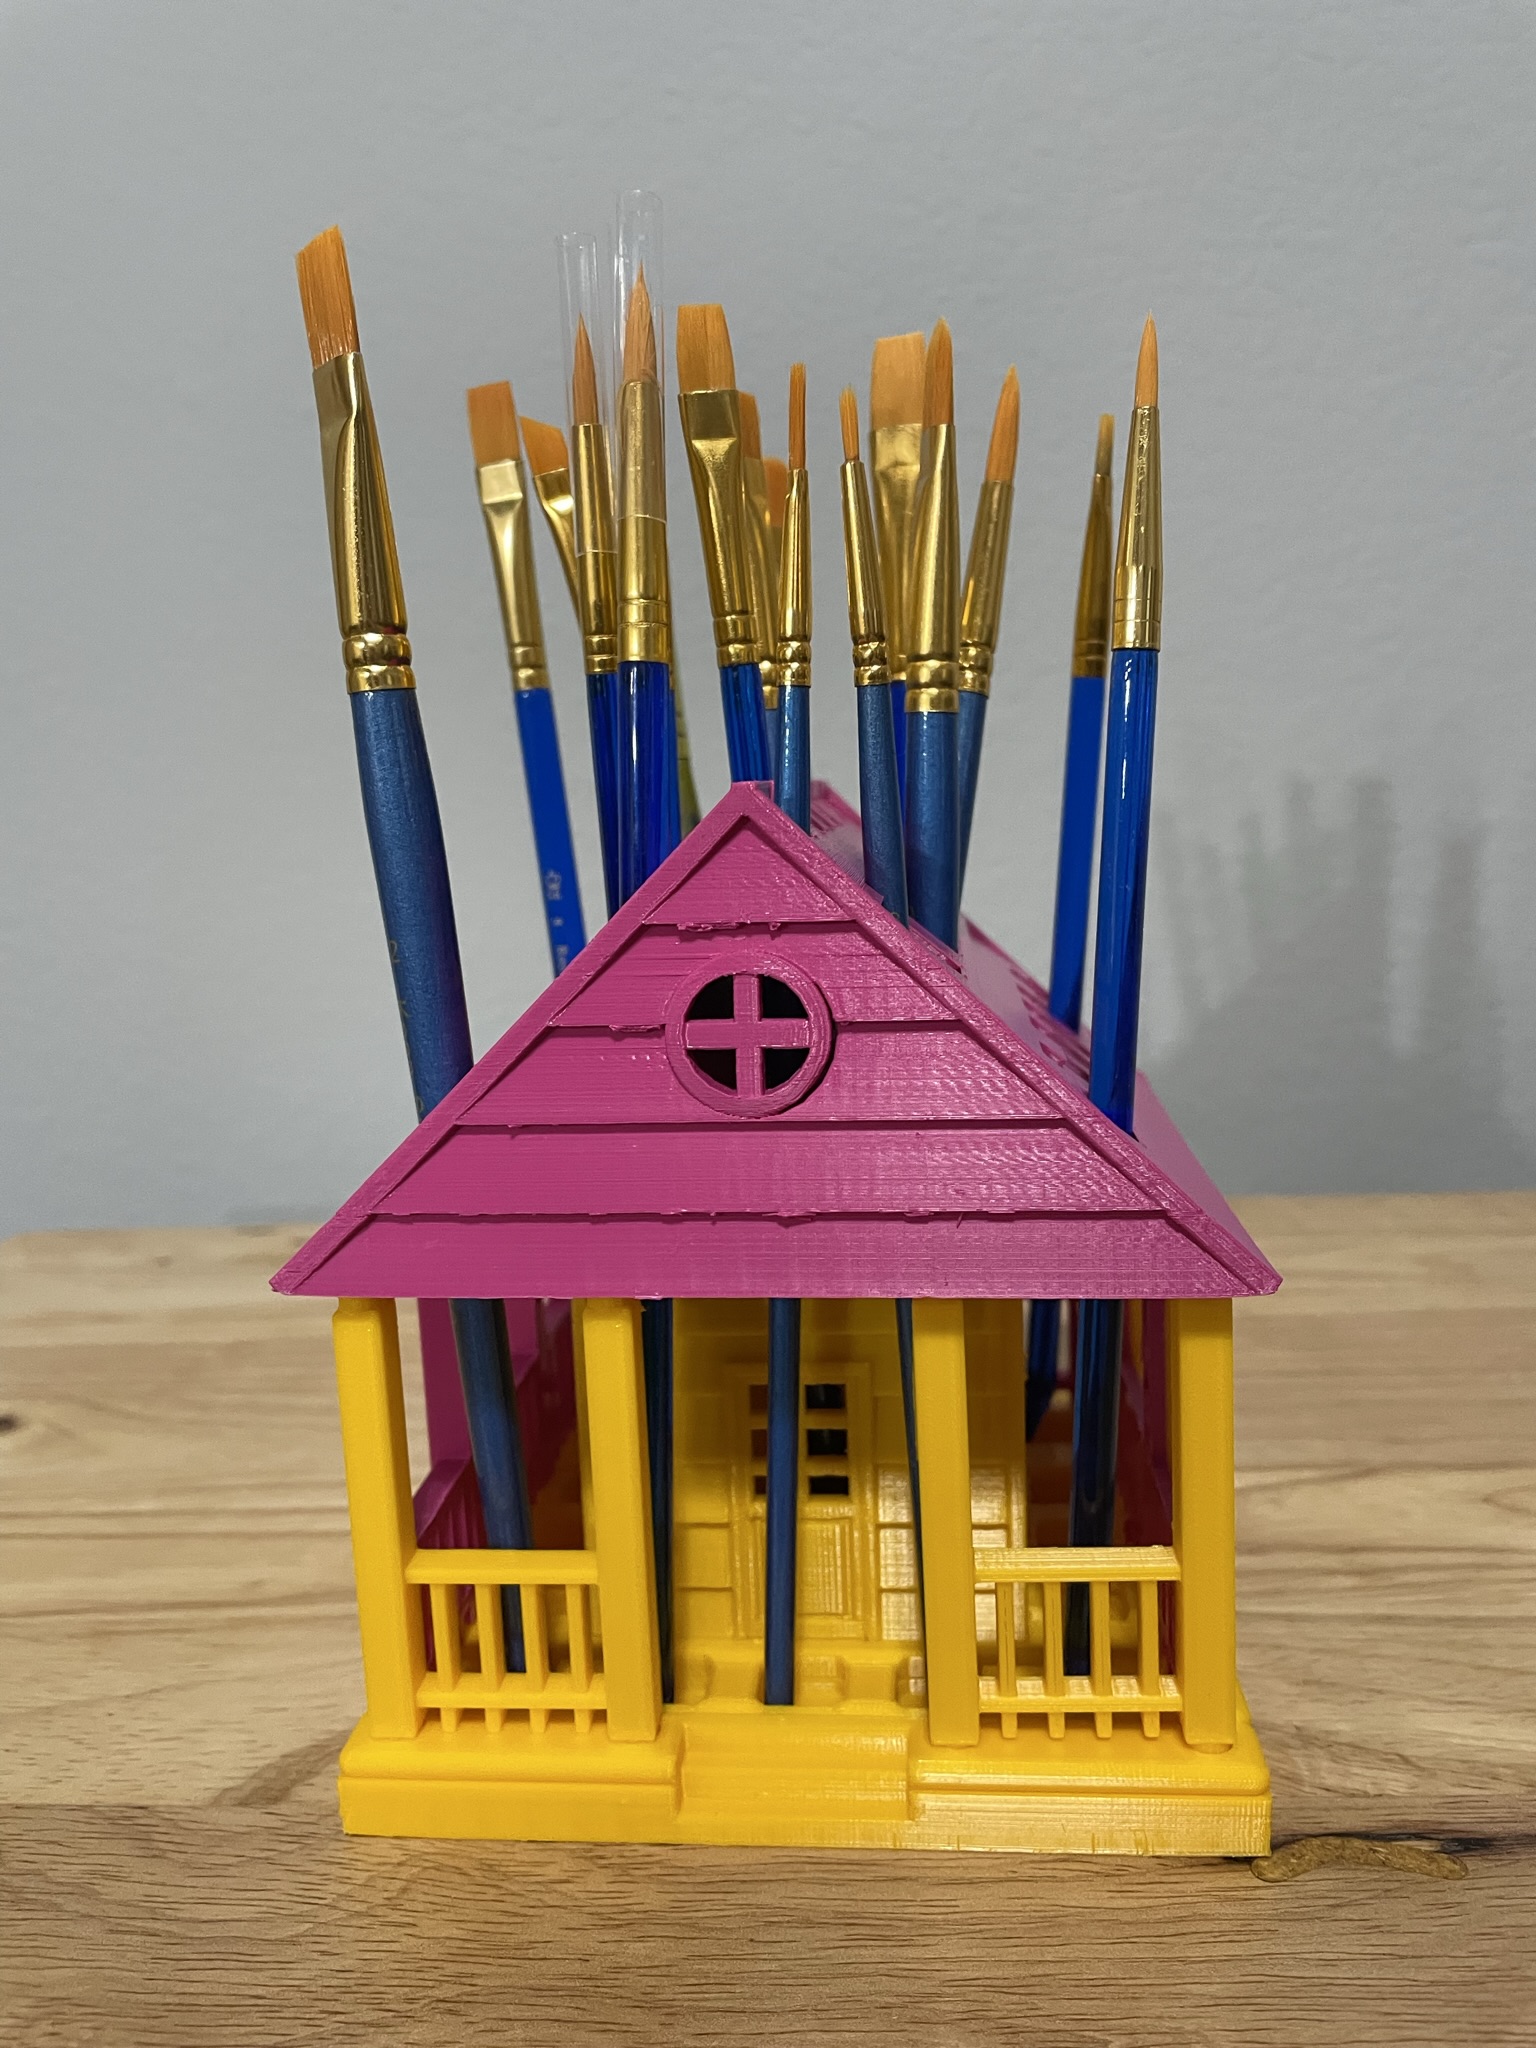
For the second attempt, I made the railing detachable. With detachable railing, I could lay it flat on the print bed and not use any supports. After it was printed, I could assemble the design.
Front and Back Railing – I printed two copies. Note, I went from round to square railing.
Side Railing – I printed two copies.
Structure – I printed one copy with Normal Supports.
Below is the printed version of my new paintbrush holder. It was printed in two different colors because I ran out of the pink filament. The design was easy to assemble, and gluing was not required.
To support all the tinkers that hosted contests during this holiday season and Tinkercad’s TinkerTogether, I created the following designs:
TinkerTogether Design Challenge #25: Winter
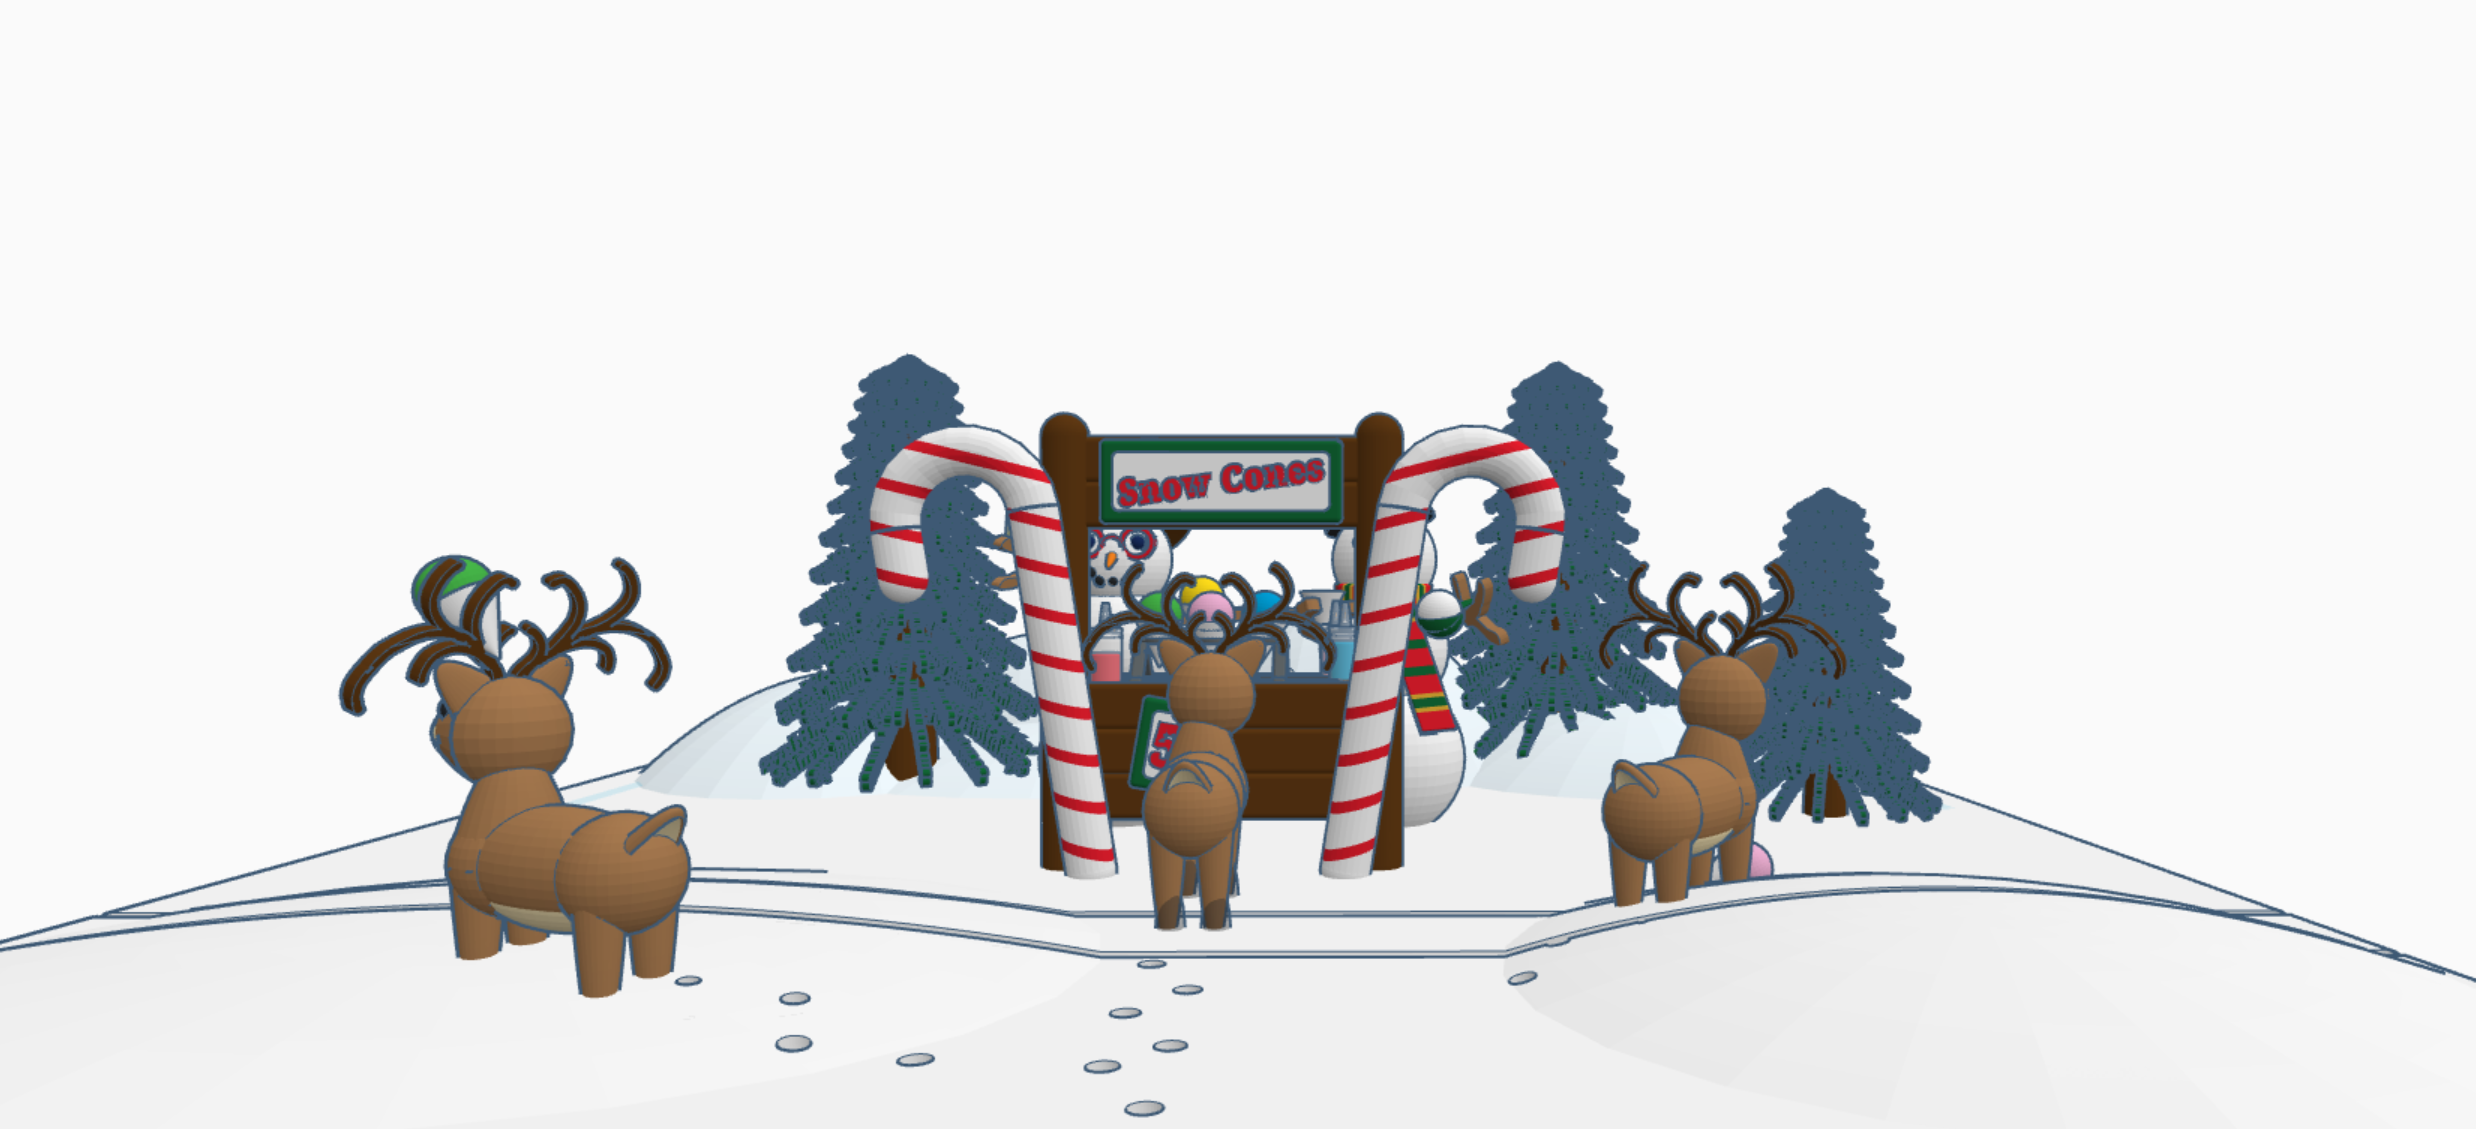
Snow Cones for Sell: In this design we have two snowman selling snow cones to a few reindeer. If you look closely at the ground, it appears that Santa Sled has been through. The hats, the reindeer and the candy cane are available in Tinkercad’s Shape Menu.
Contest: Design an Ornament – I could have created a typical ball ornament, but I wanted something that looked fragile. Do you see the snowflake inside?
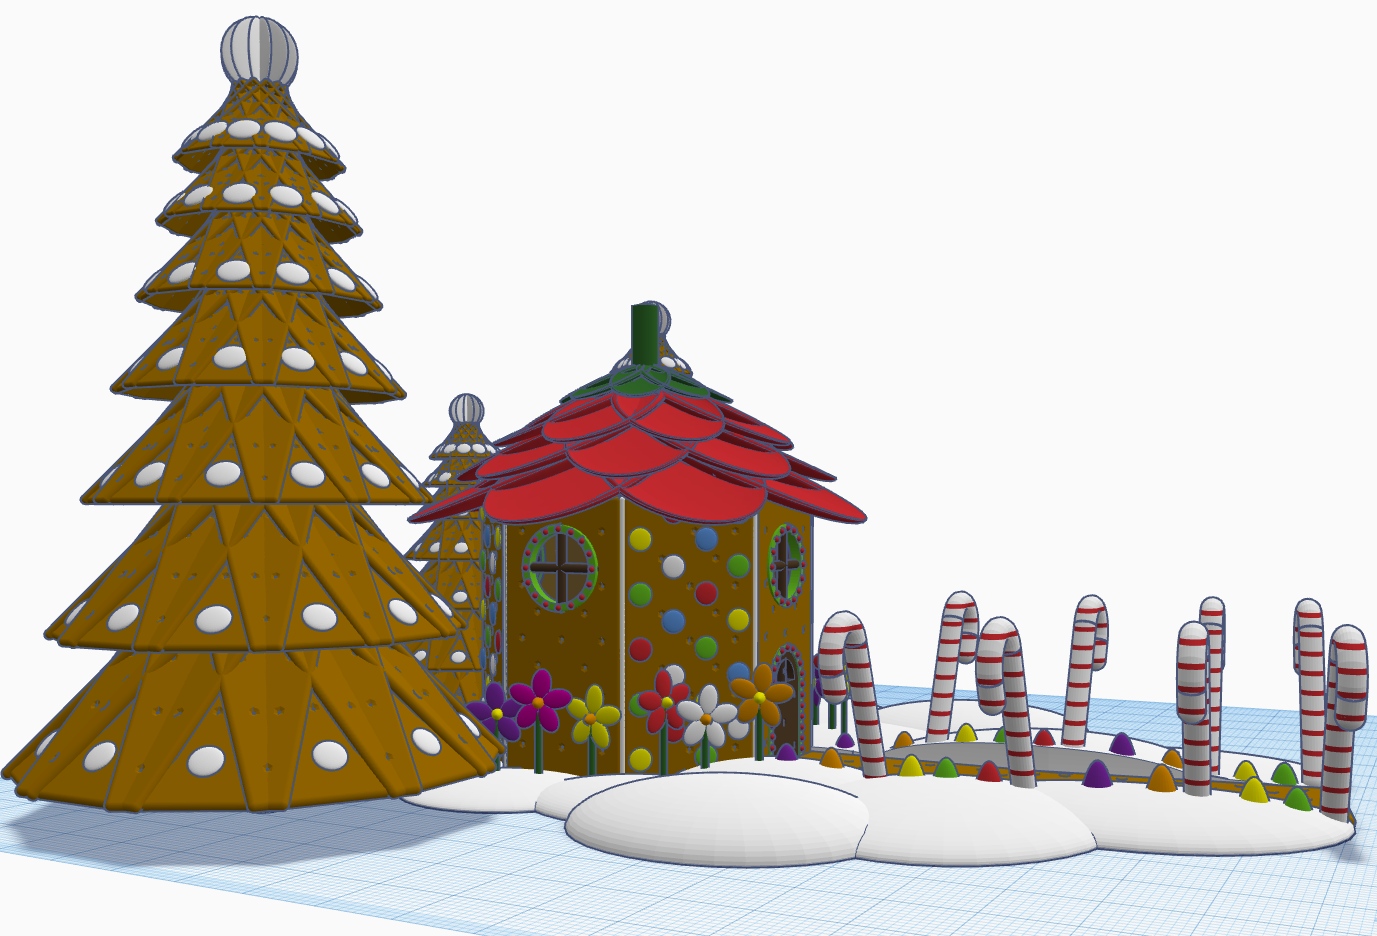
Contest: Create a Gingerbread House – I created a Gingerbread Fairy House. The roof of the house is a candy strawberry, and the path is lined with candy canes and gum drops.
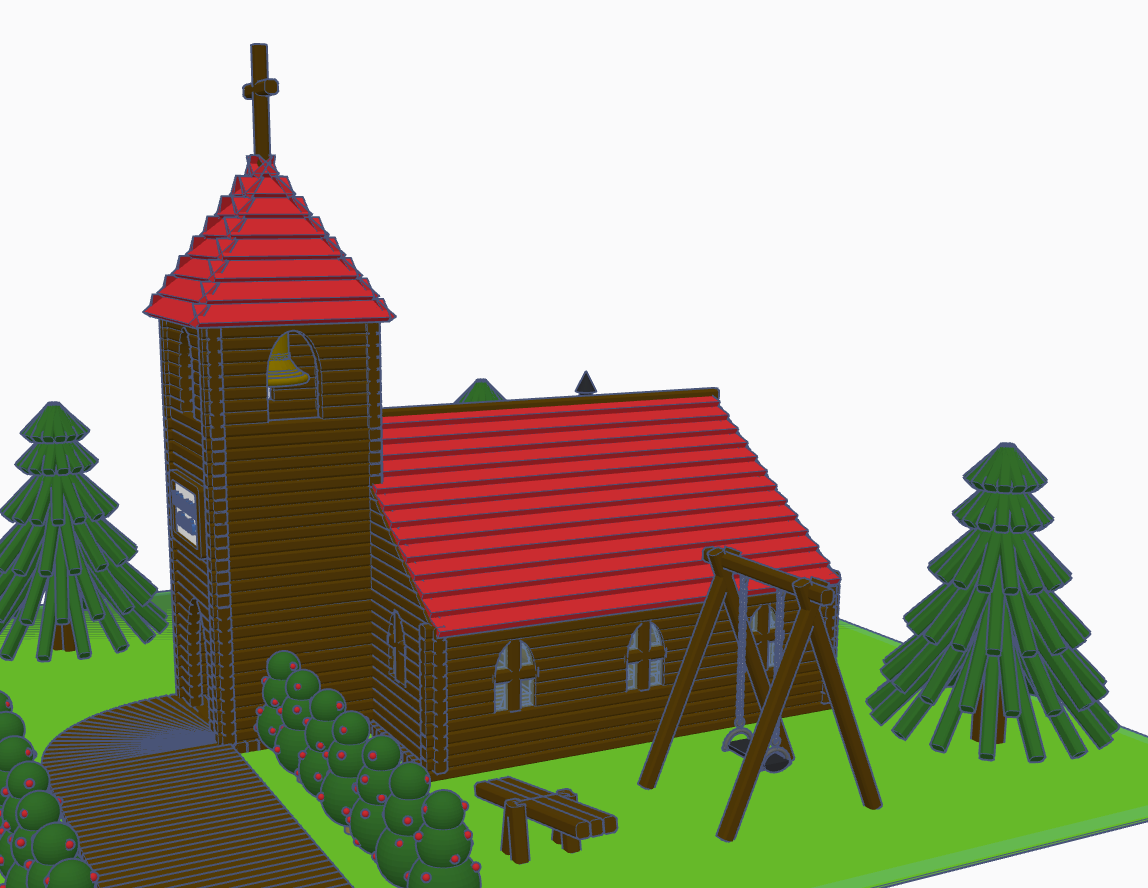
Contest: Create a Log Cabin using the TinkerLogs created by HLModTech – I created a TinkerLog Church. The building and most of the items, including the trees, were created using the TinkerLogs that HLModTech created. I kept the width and height of the TinkerLogs, and only change the length.
TinkerTogether Design Challenge #26 – Party: For this challenge, I created a Bouncy Castle and Balloon Animals. Can there be a party without these items?
Contest: Create a Christmas Plushie – my contest entry was me. For years, I had a certain way of creating a stick figure of me. I decided for this contest I would create a Plushie of Me. Notice the Santa Hat, it came out looking pretty awesome.
You can see all these items in 3D view from my profile or clicking the links above: SarahCath
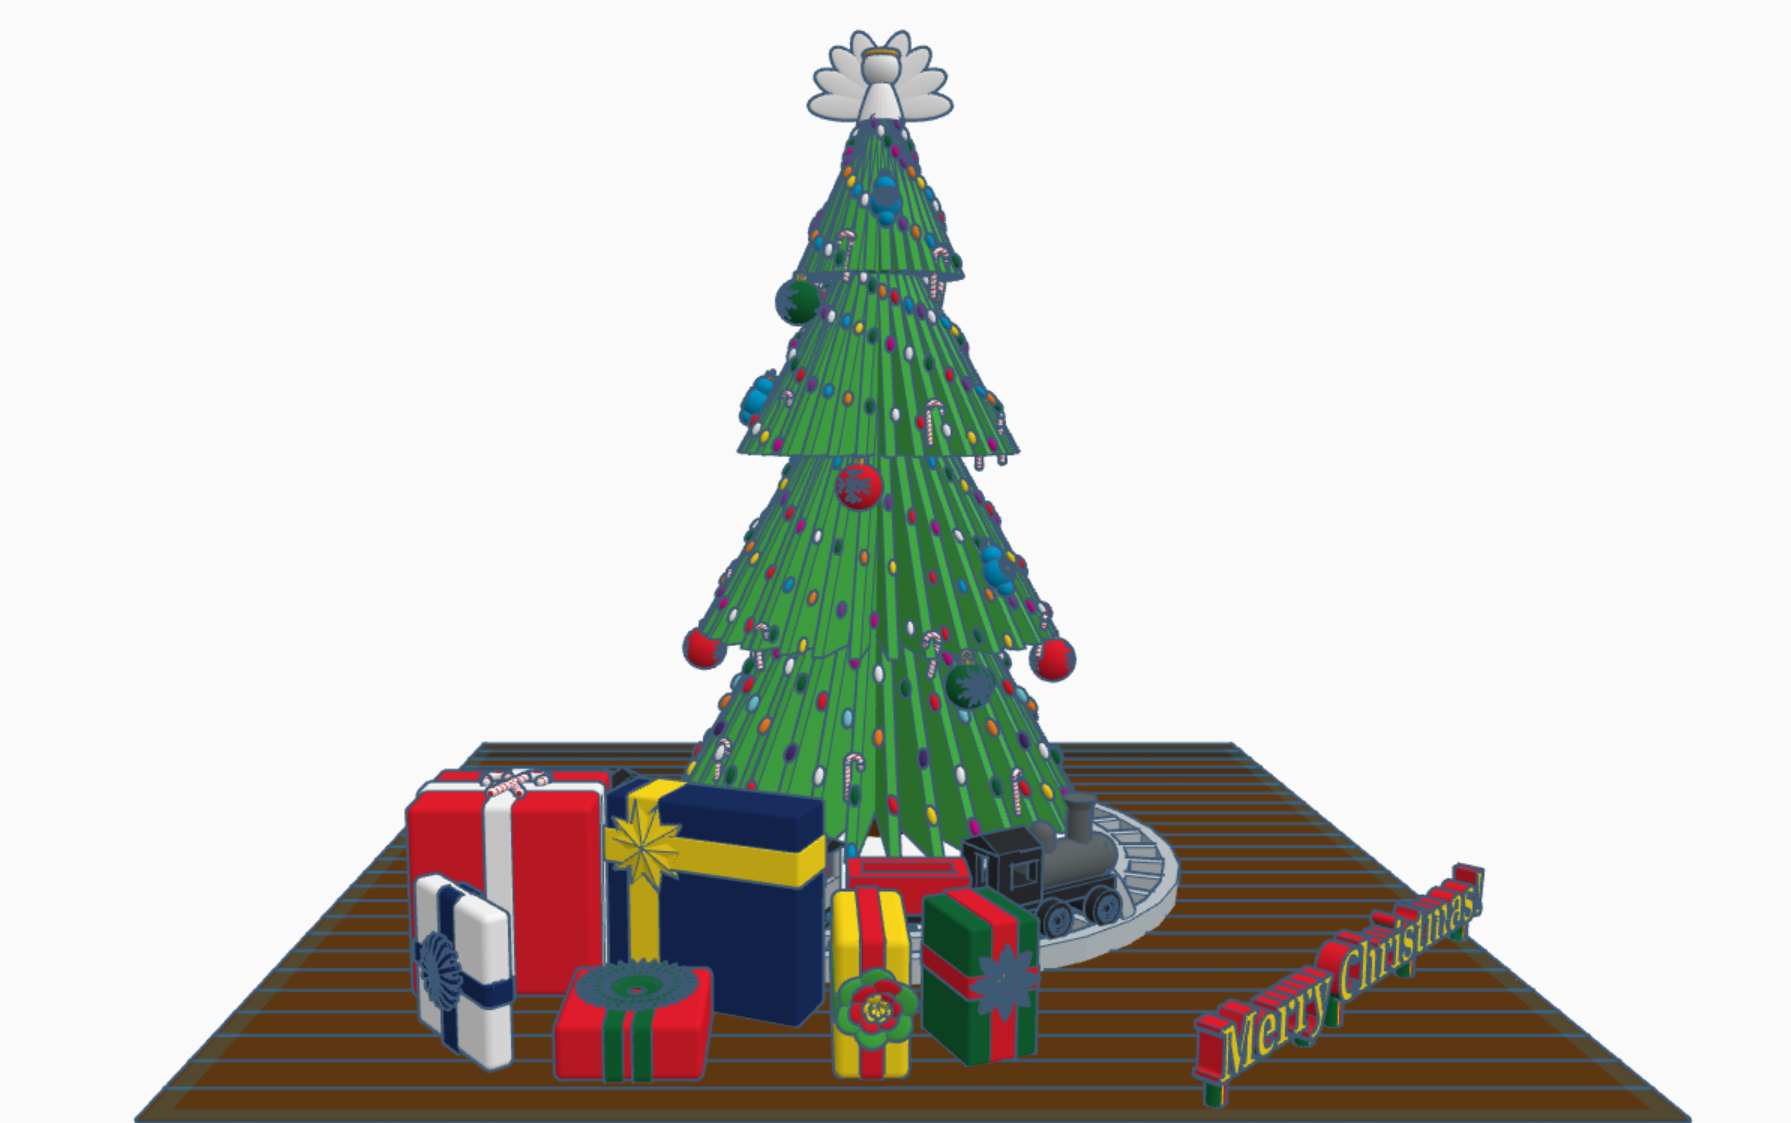
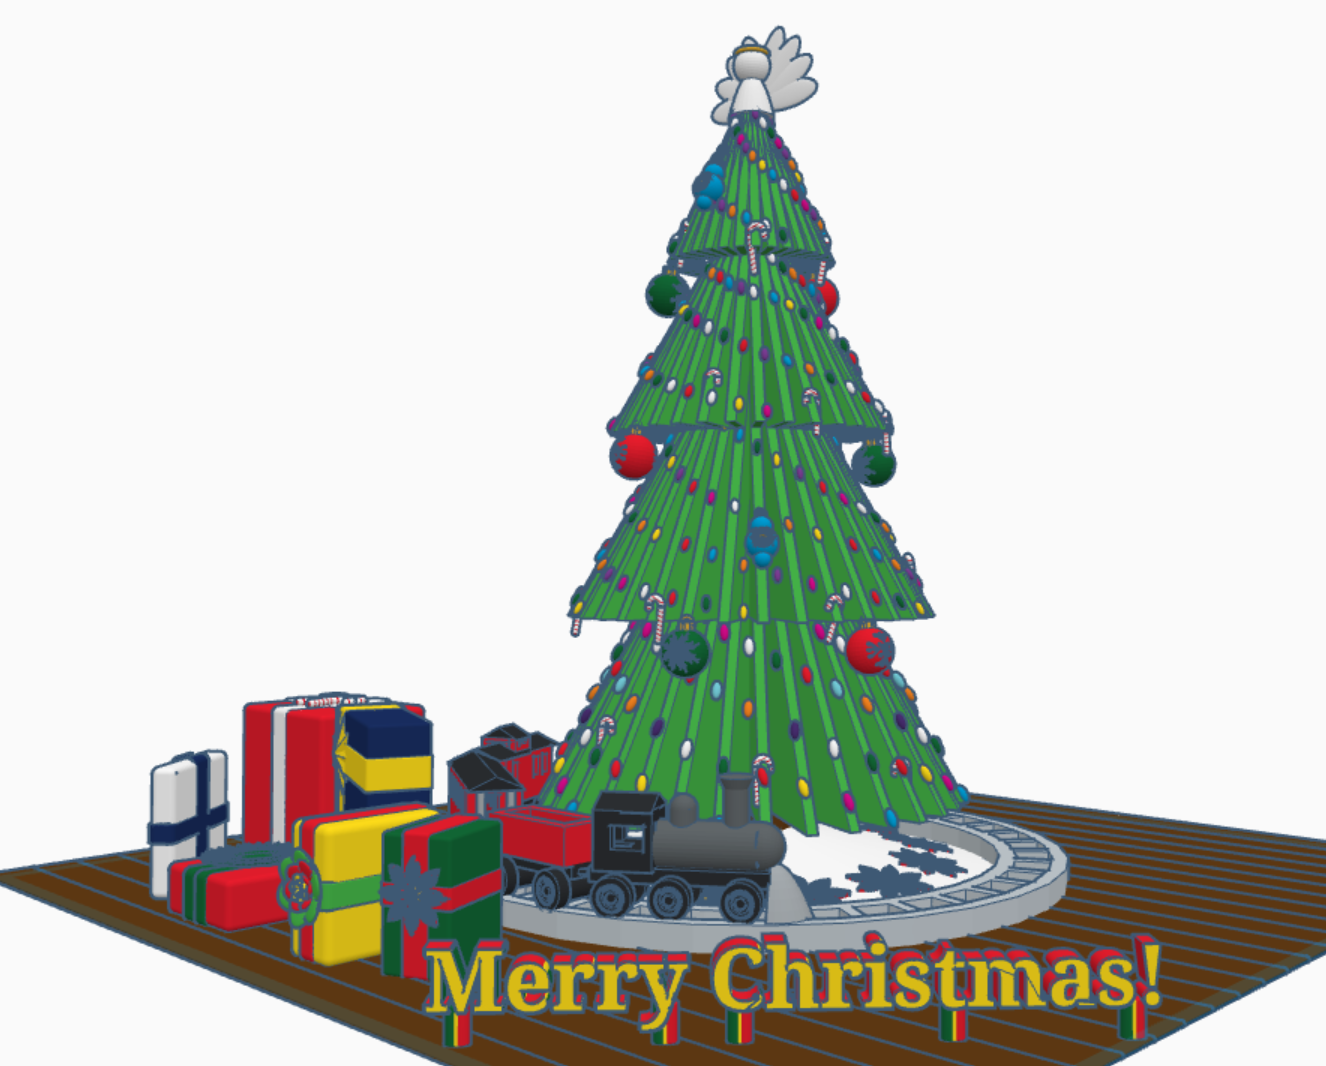
Merry Christmas from Sarah, or Sarahcath, as I use it a lot for my handle. Link: Merry Christmas 2022. For all the Tinkercad users; both past, present, and future; I created a Christmas 2022 scene with a tree, a train, and presents. Each present under the tree contain a gift. It is not just a pretty box. To open the gifts, you will need a Tinkercad account. Copy the design and ungroup the box from around the present. If the gift is too small, you are using Tinkercad, you can make the gift larger.
My biggest adventure this year was moving. Not a move across town, but a move to a different State over 500 miles away. I cannot recommend moving. While I was sitting in front of the TV at night, during my breaks from unpacking boxes and organizing, I decided to relax with some coding in Tinkercad Codeblocks.
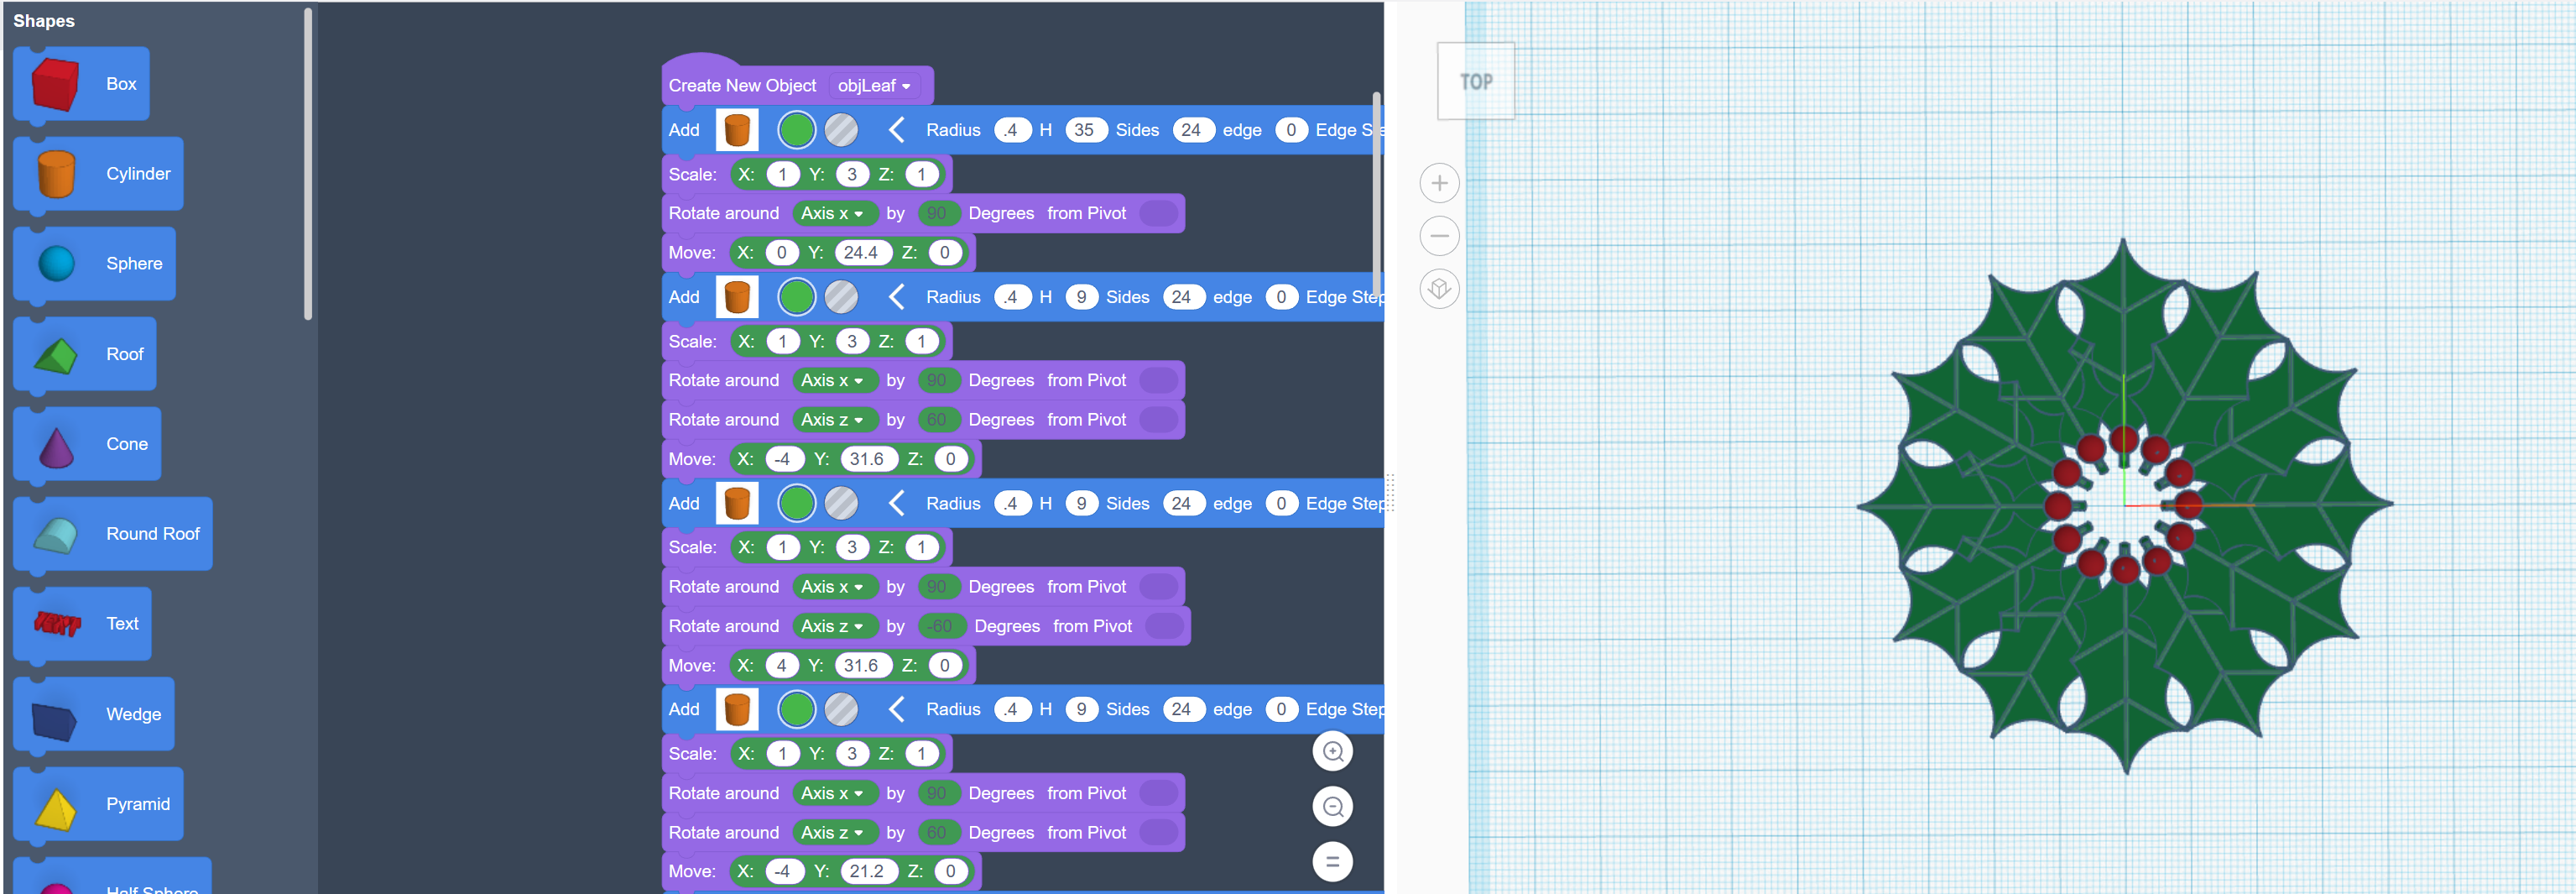
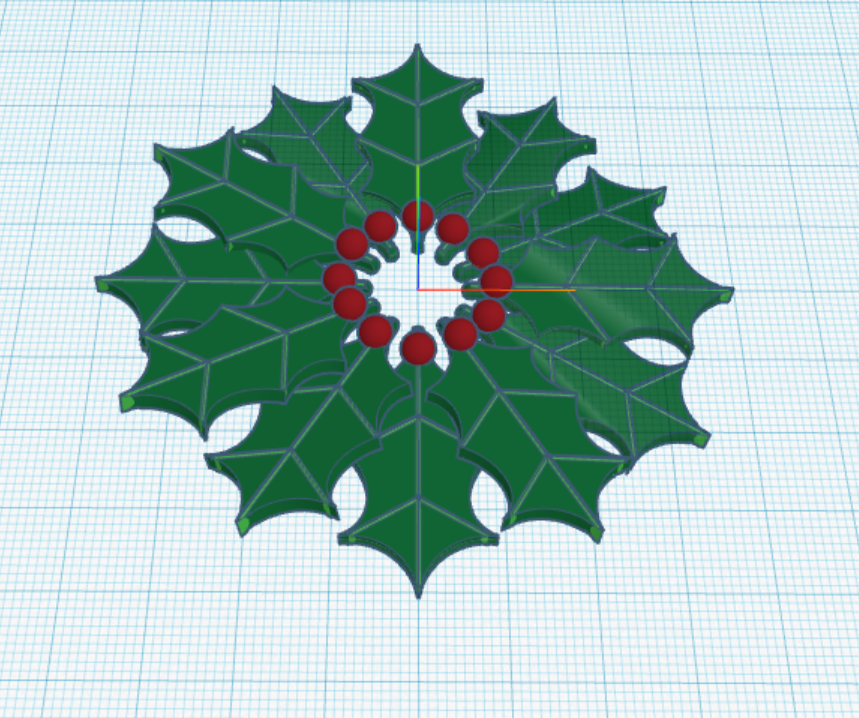
The first thing I coded was a Christmas Wreath:
First, I coded one holly leaf with all the details. Then I copied and rotated each leaf along the x, y and z axis.
The rotation around the x and y axis is random, so the wreath will look a little different every time the program in run.
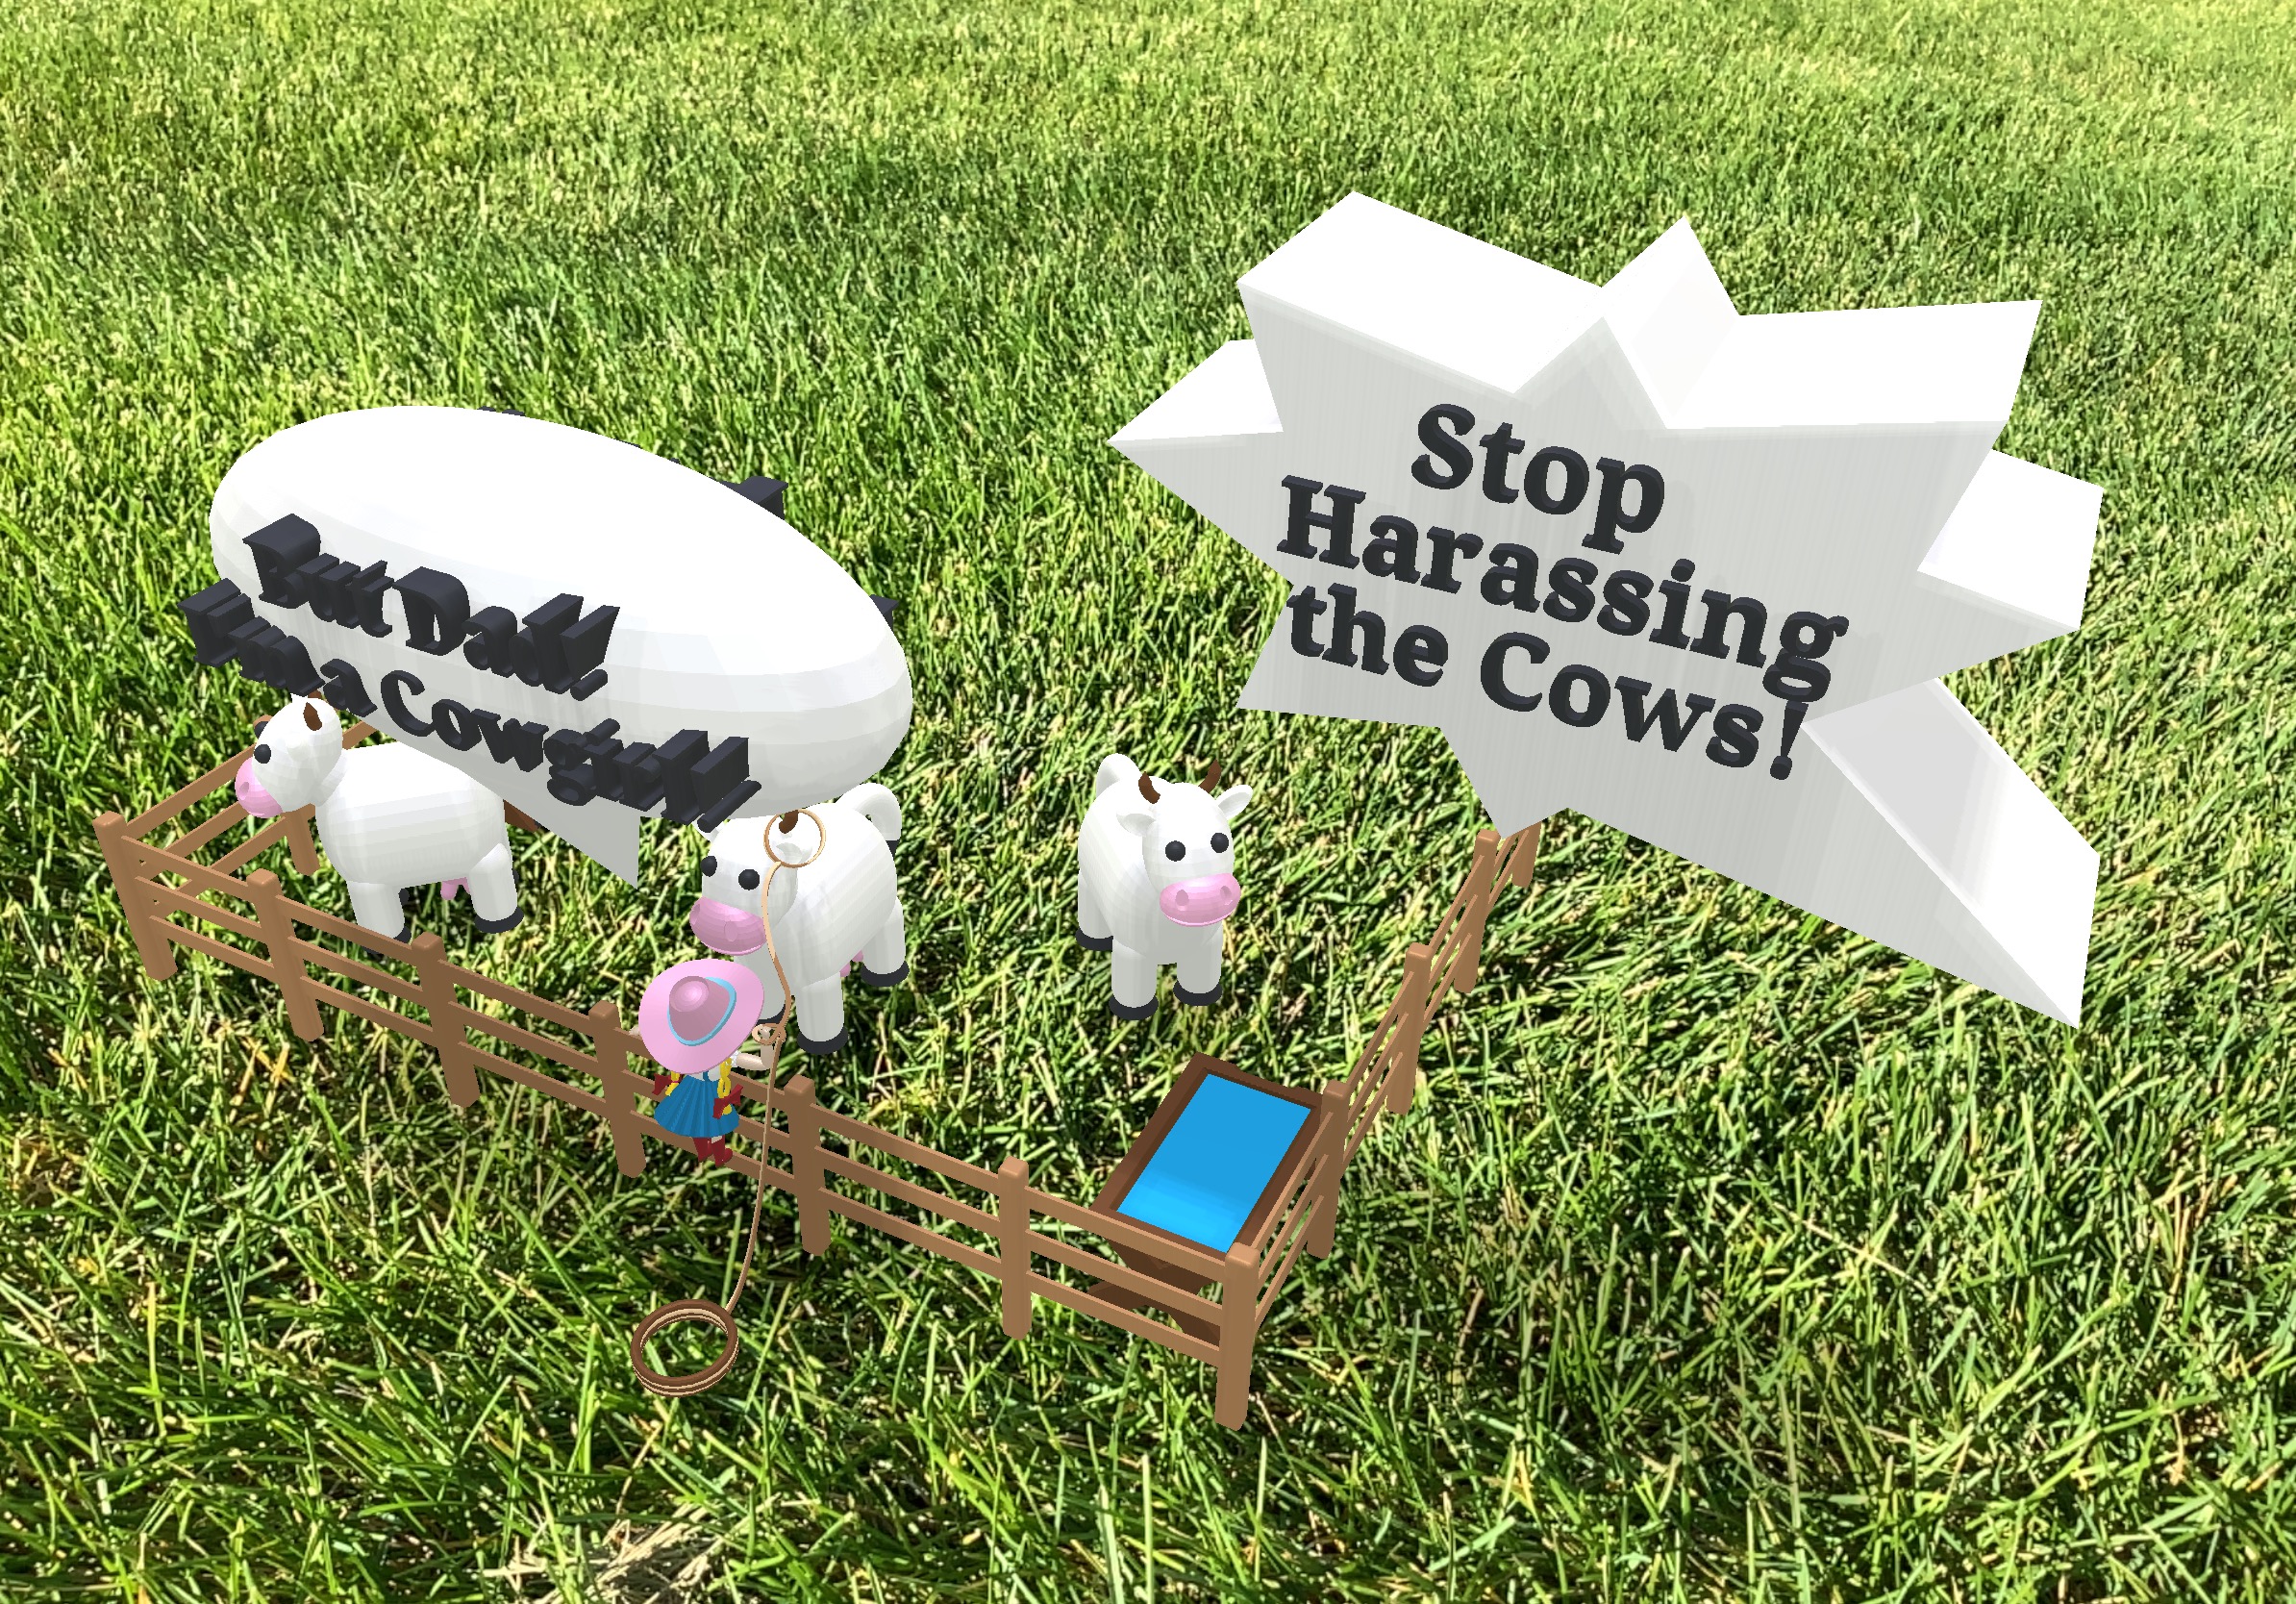
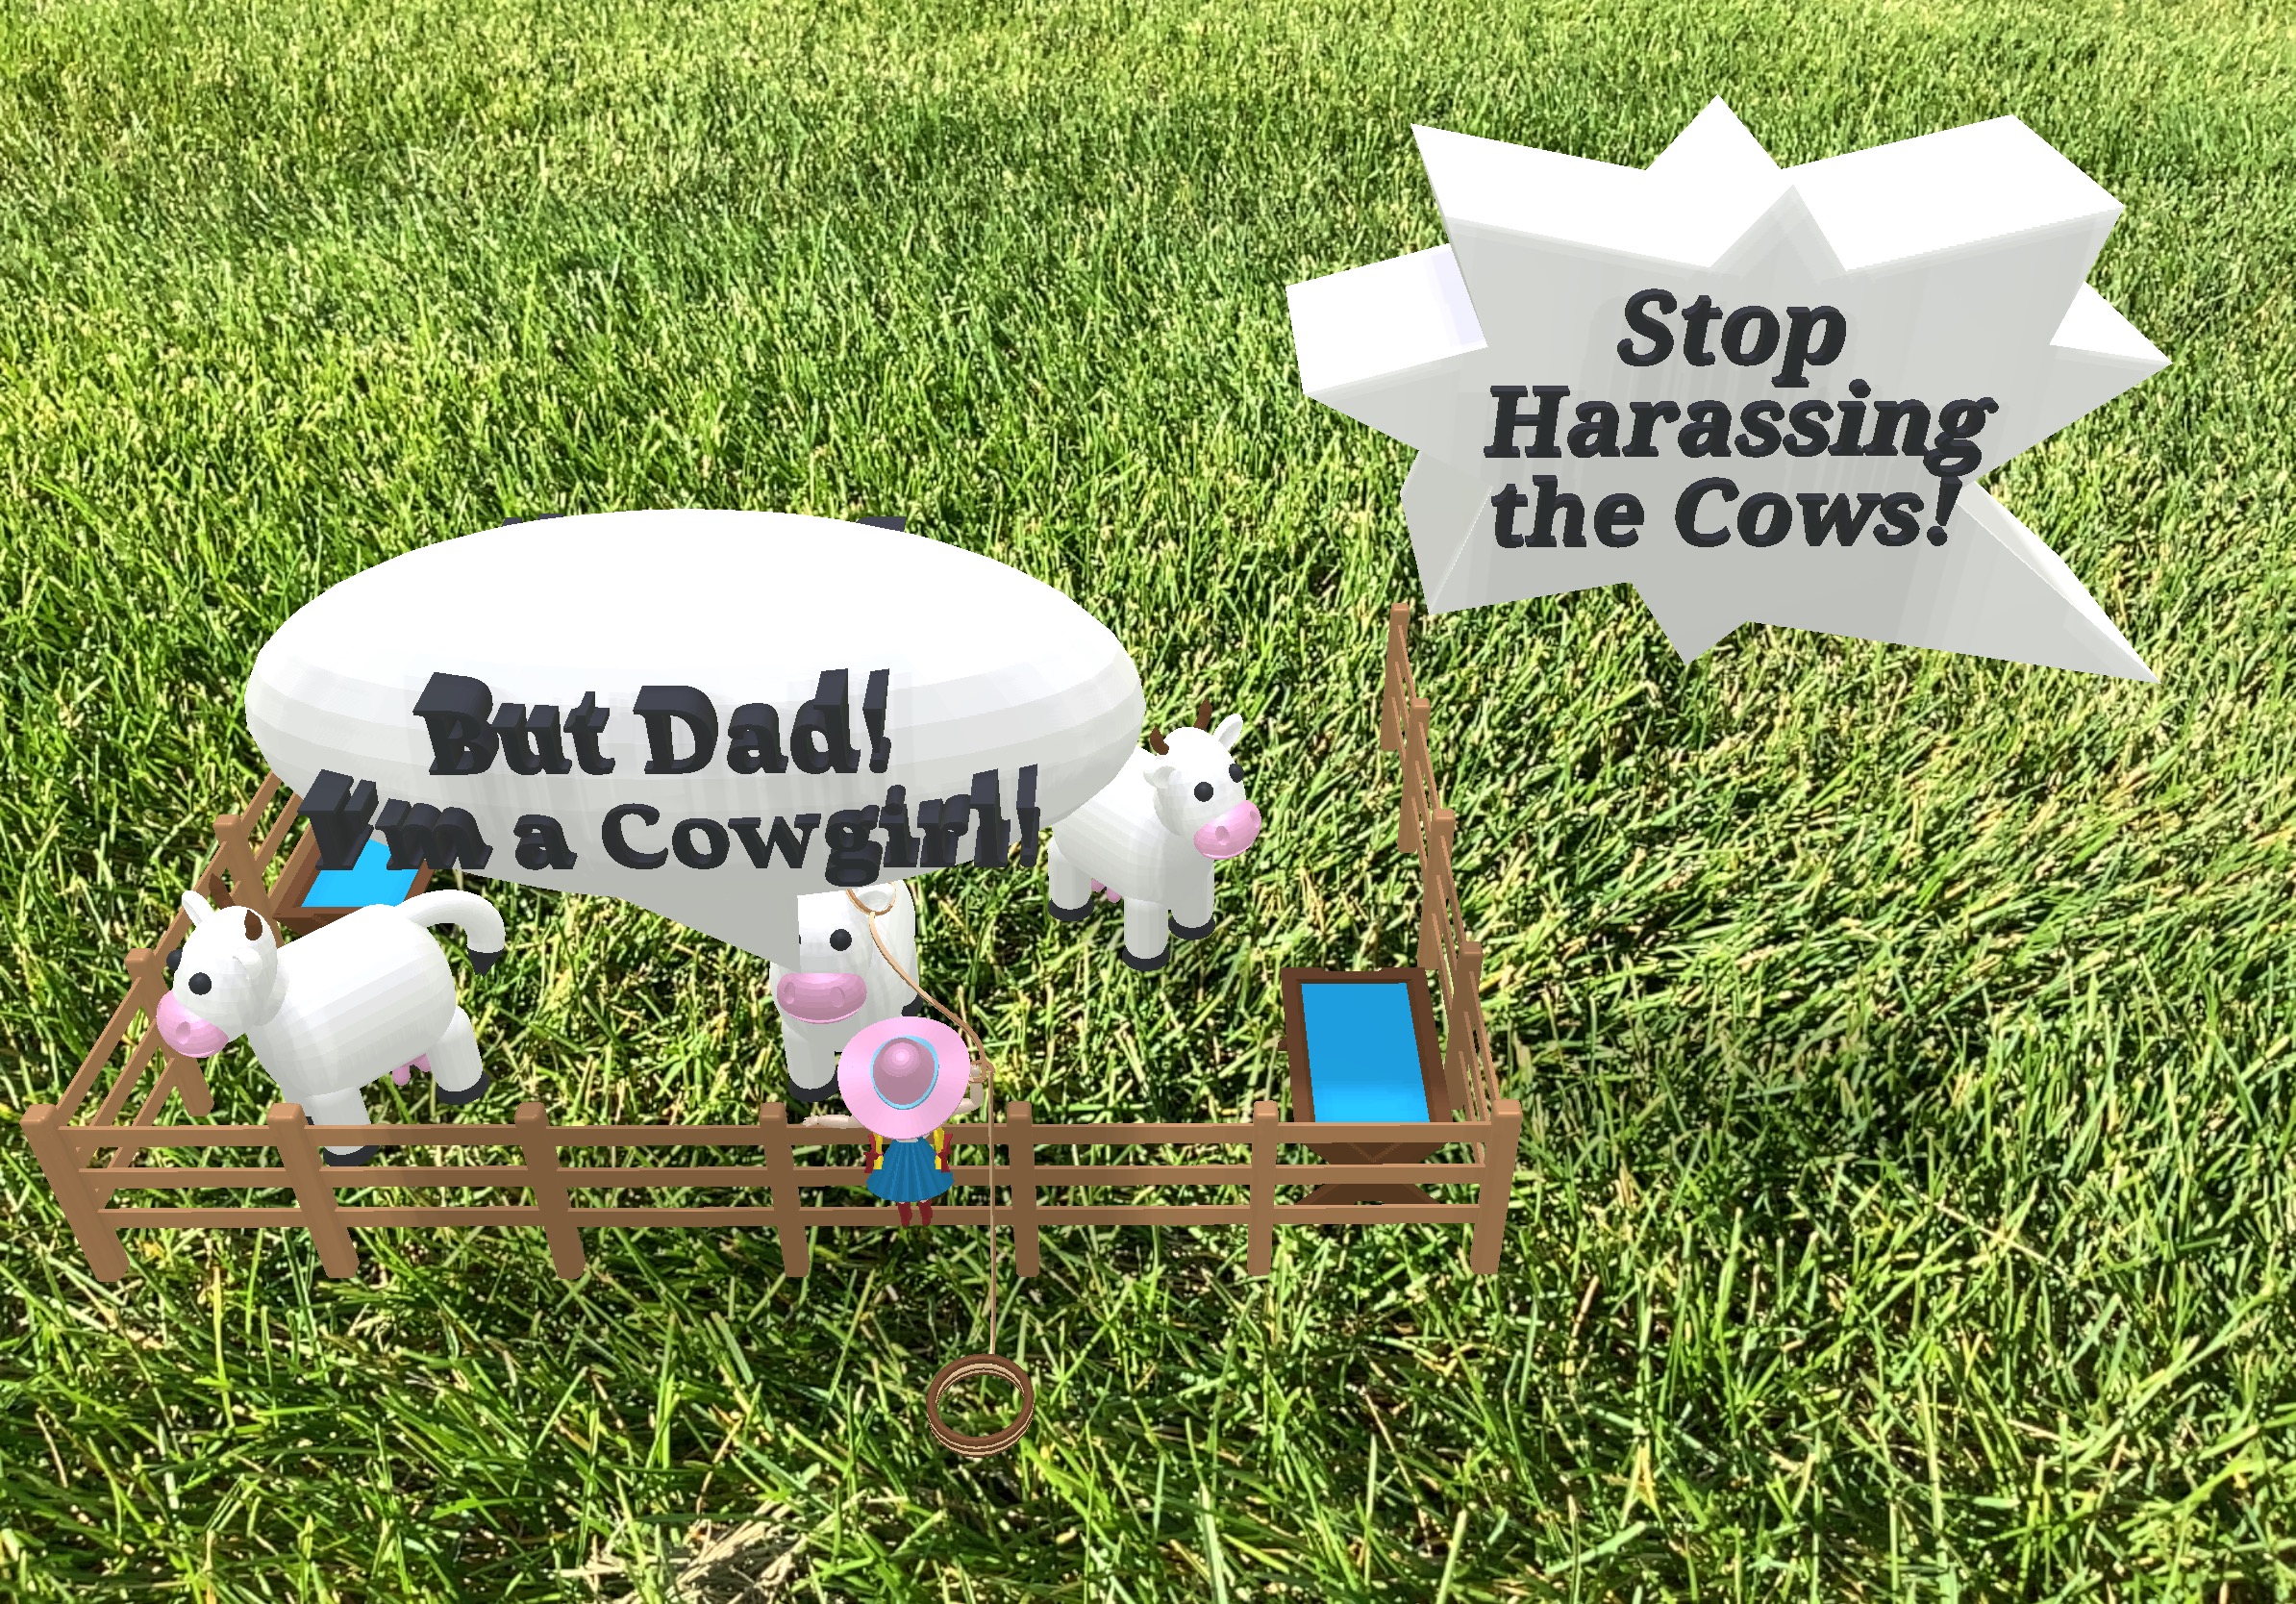
This is the first issue of my 3D comic, made in Tinkercad, that I am calling Earthling. Click on the link above to see the comic in 3D. Here are some pictures of the comic. All items in the comic were created by me, except for the grass.
Note: The AR Viewer on the IPad was used to capture the images.
Other issues will be forthcoming as I have time to develop them.
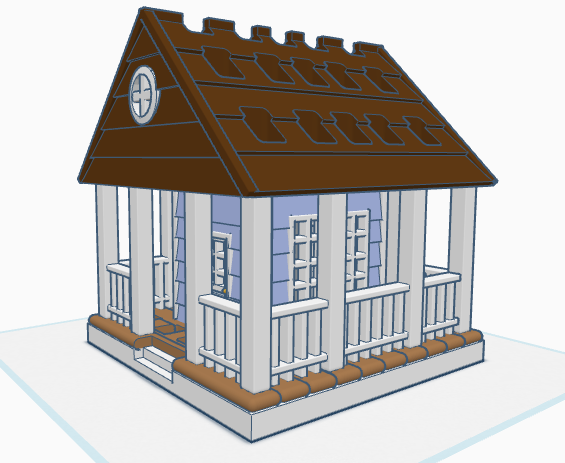
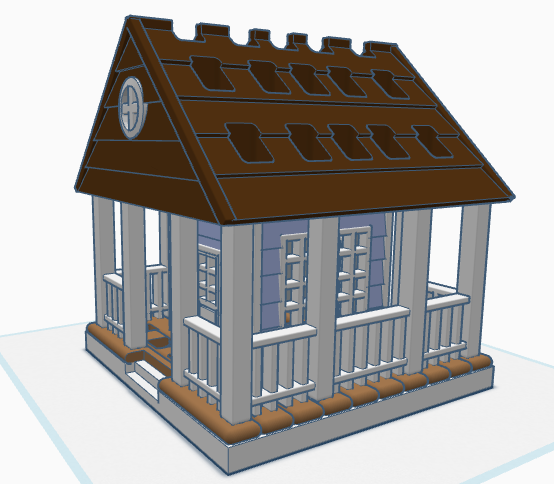
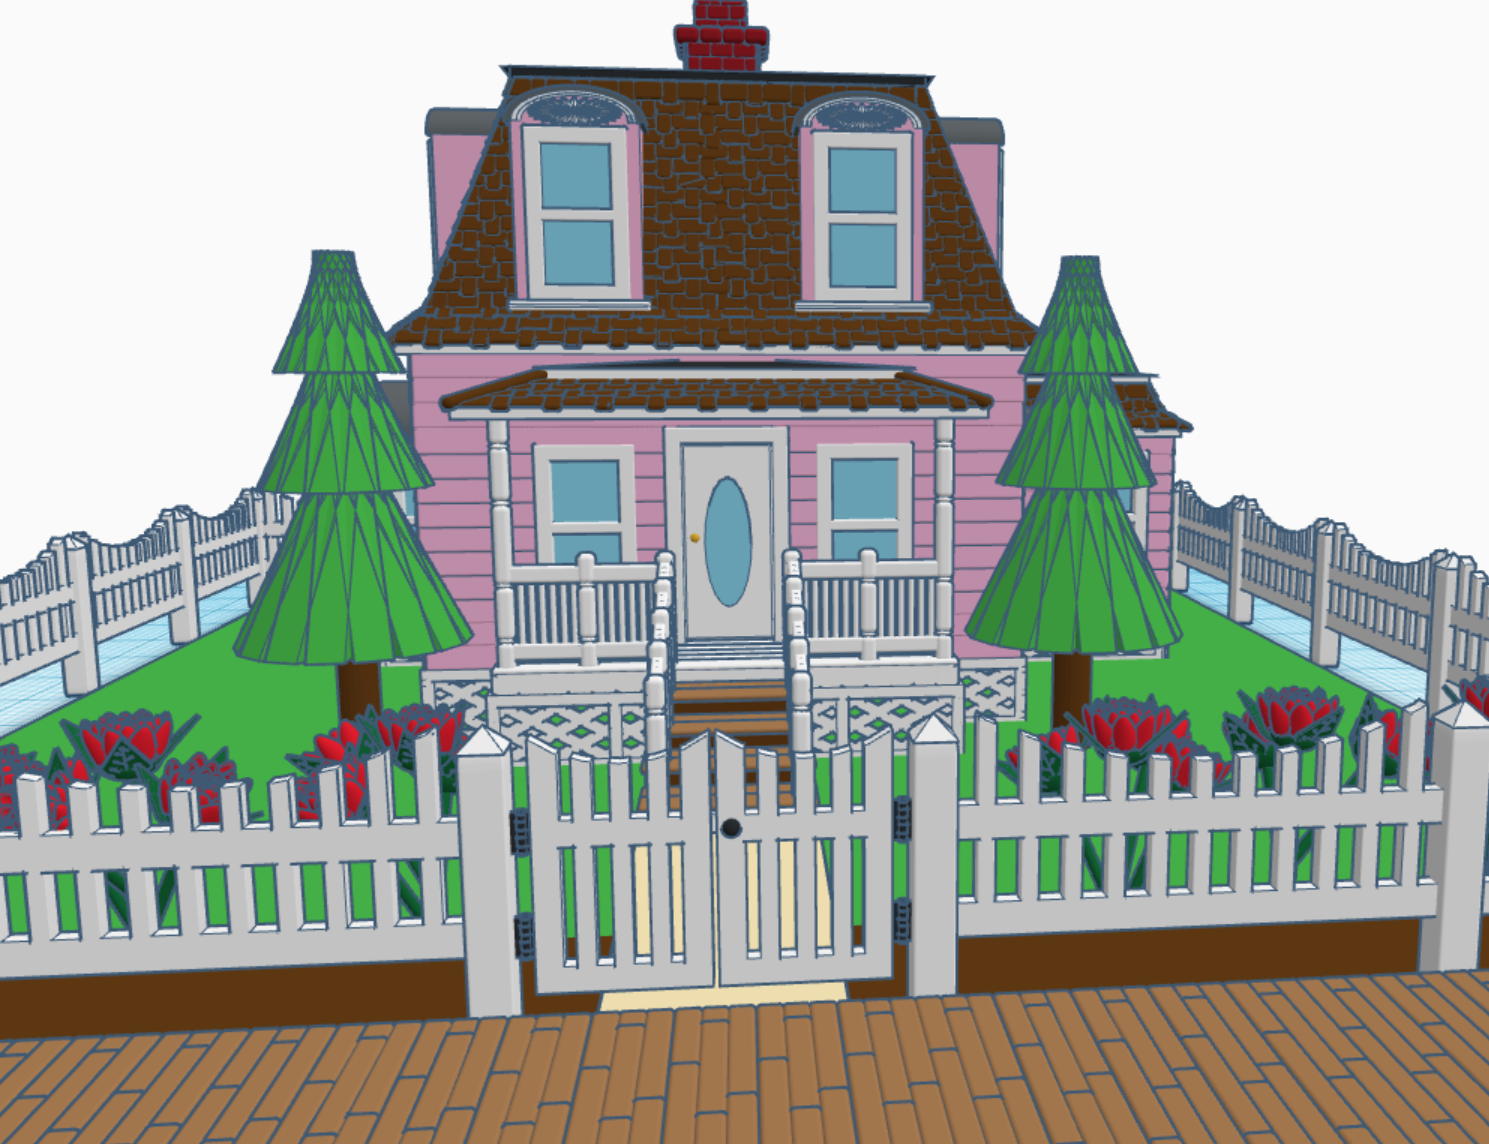
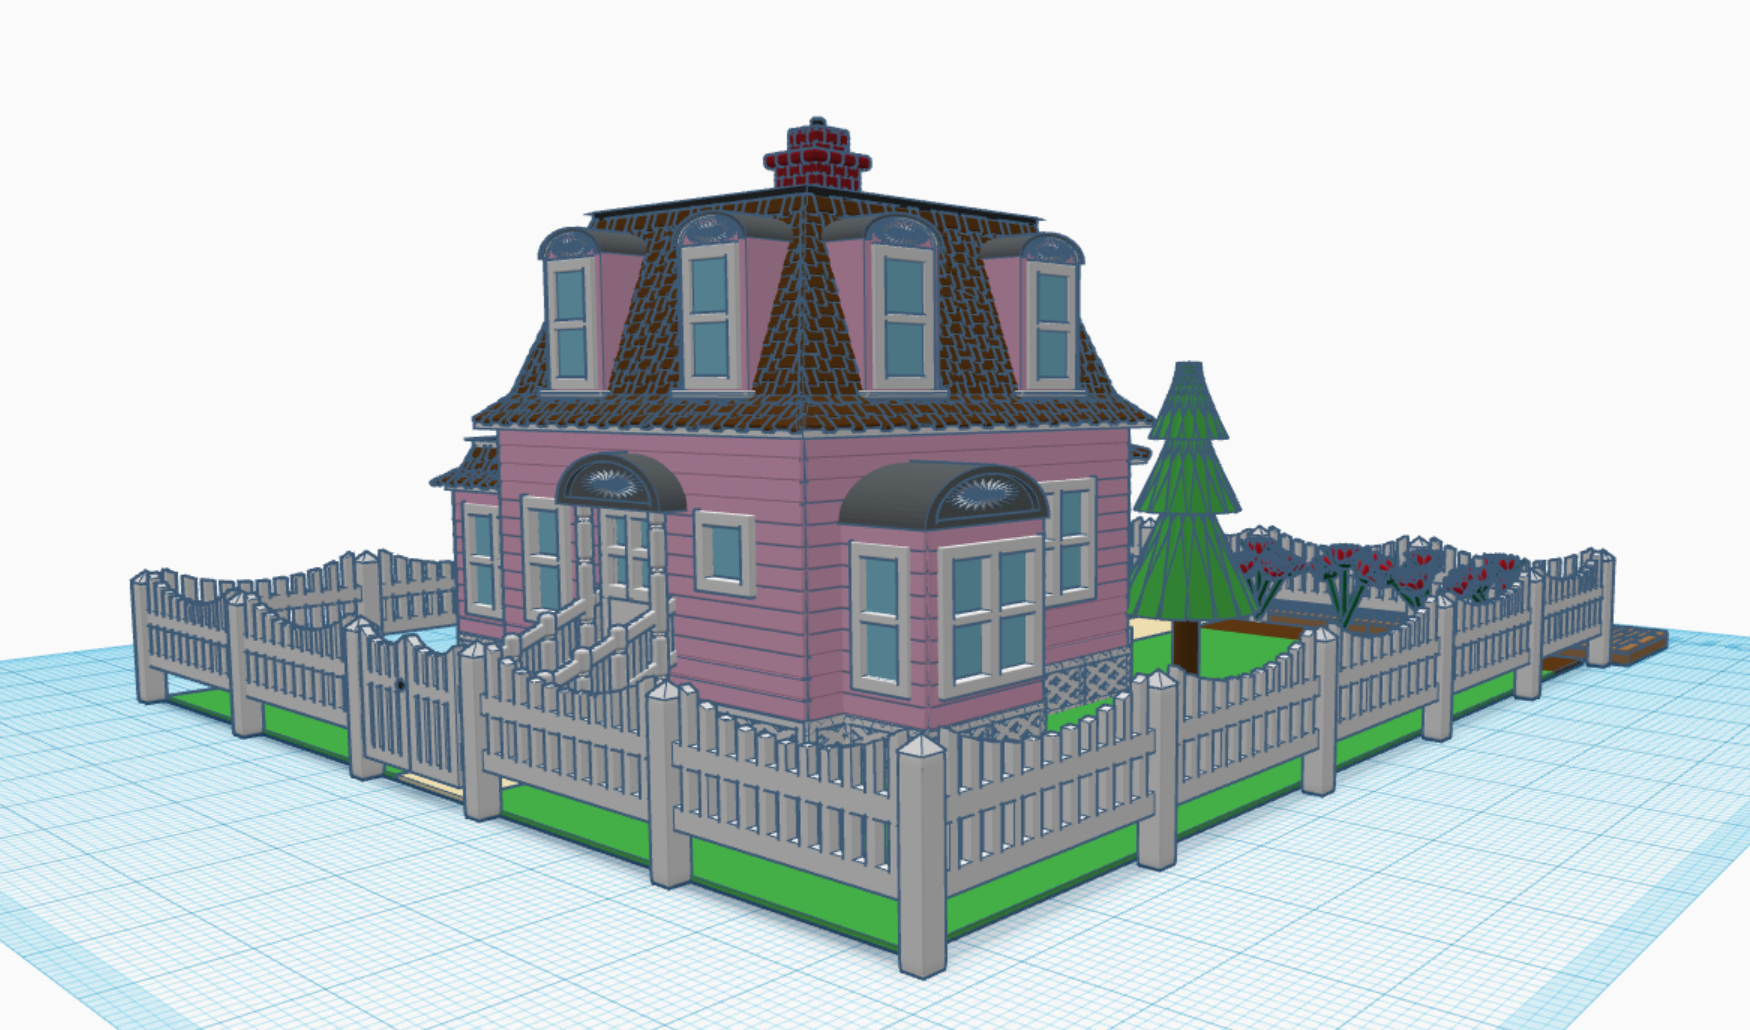
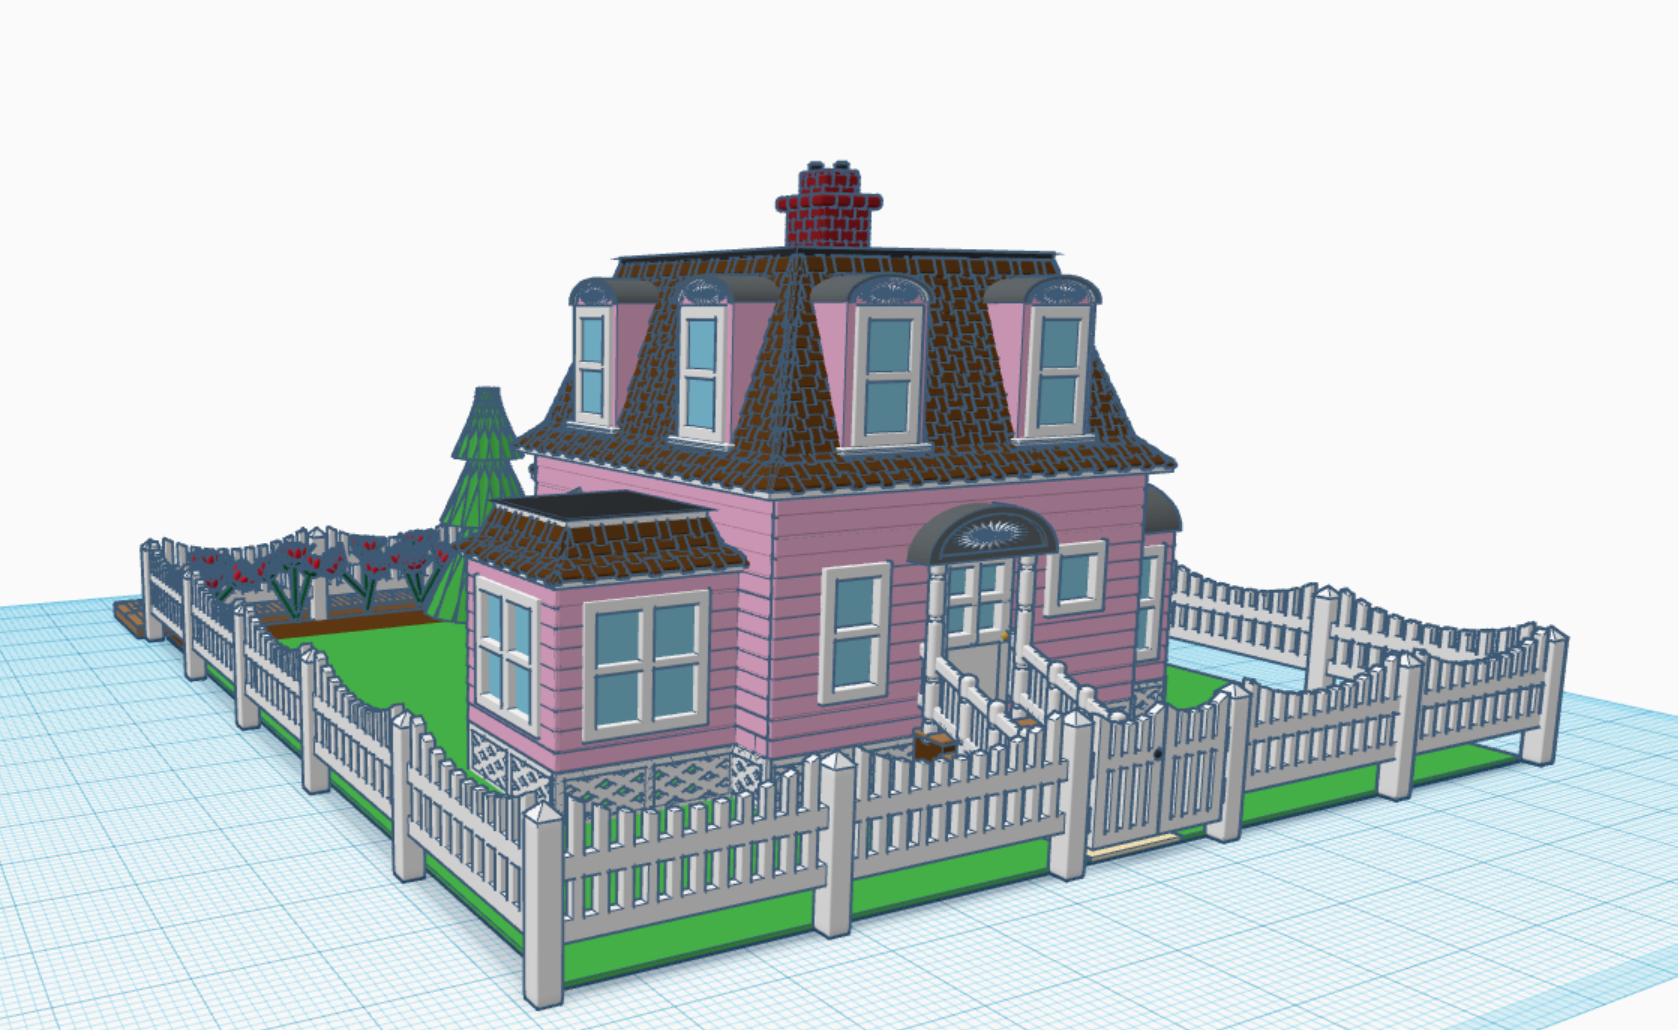
After I completed the Town Hall in Tinkercad, I knew I wanted a house for the Town’s Mayor. For months, I thought about what I wanted in the house. For example, I wanted a porch or balcony for the mayor to stand on the talk with the citizens of the town.
My inspirations come from looking at old buildings. All the pictures I saw for “Mayor House” was big opulent mansions that just did not fit my town. It wasn’t until I travel to Aurora, NE and visited their museum, that I found the style of the house I wanted for the town. Behind the museum was the Bate’s Houses. Its architecture and age was exactly what I wanted in my design. It was painted blue, but I wanted something special. I decided to color house pink with brown roofing to make it different from all other buildings in my town.
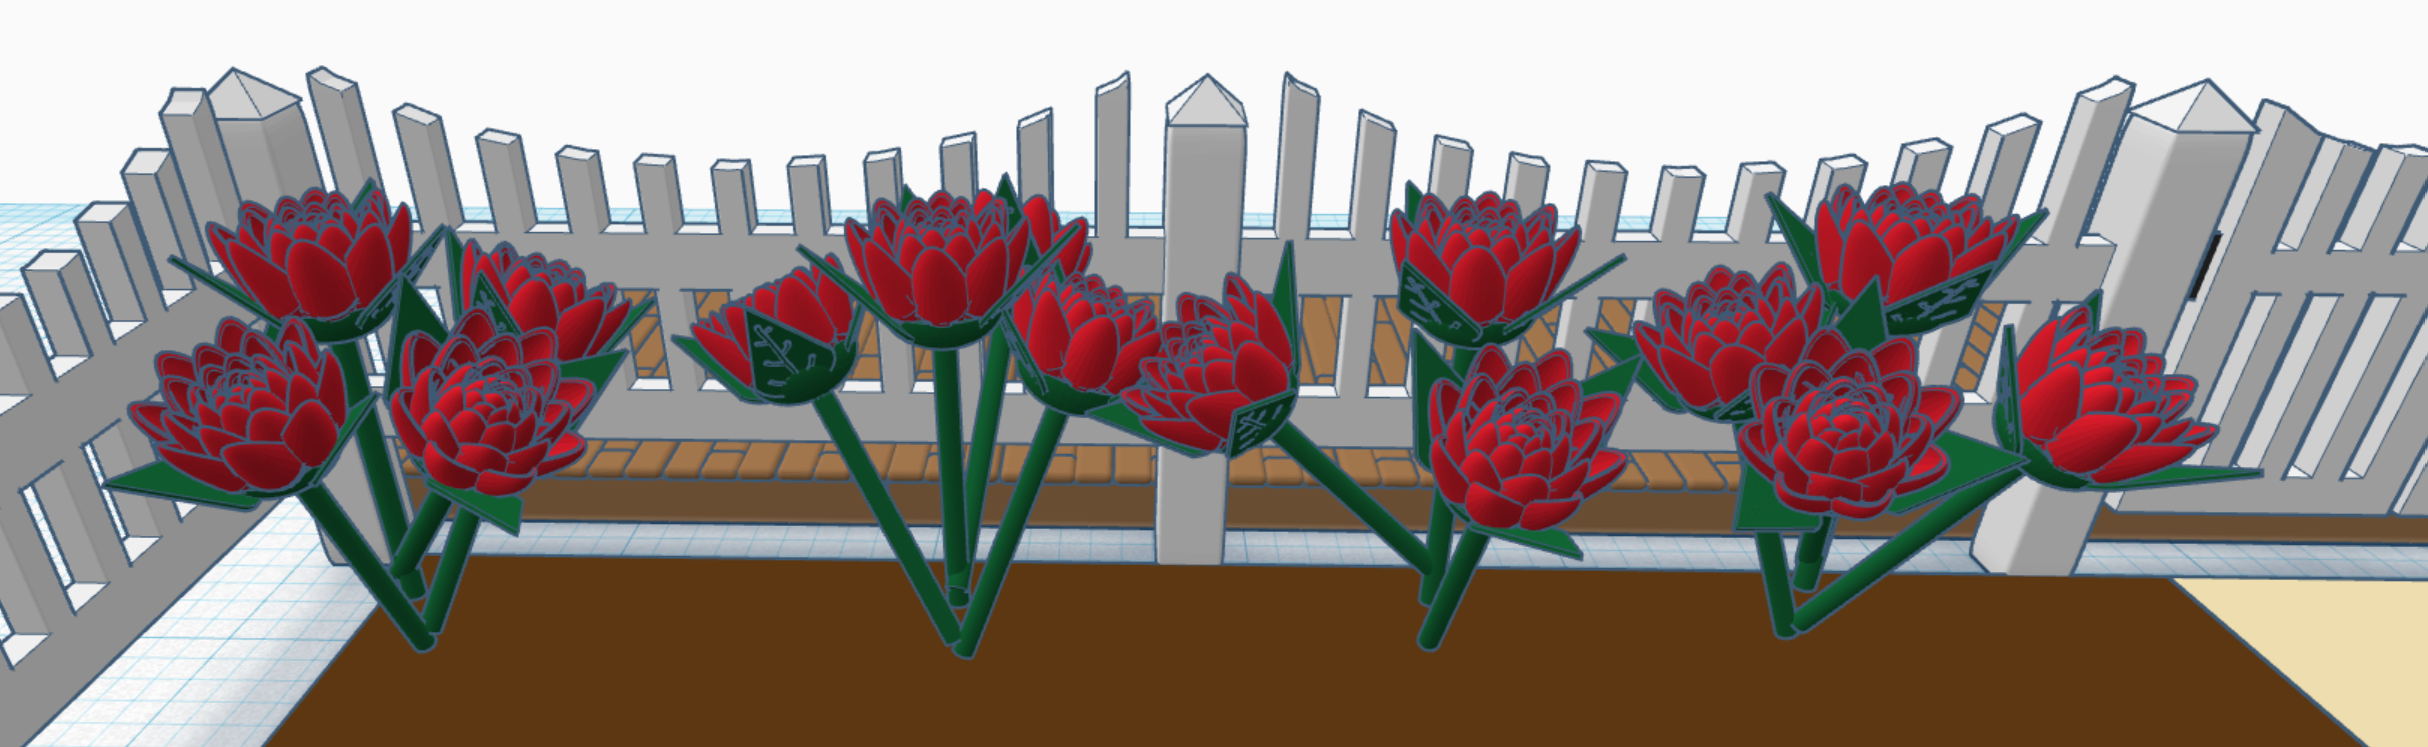
I placed the wooden path in front of the house, because the mayor’s house is located on Main Street in my Railroad Town. I placed a picket fence around the yard. I wanted the fence curved to add some character to the design.
The mayor’s house needed a flower garden. I create one rose and stem; then to create the bush I duplicated it, changed the angle, rotation and position.
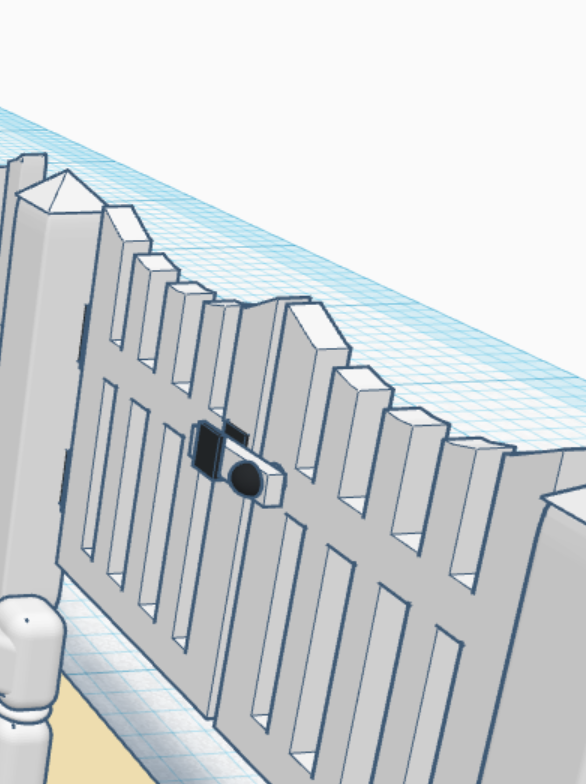
One detail that everyone will probably overlook is the gate. On the gate it has a latch and hinges that would actually function if they were 3D printer
You can view this design in 3D on Tinkercad at this link: Mayor’s House
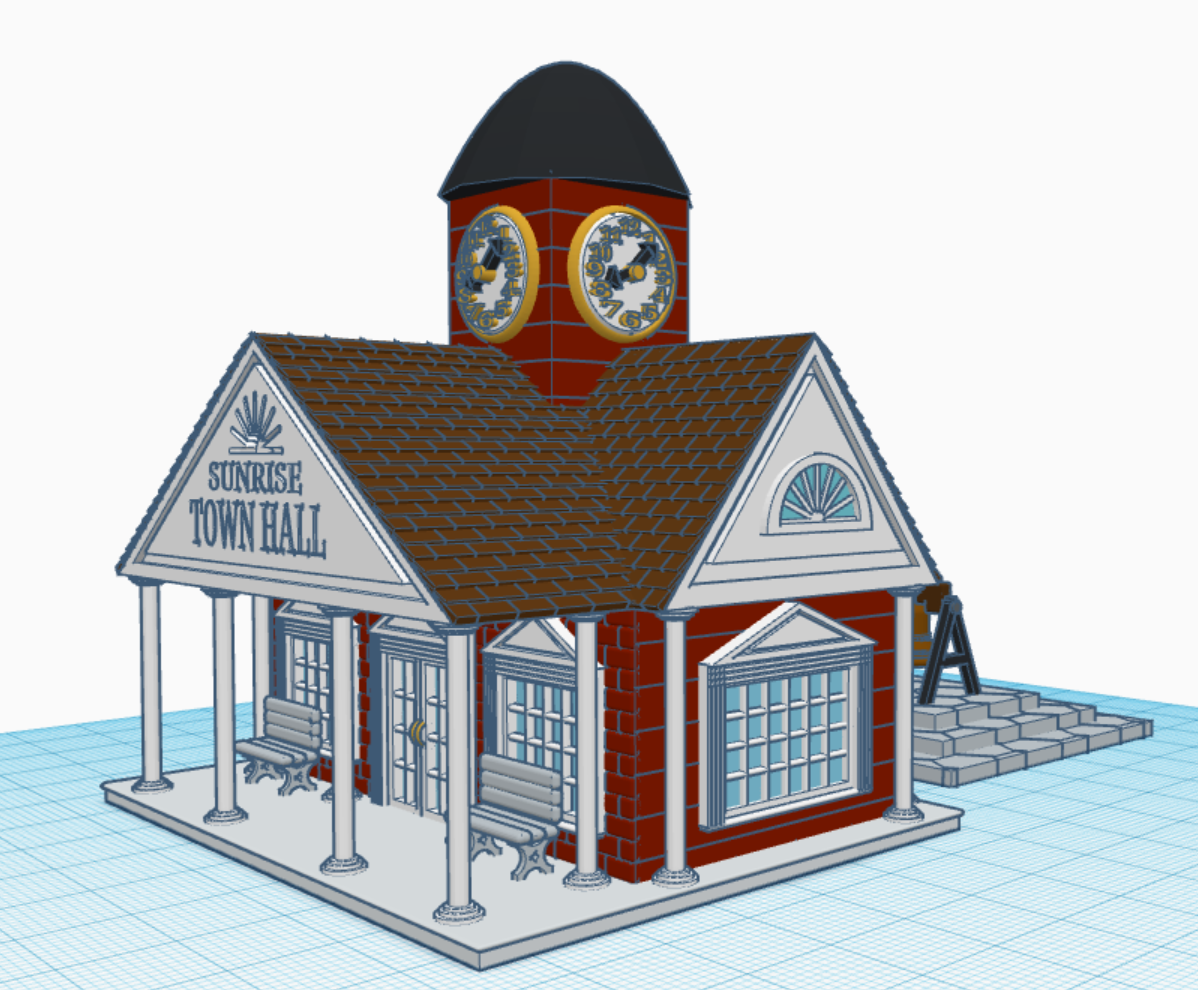
Using Tinkercad I have designs buildings to create a Railroad Town. It started in 2016 when I designed a Train Engine and related train cars. They were all based off the early train designs, when trains ran on coal and steam. Two of the building I designed for my town are, a Saloon and a Sheriff Office (a.k.a. a jail). If anyone was going to spend any time in the jail, and if the town kept growing, they would a Town Hall to provide administration.
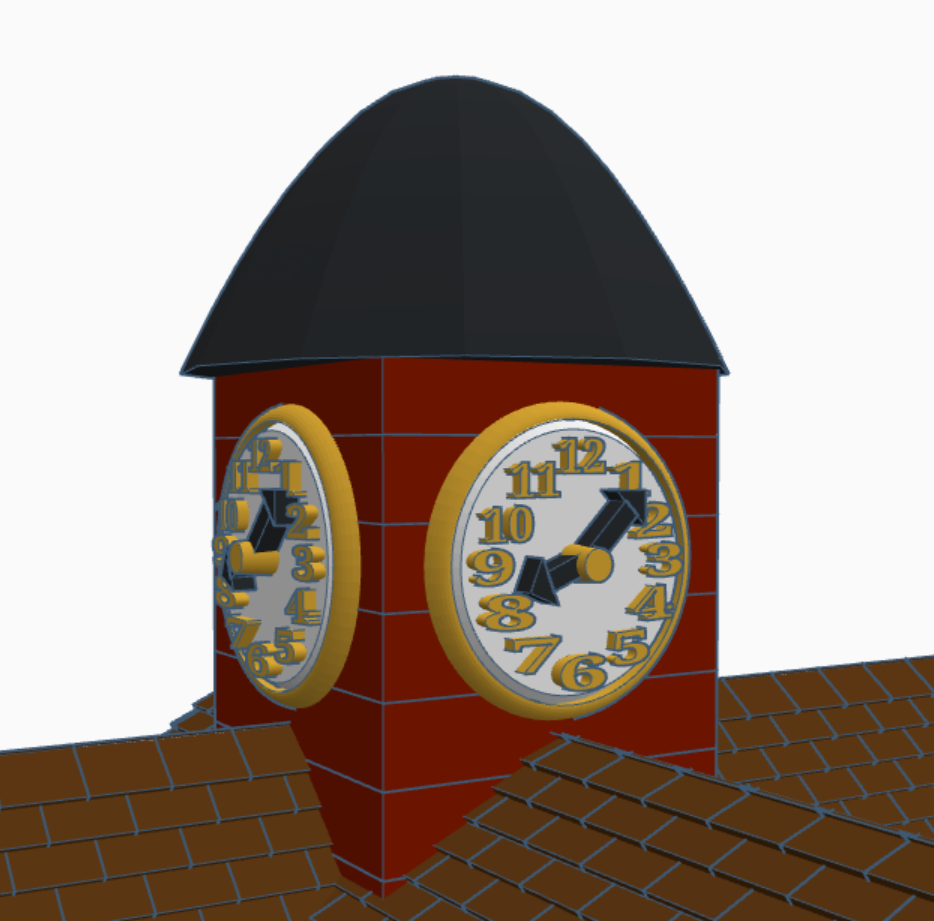
The Town Hall often had a clock tower and consisted of numerous details. I incorporated these details by adding large columns and lots of windows.
The clock tower I frame in gold and set the time to after the start of the workday. I duplicated the clock and placed it on all four sides.
Clock Tower
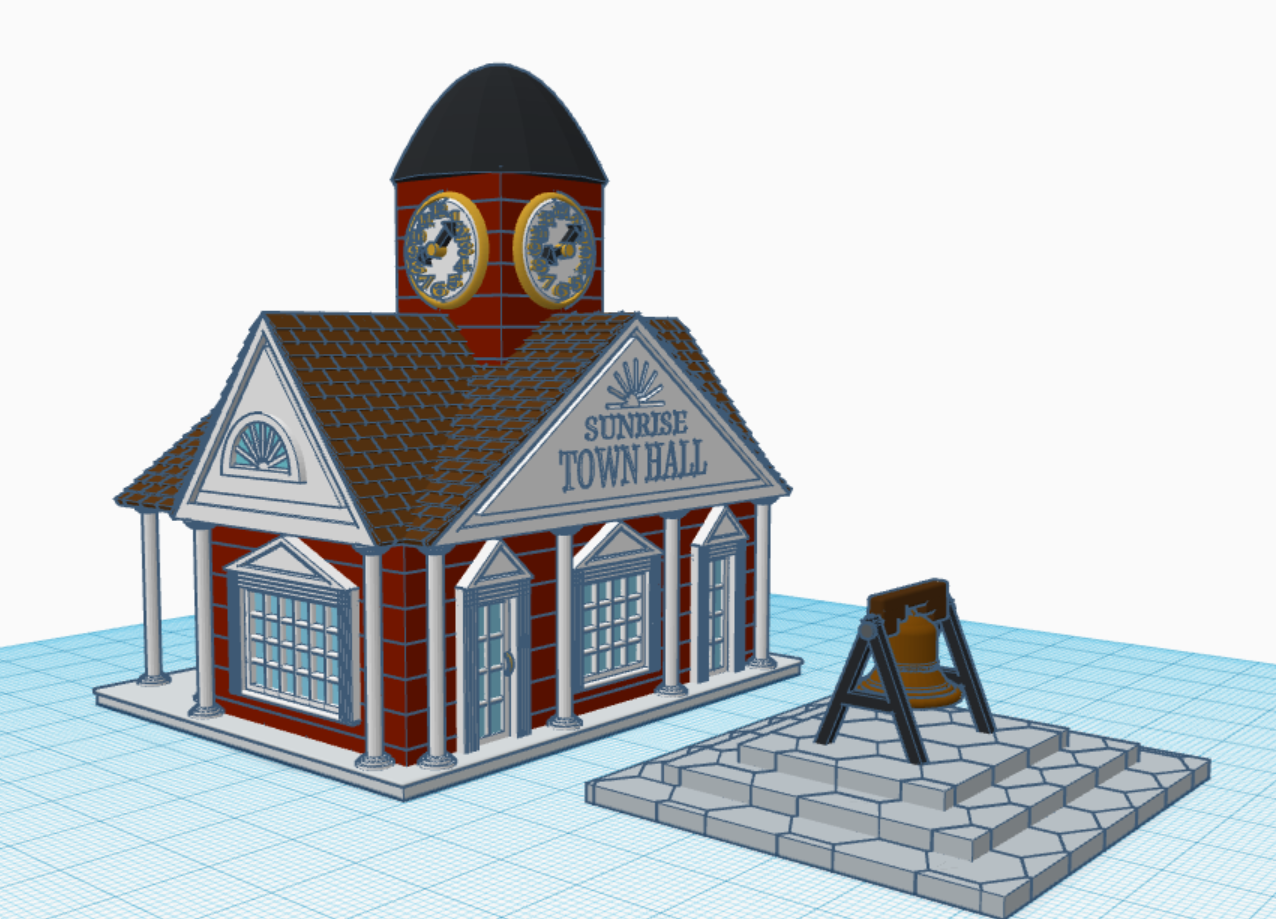
Town Halls, in the Railroad Town days, had a bell to signal the town. The building appears to be only one story, and if I put the bell in a tower, it would look out of proportion. Therefore, I placed the bell on the stone platform.
Town Hall Bell
All of the buildings for the Railroad Town are based on the same scale. The doors and windows are approximately the same height. You can see and copy the 3D version at the Town Hall at this link: Town Hall. Sometimes, you learn more about how something is designed by deconstructing it.