Deviled Eggs

After October was spent making Fall and Halloween items in Tinkercad, I wanted to make a few items that had a Thanksgiving theme. So, I decided it was time again to get out that deviled egg platter and start making those delicious eggs again. Why are they called “deviled” eggs? Deviled is a term that means spicy. My deviled eggs are not too spicy, they are delicious. The recipe is below.

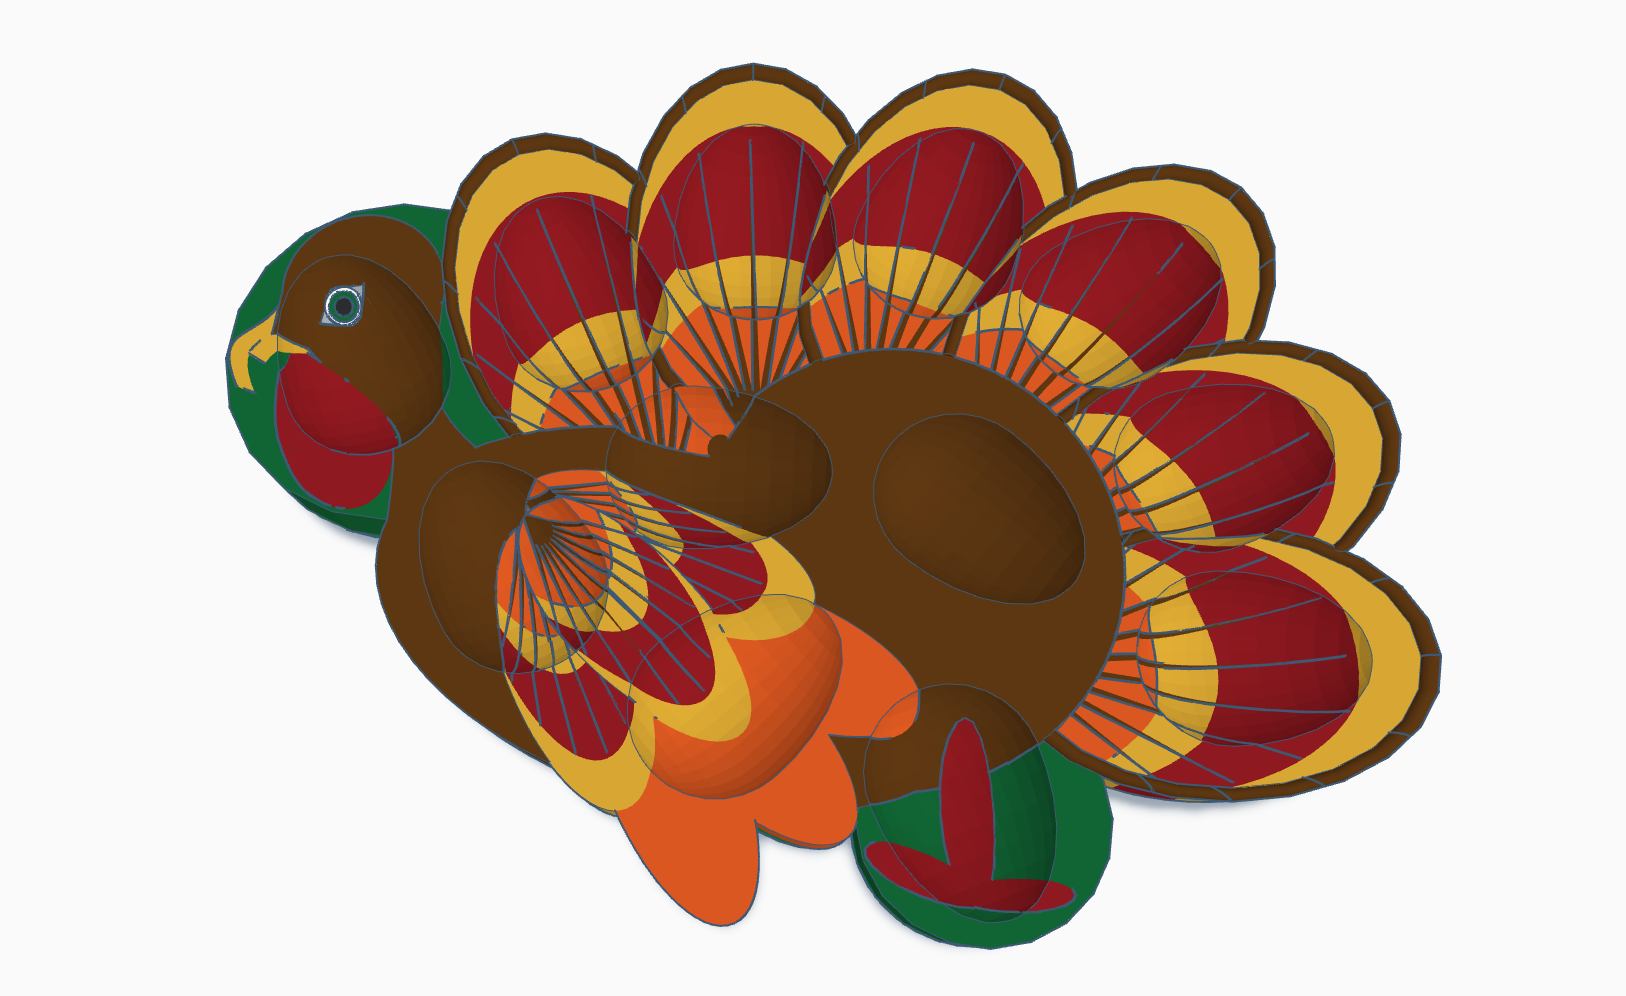
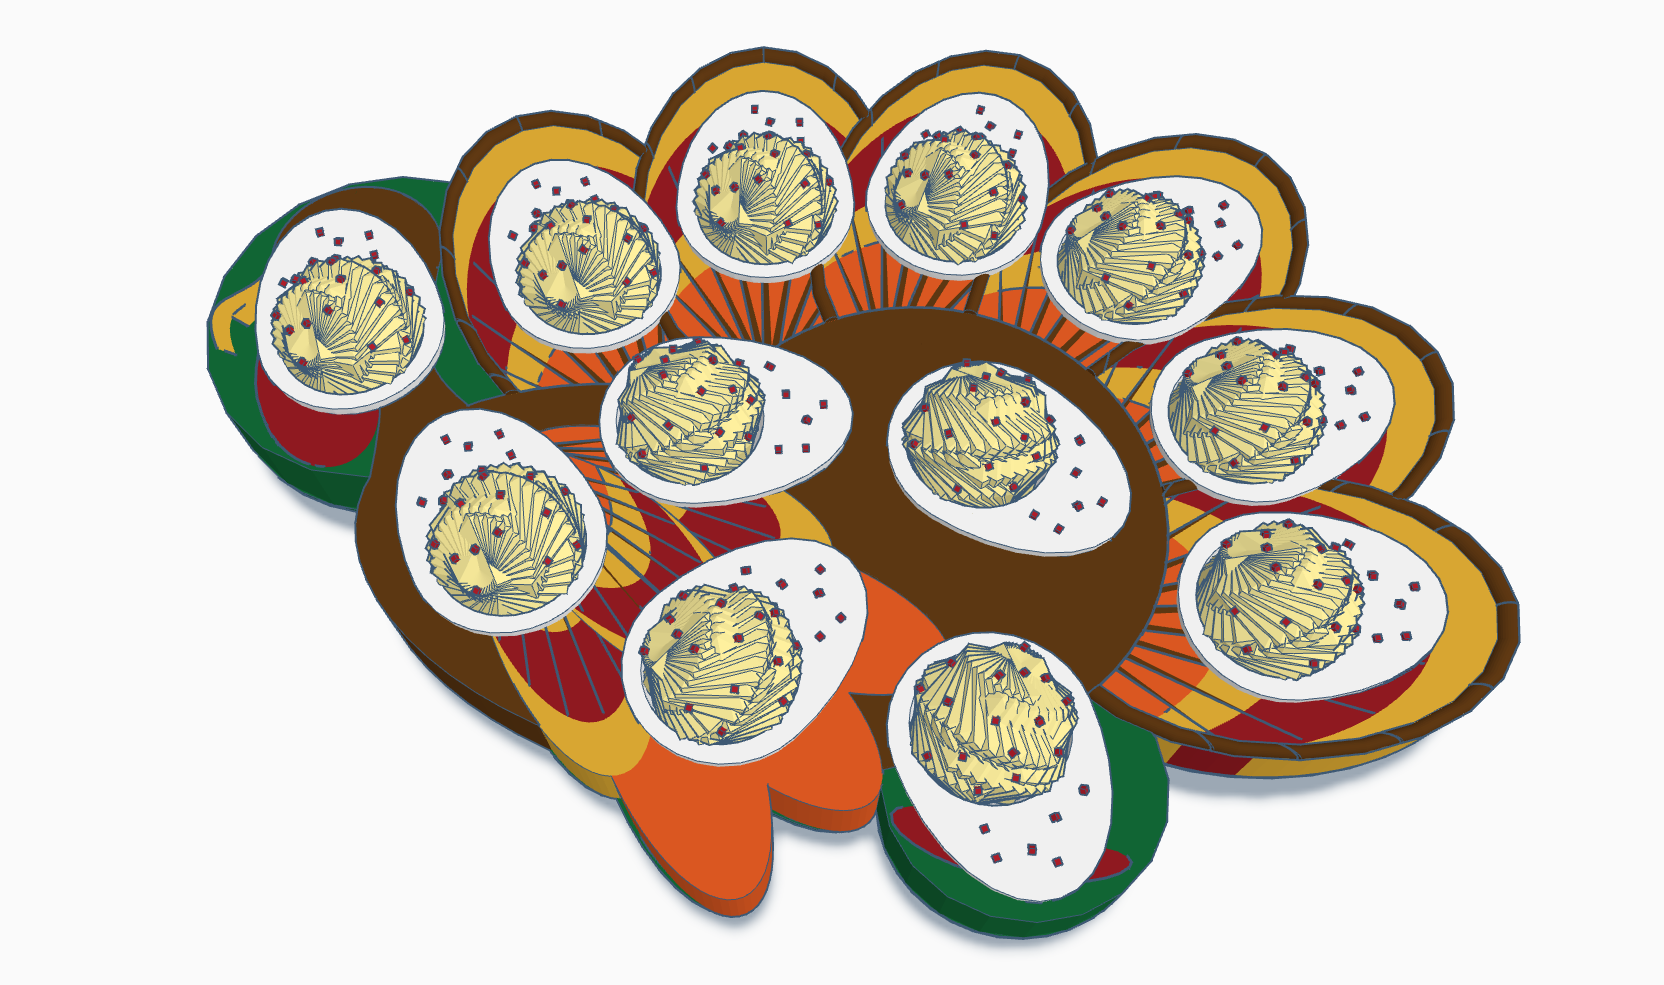
Using Tinkercad, I first had to make the deviled egg platter, then I had to make the eggs. The platter, since I wanted a Thanksgiving theme, I made it in the shape of a turkey.

For the eggs, there is an egg shape in the shape’s library. I just cut it in half, made a hole and filled the hole. To create the filling, I used a sphere and set the steps to 3. Then I duplicated the sphere and rotated it by 6 degrees in all three directions and continue to duplicate the sphere until I got the shape I wanted.

The Platter:

The Eggs:

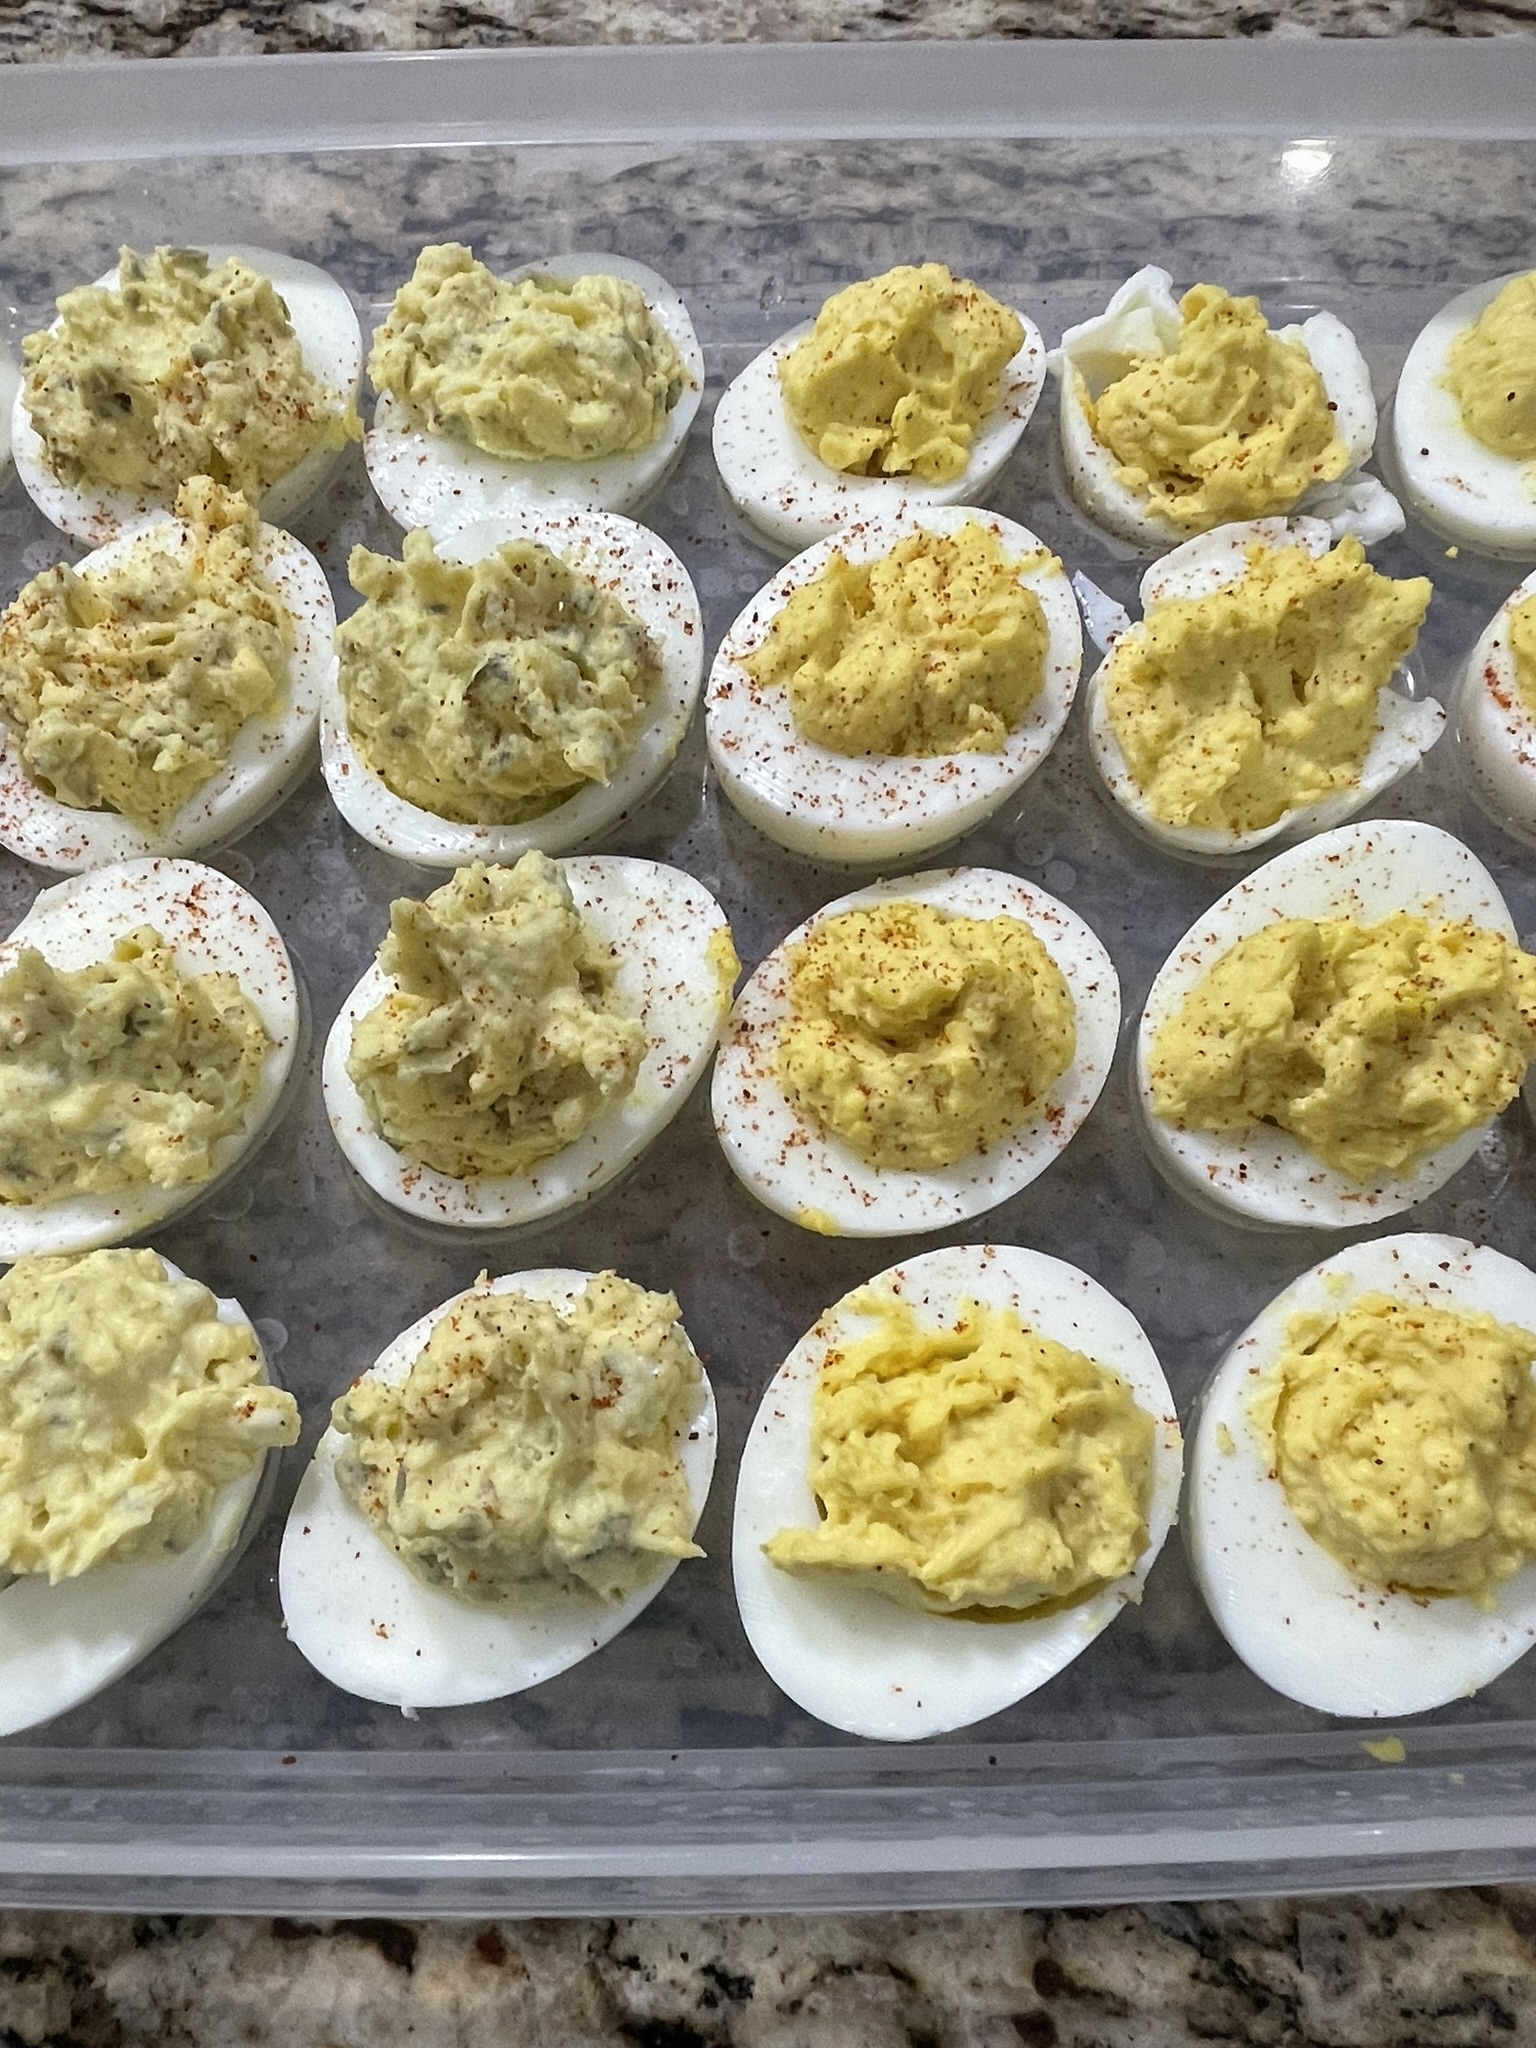
The Deviled Eggs I created in Tinkercad took me hours over a few days to create. If you want real deviled eggs, not virtual deviled eggs here is my recipe.

Deviled Eggs by Sarahcath

Ingredients:

  • Hard-Boiled Eggs: Large, Extra Large or Jumbo Eggs
    • How many deviled eggs do you want to make? Count the number of spots on the platter and divided by two. Add an egg or two to the number, so you can “taste test” before serving.
  • Salt
  • Black Pepper
  • Dry Mustard/Ground Mustard: Not the mustard that comes in the yellow bottle, but the mustard that is on the spice rack.
  • Mayonnaise: You can use any mayonnaise, but if it is not Blue Plate mayonnaise, I cannot guarantee the quality of the deviled eggs.
  • Sweet Pickles: Do not use sweet pickle relish. Do not use name brand sweet pickles. The name brand puts added ingredients in their pickles which gives it a weird taste. Buy the store brand sweet pickles. Preferable the minis but the gherkins will work too.
  • Cayenne Pepper or Paprika:

Instructions:

  • Hard Boil the Eggs
    • Place the eggs in a pot and cover the eggs with cold water. Add a dash or two of salt.
    • Place pot with eggs on the stove over a high heat.
    • Bring the eggs to a rolling boil and let the eggs boil for 15 minutes.
  • Peel the shell from the eggs and set the eggs aside.
    • There are many ways to peel the eggs, but I prefer to drain all the hot water off the eggs and peel the eggs under running cold water. Yes, the eggs are hot to the touch. If you prefer not to handle hot eggs, search the internet for other methods.
  • Cut the eggs in half lengthwise and remove the egg yolks and place in a mixing bowl. Most of the time, by pressing gently on the back of the egg, the eggs yolk will easily slip out. Lay the egg whites on the egg dish.
  • Use a fork to break up the egg yolks until there are not any large lumps.
  • Add a dash of salt, a couple of dashes of black pepper, and 1/4 of a teaspoon of dry mustard for every 6 whole eggs (12 halves) to the egg yolks.
  • Stir all the ingredients together until they are mixed well.
  • Finely chopped 2 mini or 6 gherkins sweet pickles (for every 6 whole eggs) and stir into the egg yolk mixture.
  • Stir in one heaping tablespoon of mayonnaise into the egg yolk mixture. Keep stirring in additional mayonnaise, one tablespoon at a time, until the egg yolk mixture appears creamy.
  • Spoon a heaping teaspoon of egg yolk mixture into hole of the egg white, attempting to distribute mixture evenly between eggs.
  • Sprinkle a fine mist of Cayenne Pepper or Paprika over the filled eggs.
  • Cover and refrigerate. Don’t forget to taste test the extra eggs you made. They are good warm or cold.

If there is a member of you household that does not want sweet pickles in the deviled eggs and would prefer mustard eggs. Leave the sweet pickles out of the recipe and add a couple of squirts of the mustard that comes in that yellow bottle instead.

You can get a PDF copy of the recipe by clicking this link: Deviled Eggs by Sarahcath

King Cake Recipe

When you are from Louisiana, but don’t currently live in Louisiana, and King Cake Season rolls around you need a King Cake. You have two options available for your King Cake need: 1) Spend $50 to have one ship to you. Oh, they are so good, it may be worth it. Or, 2) Make your own King Cake. I decided to make my own.

Below is my recipe for a King Cake:

Ingredients:

  • A large cookie sheet
  • A heavy stand mixer with a dough hook. (A hand mixture will work but will take a lot more work.)
  • A serving platter large enough to hold the King Cake. (I buy the 14″ round cake boards made from cardboard)
  • Candy Thermometer
  • All Purpose Flour
  • 1 cup of Butter – room temperature; 1/4 cup of butter melted
  • Egg – room temperature
  • Hot Water (that is why you need the Candy Thermometer)
  • Powder Sugar (just in case)
  • Mam Papaul’s King Cake Mix – Yes, I just buy the mix directly from the company. It comes with everything you need; cake mix, filing, icing, colored sugar, and plastic baby.

Instructions:

Follow the directions on the back of the box. You could try just using the bag method, but I had the bag break during the kneading process and had to switch to the hand mixer. That was a lot of work. I now use my stand mixer.

The extra flour is for light dusting during the rolling and shaping stage. If you add too much water to the icing, you can thicken it up by adding some extra powder sugar and stirring well.

Let cool and decorate.

Oreo Cream Cups

I did take pictures. I can now share my recipe. I came up with this recipe after spending hours looking at numerous recipes for different goodies ideas.

Ingredients:

Directions:

  1. Place large mixing bowl in freeze for at least 1 hour.
  2. Place Fillo Pastry Shells on a cookie sheet and bake according to the directions on the box. Let cool completely.
  3. Place 3 Oreo Cookies in a Ziplock bag and beat into fine crumbs. I use my meat mallet.
  4. When pastry shells are cool: Place 1/2 cup of chocolate morsels in shallow microwaveable bowl and place in microwave for 30 seconds. Stir, microwave for 15 seconds and repeat until chocolate is smooth.
  5. Dip each pastry shell tops into chocolate. Let chocolate harden.
  6. Remove mixing bowl from freeze and add heavy whipping cream. Beat on high.
  7. Slowly had one box of Oreo Pudding to heavy whipping cream and continue to beat on high. Scrap bowl occasionally.
  8. Add vanilla extract. Beat on high until mixture in forms stiff peaks and can hold its shape. It should be the constituency of icing.
  9. Place part of the mixture in Ziplock bag. Cut of a tip of Ziplock bag and pipe the mixture into each pastry shell.
  10. Sprinkle Oreo crumbs on top of each pastry shell.

Easy Miniature Pies

These are some easy pies I made. I didn’t have a recipe, just an idea. This recipe would probably make twice as many pies, but 120 pies would be a lot of pies.

Ingredients:

  • 2 cans pie filling – different flavors (I used cherry and blueberry) *
  • 1 container of Philadelphia Cheesecake Filling
  • 4 boxes of Fillo Pastry Shells
  • 1 cup heavy whipping cream
  • 1/2 cup confectioners’ sugar
  • 1 tsp vanilla extract
  • 1/2 cup all-purpose flour
  • 1/2 cup packed brown sugar
  • 1 tsp cinnamon
  • 1/2 cup melted butter

Directions:

  1. Cook Fillo Pastry Shells on a cookie sheet as directed on the box and let cool.
  2. Preheat oven to 350 degrees.
  3. Prepare crumble topping by combining butter, cinnamon, brown sugar and flour in a mixing bowl. Stir until crumble is in small chunks.
  4. Place 20 of the Fillo Shells on a serving dish. Place about 1 tsp of Philadelphia Cheesecake Filling in each pastry shell. Top each cheesecake with about 1/2 tsp of pie filling. Place in refrigerator. Note: You will have cheesecake filling left over.
  5. Fill 20 of the Fillo Shells with approximately 1 tsp of the pie fillings each. Fill 20 of the Fillo Shells with the other pie filling. Sprinkle crumble on top. Note: You will have pie filling and crumble left over.
  6. Bake the miniature pies in oven until bubbly, about 20 minutes. Caution: Do not bake the Cheesecake Miniature pies.
  7. Let cool completely.
  8. Prepare Whipped Icing:
    1. Place a mixing bowl in freezer for at least 5 minutes.
    2. Beat heavy whipping cream on high speed and slowly add confectioners’ sugar. Add Vanilla.
    3. Continue to beat on high speed until mixture forms peaks and can hold its shape.
  9. Place Whipped Icing in a piping bag, or a Ziplock bag with the end cut off, and pipe the icing over each of the pies.

* Please do not use store brand pie filling. Buy the good stuff.

Each box contains 15 Fillo Pastry Shells

Fillo Pastry Shell

The entire container of Philadelphia Cheesecake filling would probably fill about 60 Fillo Pastry Shells. I didn’t use it all because I wanted a variety of pies. Some cheesecake filling and the pie filling can be placed into a bowl and eaten, by the cook, while baking.

Good Stuff
Miniature Pies – The Whipped Icing taste like whipped cream.

Blueberry Sour Cream Coffee Cake

Oh, my house smelled so good after I made this cake. I started with the recipe from The Girl Who Ate Everything.

Ingredients:

  • 1 cup butter, softened
  • 2 cups white sugar
  • 2 eggs (room temperature)
  • 1 cup sour cream (room temperature)
  • 1 tsp vanilla extract
  • 1 3/4 cups cake flour
  • 1 tsp baking powder
  • 1/4 tsp salt
  • 1 1/2 cups fresh blueberries (room temperature)
  • 1/2 cup brown sugar (packed)
  • 1 teaspoon ground cinnamon
  • 1/2 cups chopped pecans
  • confectioners’ sugar for dusting

Instructions:

  1. Move oven rake to center position in oven. Preheat oven to 350 degrees.
  2. Spray Bundt pan with Pam for Baking
  3. Wash and remove stems from blueberries. Drain and let dry on paper towel.
  4. In a small mixing bowl gently whisk together flour, salt, and baking powder.
  5. In a small bowl stir together brown sugar, cinnamon, and pecans
  6. In a large mixing bowl combine butter and white sugar. Beat on medium/medium high speed until mixture is creamy.
  7. Beat one egg at a time into sugar mixture.
  8. Add Vanilla into sugar mixture.
  9. Slowly add flour mixture to sugar mixture; about 1/3 of flour mixture at a time and beat on low speed until combined. Scrap bowl well and beat on medium speed until fully combined.
  10. Stir in sour cream.
  11. Fold Blueberries into batter.
  12. Pour approximately 1/2 of the batter into the Bundt pan.
  13. Sprinkle about 1/2 of the cinnamon/pecan mixture over the batter in the pan.
  14. Gently add the remaining batter to the Bundt pan. Make sure the batter in even in the pan.
  15. Sprinkle the remaining cinnamon/pecan mixture over the batter.
  16. Bake for 50 minutes in the preheated oven.
  17. Check the cake the make sure it is done by sticking a toothpick in the center of the cake. If it comes out clean, the cake is done. If not, continue to bake the cake and check for doneness every 5 minutes.
  18. Cool the cake on a wire rack for 15 minutes. Place a folded dishrag on a countertop and gently tap the Bundt pan on dishrag to loosen. Invert cake on wire rack and let cool completely.
  19. Dust with confectioners’ sugar.

Printer Friendly Version

Low-carb Chocolate Mousse

I have been stocking up on the ingredients I need for my baking adventure. One staple ingredient is heavy whipping cream. Almost every grocery item I purchase; I check out the Nutrition Chart for calories, carb, sodium, etc. I wasn’t surprised, but I realized heavy whipping cream has zero carbs. One tablespoon of Hershey Cocoa has 3g carbs. An idea was formed. Chocolate Mousse – or at least that is what my taste tester said it tasted like.

Chocolate Mousse

Ingredients:

  • 1 cup heavy whipping cream
  • 4 tbsp Splenda for Baking
  • 2 tsp Hershey Cocoa Powder

Instructions:

  1. Place all ingredients in a small mixing bowl.
  2. Beat on low speed until all the ingredients are combined. About 30 seconds.
  3. Beat on high speed until the mixture fluffy, the consistency of icing. About 3 minutes.
  4. Place into serving dishes.

Note: This recipe will make about three 1/2 cup servings of Chocolate Mousse.

You may add more chocolate for a more chocolate taste. The more chocolate you add the more carbs you add.

Oreo Chocolate Bundt Cake

It’s that time again when the baking starts, and the goodies head off to work. I have several Nordic Ware Bundt pans, so this year I wanted to make some Bundt cakes for the baking season. After intense research, I decided to make an Oreo Chocolate Bundt cake. I started with the recipe from Liv for Cake.

Ingredients

Cake

  • 2 1/4 cups cake flour
  • 3/4 cup Hersey Cocoa Powder
  • 1 tsp baking soda
  • 1 tsp salt
  • 1/2 cup milk (room temperature)
  • 1 cup sour cream (room temperature)
  • 1 cup butter (room temperature)
  • 1 1/2 cup granulated sugar
  • 4 large eggs (room temperature)
  • 1 tsp vanilla
  • 12 Oreo cookies broken into chunks

Note: Room Temperature – I place the items on the counter until the butter is soften. The butter should hold it shape but easily dented. It usually takes about an hour obtain room temperature, depending on the temperature of the room and the butter.

Icing

  • 1/2 cup Heavy Whipping Cream
  • 1/2 cup Chocolate Morsels
  • Powder Sugar (if needed)
  • 1/2 cup of Hershey White Chocolate Morsels

Decorations

  • 6 Oreo cookies crushed into crumbs
  • 30 Oreo whole cookies (Optional)
  • 2 12oz packages of Hershey White Chocolate Morsels (Optional)

Instructions:

The Basics

  1. Move oven rack to the center position
  2. Preheat oven to 325 degrees
  3. Spray Bundt pan with Pam for Baking and dust with cocoa powder

Cake

  1. In a small mixing bowl combine flour, salt, baking soda, and cocoa powder. Whisk together until it takes on a chocolate color and set aside.
  2. In a large mixing bowl combine butter and sugar. Beat on medium-high speed until the mixture is fluffy. If using a hand mixer, scrap side of bowl regularly to make sure all ingredients are combined.
  3. Beat one egg at a time into the butter and sugar mixture, making sure it is thoroughly combined.
  4. Add vanilla to the butter and sugar mixture, making sure it is thoroughly combined.
  5. Add about a third of the flour mixture to the sugar mixture and beat on low until combined.
  6. Add about a third of the milk to the mixture and beat on low until combined.
  7. Add about a third of the sour cream and beat on low until combined.
  8. Repeat step 5 – 7 until all the ingredients (except Oreos) are well blended together.
  9. Pour half of the cake batter evenly into the Bundt pan. Springle the Oreo chunks onto the Bundt pan. Cover the Oreo chunks with the remaining batter.
  10. Make sure the cake batter is spread evenly into the Bundt pan.
  11. Bake for 55 minutes, or until a toothpick inserted unto the cake come out clean.
  12. Cool the cake for 10 minutes. Tap on the Bundt pan to loosen the cake and invert onto a cooling rack.
  13. Cool the cake completely. It will take several hours.
  14. Move the cake to the cake dish for icing and decorating.

Decorating – Optional

As an added bonus, I placed chocolate covered Oreos around the cake before Icing.

  1. Cover a work area with parchment paper to allow Oreos to harden.
  2. Place 12oz of white chocolate morsels in microwave safe bowl and microwave for 30 seconds.
  3. Stir. Microwave for 15 seconds and stir again. Repeat until the morsels are completed melted and creamy (no chunks).
  4. Immediately, dip Oreos into white chocolate and place on parchment paper. Springle with the Oreo crumbs.

Note: I was able to make 15 covered Oreos with one 12oz bag of morsels.

Icing – Chocolate Ganache

  1. Once the cake has cool completed, you can put the Chocolate Ganache on top.
  2. In a microwave safe bowl, place 1/2 cup of Heavy Whipping Cream. Microwave for 1 minute until cream is hot (not boiling).
  3. Add 1/2 cup of chocolate morsels and let sit for 5 minutes.
  4. Stir the mixture until it has the chocolate color. The mixture must be thin enough to pour on the cake, but not runny like water.
  5. Let the mixture sit for another 5 minutes and stir. If mixture is still too thin, keep repeating this step until the mixture is cool.
  6. If the mixture is still not thick enough, add 1 tsp of powder sugar to the mixture, stir well, until the mixture is at the right consistency.
  7. Pour evenly on top of the cake.
  8. Melt 1/2 cup of white chocolate morsel in microwave and drizzle over ganache.
  9. Springle the remaining crushed Oreos over the cake

The report from the office was that the cake was devoured. So, it was probably good.

Printer Friendly Version

My Low-carb Cheesecake Recipe

20190316_130000.jpg

Here is my recipe for my low-carb (no-sugar) Cheesecake.  Several people have asked me to make this for their birthday.

Ingredients:

Crust:

1 Cup Chopped Walnuts

1 Cup Splenda for Baking

2 tablespoons Ground Cinnamon

Filling:

5 pkg. (8 oz. each) PHILADELPHIA Cream Cheese, softened

1 pint Sour Cream

5 eggs at room temperature (3 whole eggs and 2 egg yokes)

1 teaspoon Vanilla Extract

1 Cup Splenda for Baking

Directions:

Preheat oven to 325 degrees.

Spray the springform pan with cooking spray.  I like Pam from Baking.

Mixed the Walnuts, Splenda, and Cinnamon together and pour into the springform pan.  Gently shake pan to level the crust ingredients.

Place the Cream Cheese and vanilla into a mixing bowl and beat on medium speed until it is combined.  Add the 1 cup of Splenda to the mixture and beat on medium speed until it is combined.  Beat in one egg at a time to the mixture, until all three eggs and two egg yokes are added.  Make sure you are scraping the sides of the bowl while adding everything to make the filing.

Add one pint of Sour Cream to the mixture and beat on low speed until sour cream is blended into the filing.

Pour filing into springform pan over the top of the crust.  Make sure the filing is level inside with pan.

Bake until the Cheesecake appears to be firm and set on the outer 2″ rim of the cake.  The center of the cake will still appear to be soft.   The baking time is approximately 1 hour – check cake after 40 minutes and then every 10 minutes.  Do not stick a toothpick or knife into the cake to check for doneness.

Let cool and refrigerate it.

20190316_144413.jpg

There are some people that can’t wait to eat it and eat it warm.